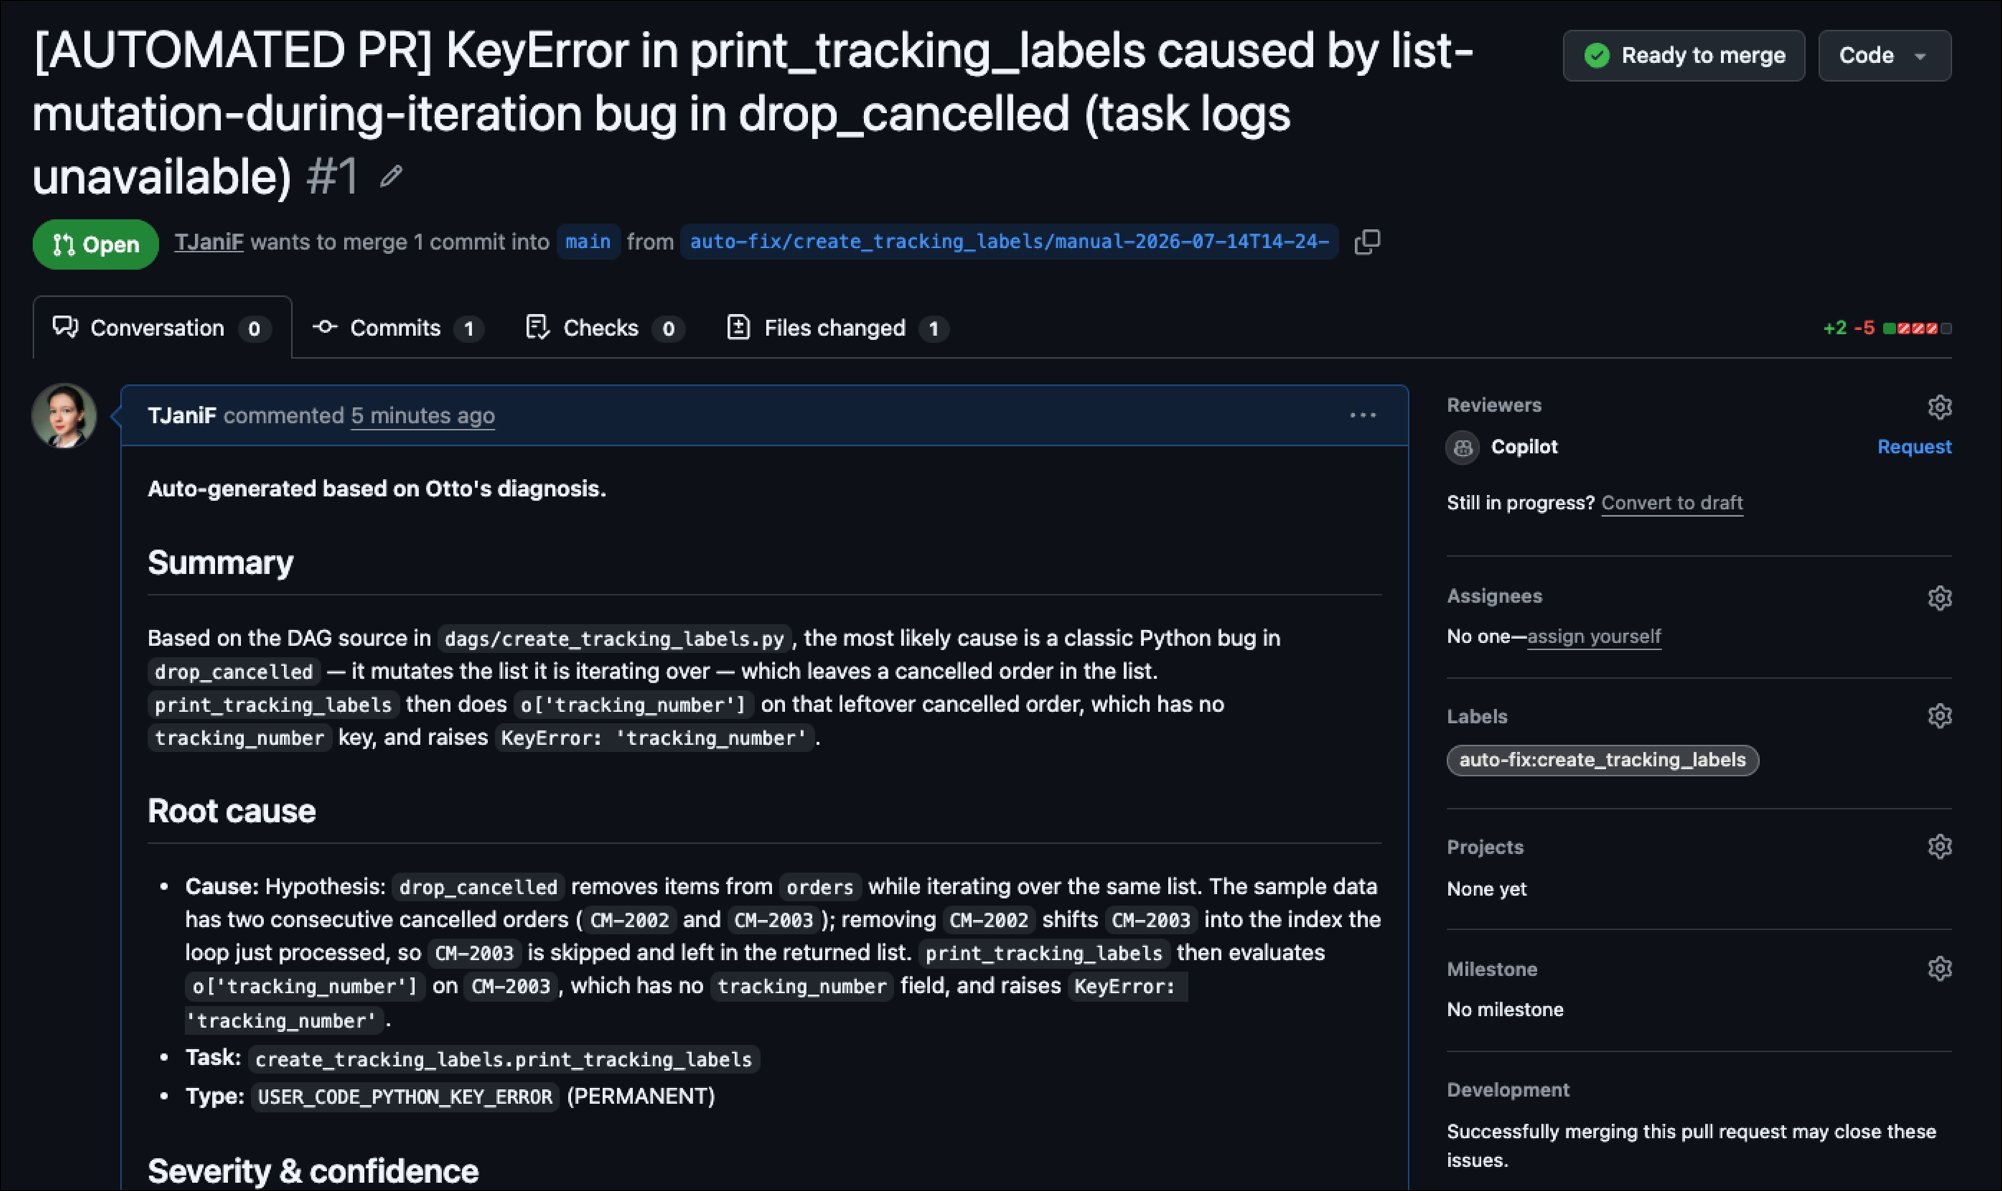
This feature is in Labs.
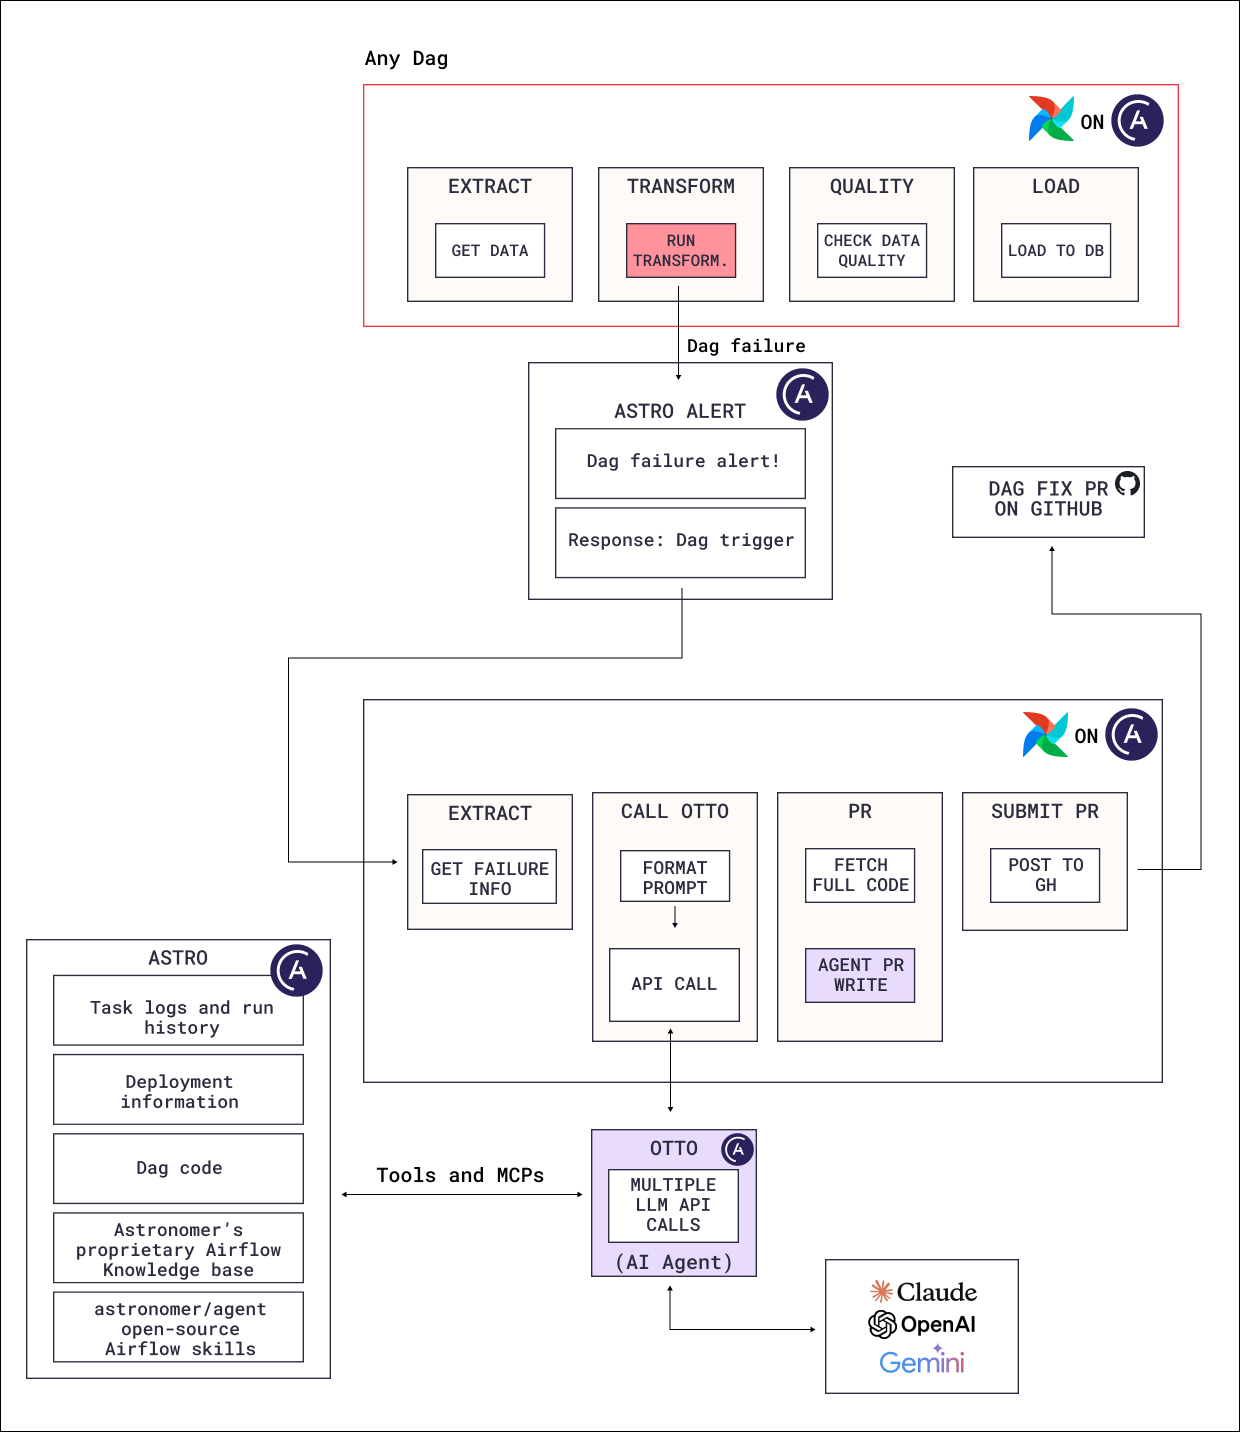
- Setting up an Astro alert that gets triggered on the failure of a Dag and responds by starting a run of the auto fix Dag.
- The auto-fix Dag which uses Otto to investigate the failure having all necessary context about your environment, uses
@task.agentto create a fix based on Otto’s suggestions, and submits a PR to GitHub for your review.
Assumed knowledge
To get the most out of this tutorial, you should have an understanding of:- Basic Airflow concepts.
- How to use the GitHub REST API.
Prerequisites
- An API key of an LLM provider that is compatible with Pydantic AI. This tutorial uses an OpenAI API key. This API key is needed for the agentic tasks that create the GitHub PR. Otto interacts with models through Astronomer’s LLM gateway to run the root-cause-analysis, and does not need an API key.
Step 0: Sign up for Astro and install the Astro CLI
If you already have an Astro account and the latest version of the Astro CLI installed, continue with Step 1.- If you don’t have an Astro account yet, sign up for a free trial of Astro, which gives access to Otto.
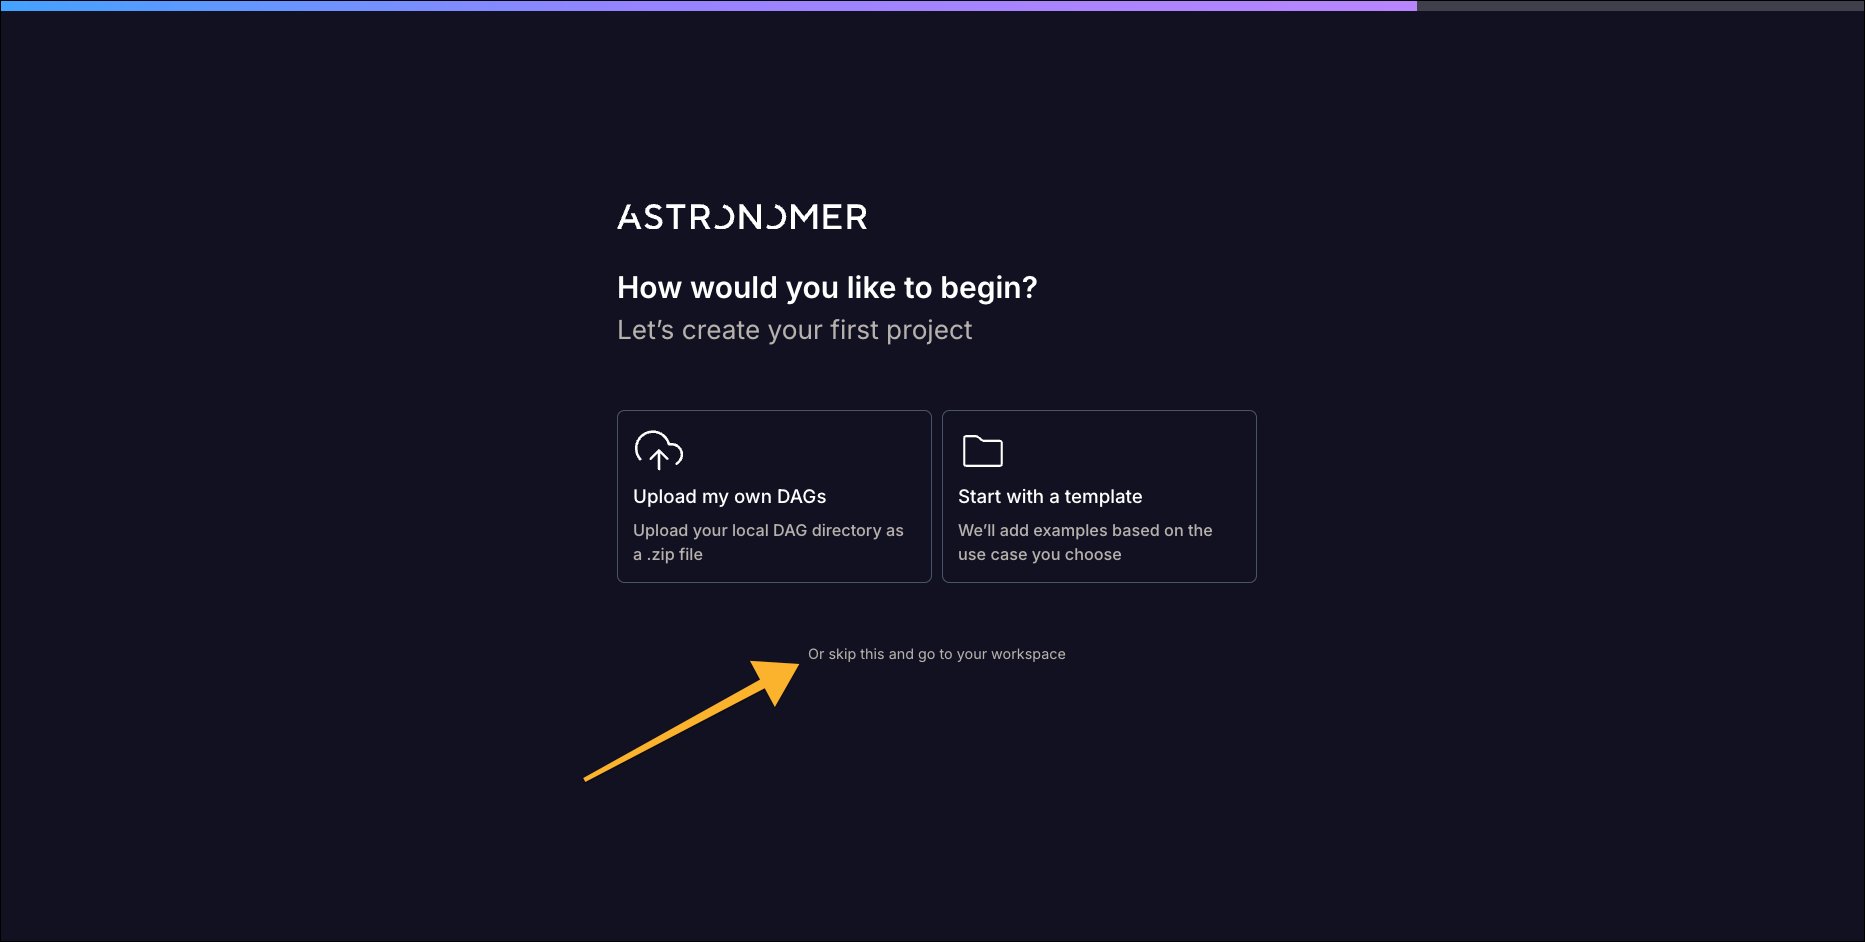
- Use the following command to install the latest version of the Astro CLI.
If you cannot install the Astro CLI locally, you can still complete this tutorial by deploying the tutorial repository directly from GitHub using the GitHub integration.
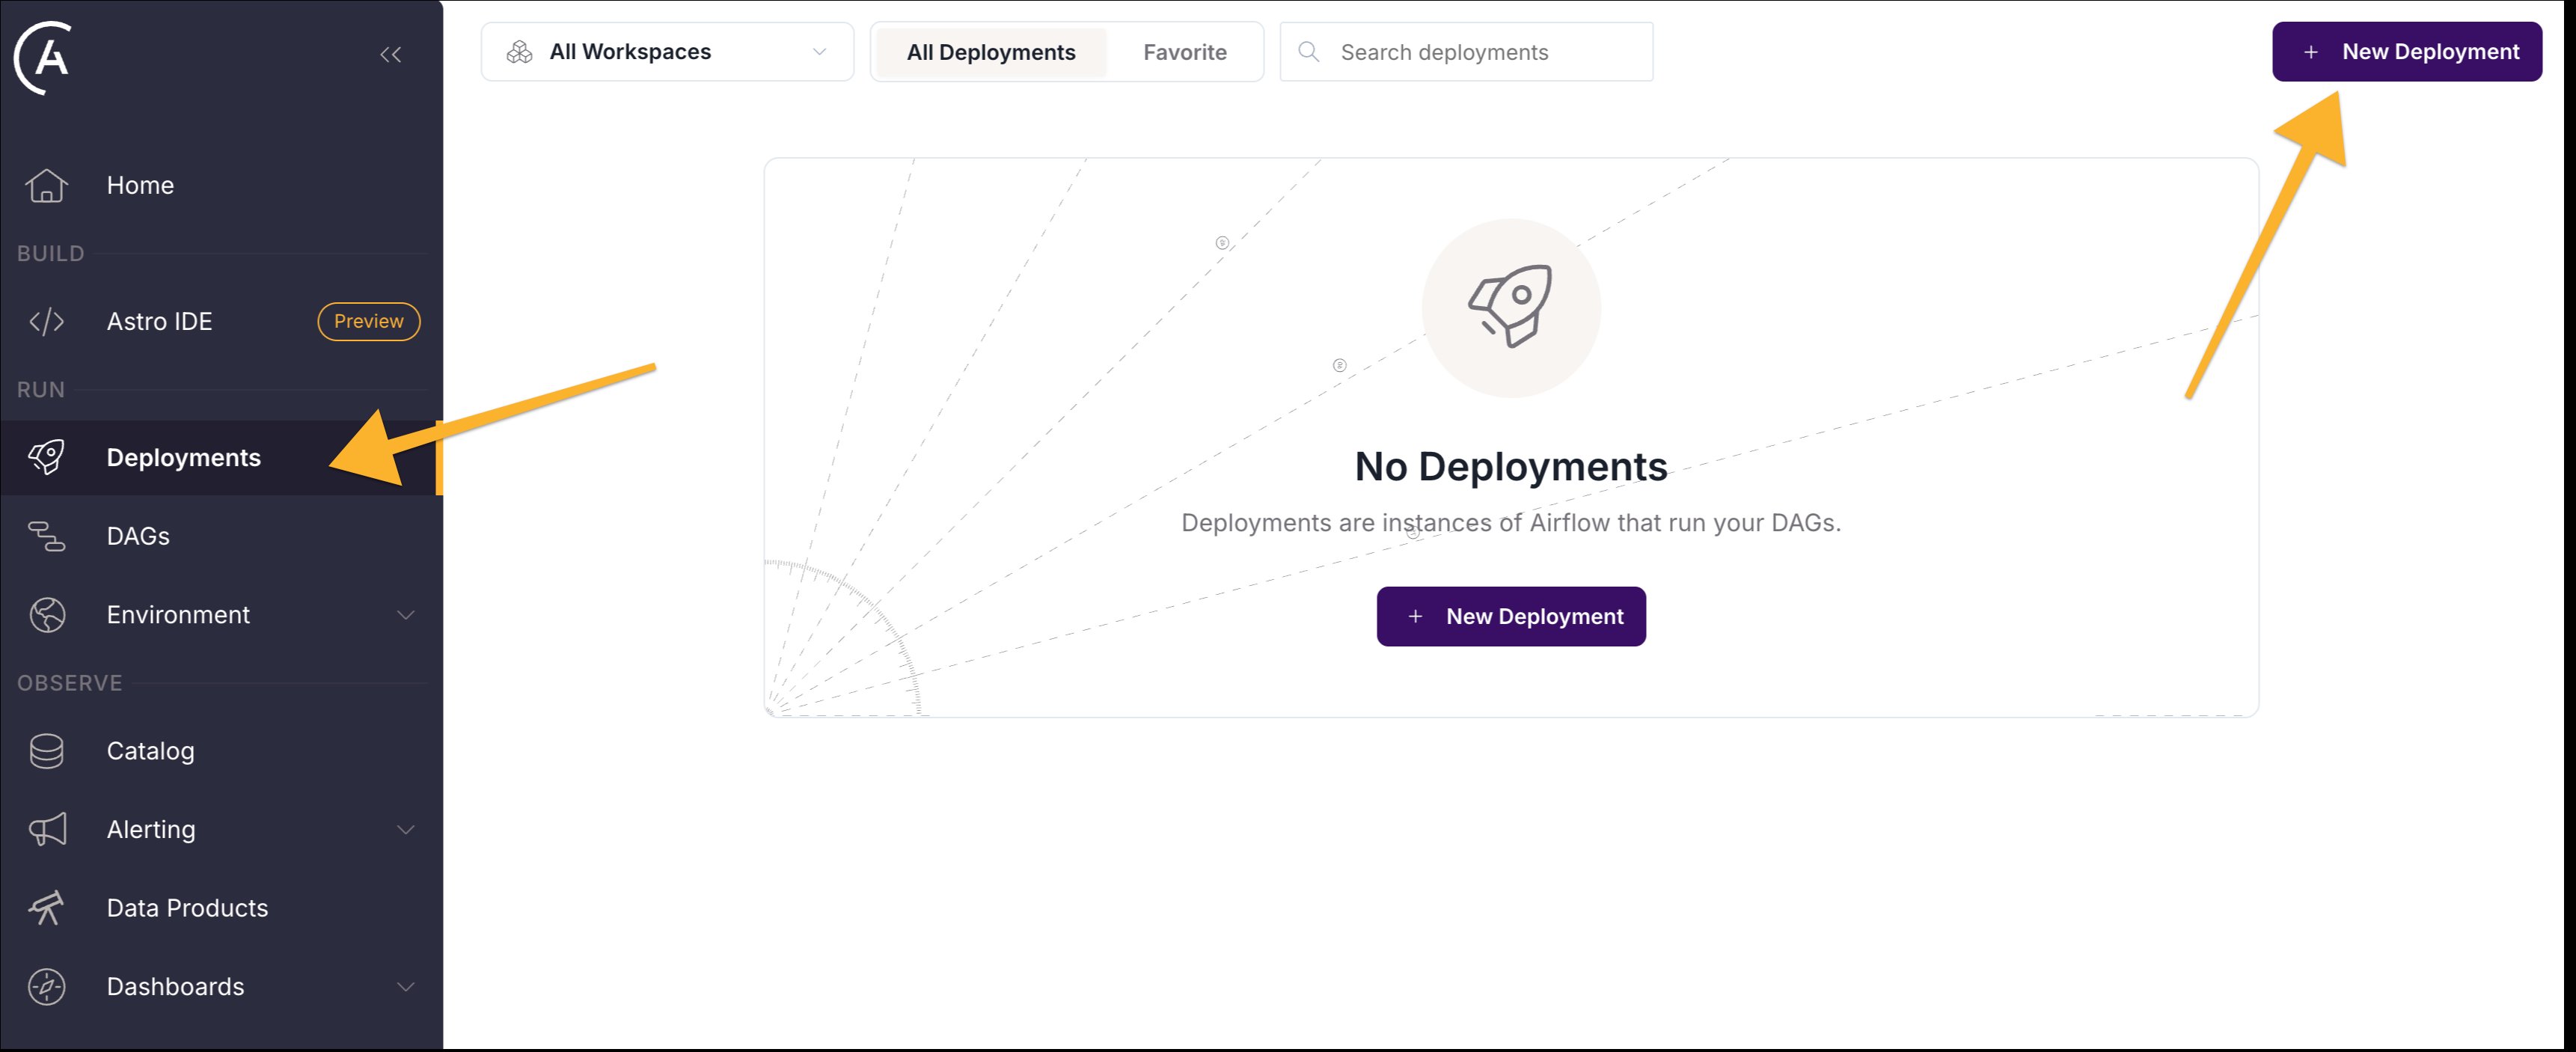
Step 1: Create a new Astro Deployment
Create a new Deployment. You can choose any settings. Astronomer recommends theDevelopment template for testing.
Step 2: Fork and clone the tutorial repository
Fork and clone this GitHub repository. It contains a fully functional Airflow project with two Dags:create_tracking_labels: This is a test Dag designed to fail with an error for Otto to investigate automatically.otto_rca_to_gh_pr: This is the Dag that runs the investigation.
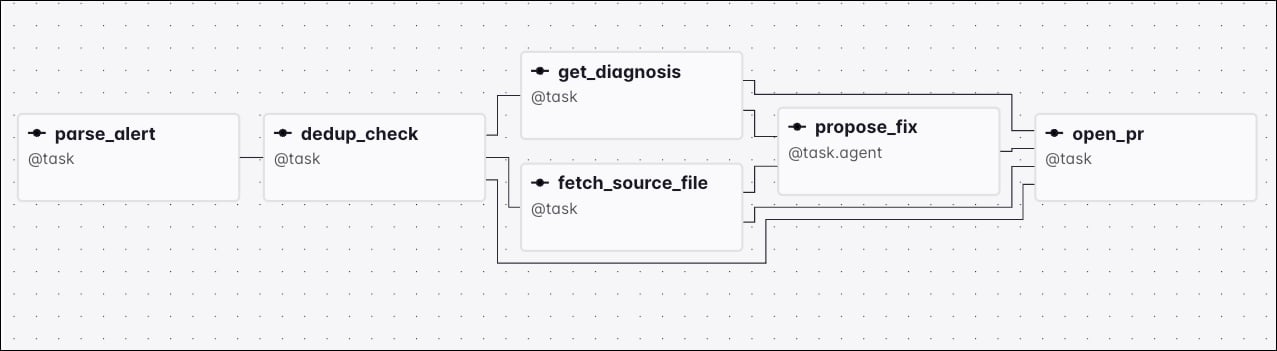
otto_rca_to_gh_pr Dag consists of six tasks:
parse_alert: Extracts the source Dag ID and run ID from the triggering alert. If the alert message doesn’t include a recognizable Dag ID or is missing a run ID, the task raises an error.dedup_check: Checks GitHub for an existing open pull request labeled with the source Dag ID. If one already exists, the task skips the rest of the Dag run to avoid opening a duplicate fix. This is a simple example of deduplication logic. You might need more complex logic in a production setup specifying the issue to be fixed by task ID and deployment ID in addition to the Dag ID.get_diagnosis: Requests a root cause diagnosis for the failed Dag run from Otto, using the Astro Organization ID, Deployment ID, and an investigation token.fetch_source_file: Retrieves the current content of the failing Dag’s source file from the base branch of the GitHub repository.propose_fix: An agent task that sends the diagnosis and current file content to an LLM, which proposes the smallest set of exact search-and-replace edits that resolve the diagnosed root cause.open_pr: Applies the proposed edits to the source file, formats the result withruff, then creates a branch, commits the change, and opens a labeled GitHub pull request.
include folder. The request_diagnosis function in include/airflow_rca shows the interaction with Otto.
The failing Dag and the auto-fix Dag are running in the same Astro Deployment for convenience in the context of the tutorial. You can use the
otto_rca_to_gh_pr Dag to investigate any Dag failures in any of your Astro Deployments.Step 3: Deploy the tutorial project
Run the following commands in your repository’s root to sign in to Astro and push code to your Astro Deployment, created in Step 1.If you cannot install the Astro CLI locally, you can still complete this tutorial by deploying the tutorial repository directly from GitHub using the GitHub integration.
You can also interact with Otto from the Astro CLI. Just run
astro otto and ask anything about Airflow, Astro, and your projects.Step 4: Create a Deployment token
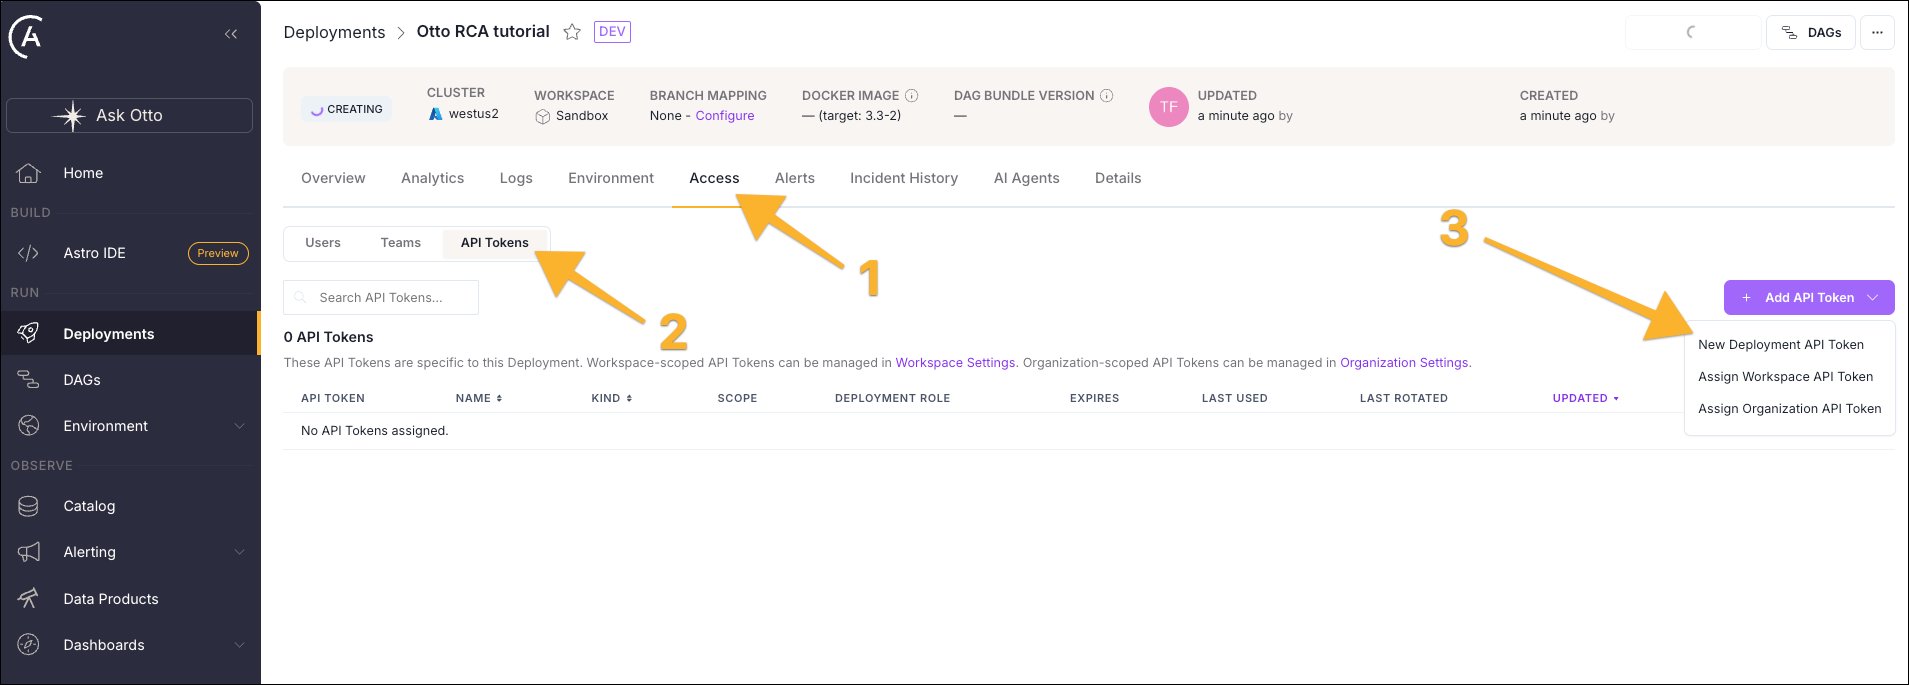
In order for an Astro alert to start a Dag in one of your Deployments, you need to give it a Deployment token.- On your Deployment, click Access, then API Tokens, and Add API Token.
-
Create a new token with the name
AlertTokenof theStandardKind with theDeployment AdminRole. -
Click
Create API Tokenand store the token value in a safe location.
Step 5: Create an Astro alert
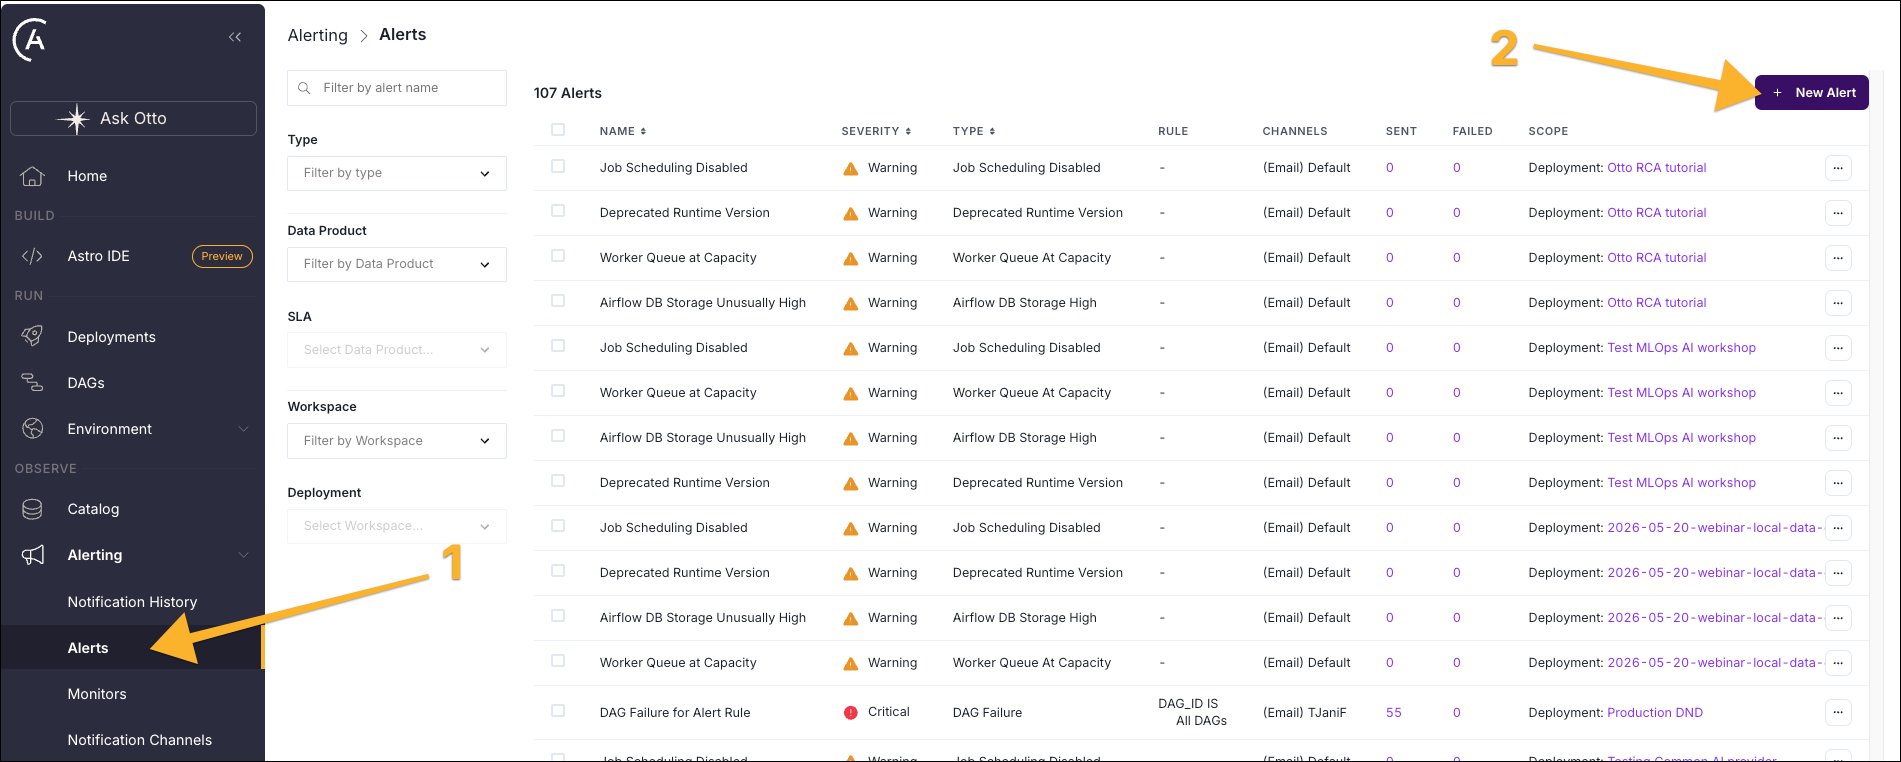
In order for any Dag failure to start the investigation Dag, you need to create an Astro alert with a Dag trigger.- In the Astro UI, open the Alerting dropdown and click Alerts -> + New Alert.
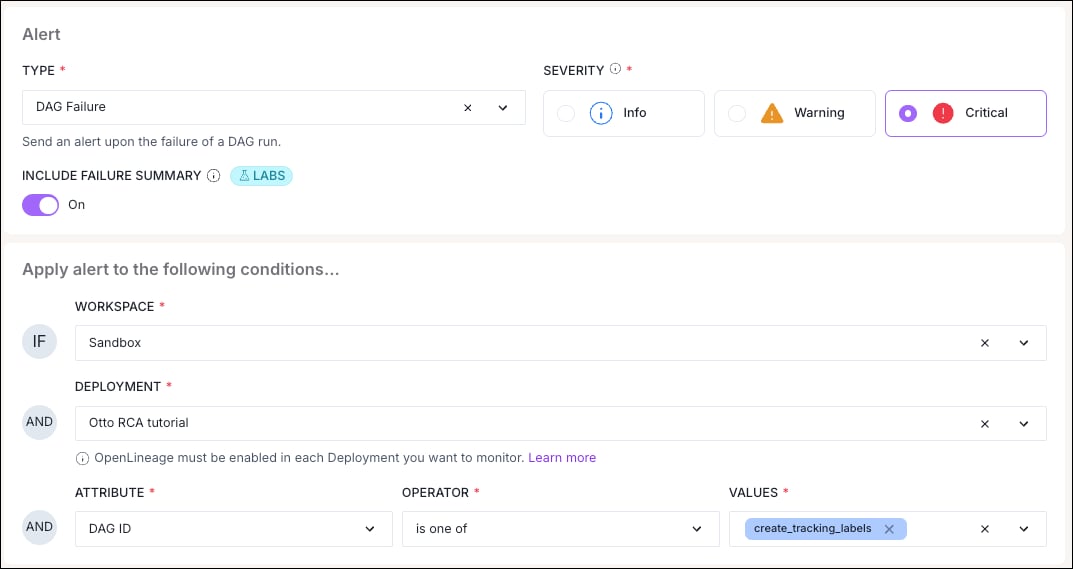
- The first part of the alert form describes when the alert should fire. Select the
DAG Failuretype, your workspace, and Deployment name. For this tutorial we’ll scope the alert to only trigger when thecreate_tracking_labelsDag fails.
Note that if you are running the
otto_rca_to_gh_pr Dag in the same Deployment as Dags that need to be fixed, be careful about selecting All DAGs for the alert. You want to avoid a situation where any failure in the otto_rca_to_gh_pr triggers another run of the same, creating an infinite loop.- Next you need to add the
DAG triggernotification channel. Click+ New Notification Channeland create a channel with the nameotto_rca_to_gh_pr Dag, the typeDAG trigger, and aim it at your Deployment and theotto_rca_to_gh_prDag. Copy your Deployment API token that you saved at the end of Step 4 into theDEPLOYMENT API TOKENfield. Lastly make the channel available to your entire organization, workspace, or just to this tutorial Deployment.
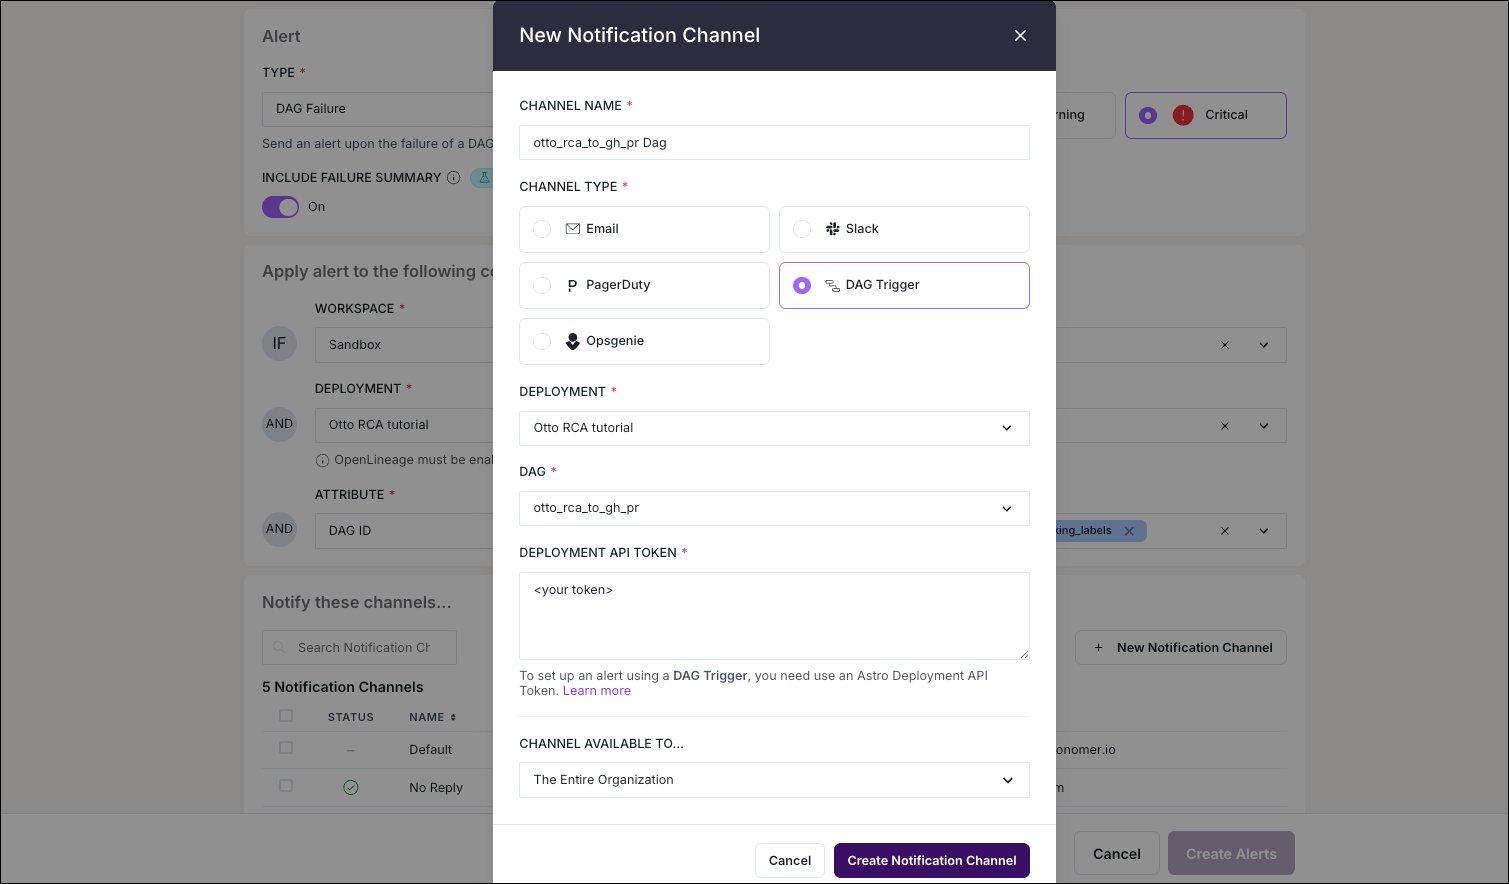
- Click
Create Notification Channelto create the channel andCreate Alertsto save the alert.
Step 6: Create a GitHub token
In order to be able to raise a PR on GitHub, the AI agent needs access to your GitHub repository. For a production use case, you’ll likely want to setup a scoped GitHub App. For this tutorial, you can use a scoped personal access token.- Go to your GitHub account’s Developer Settings and click Generate new token to create a new fine-grained token.
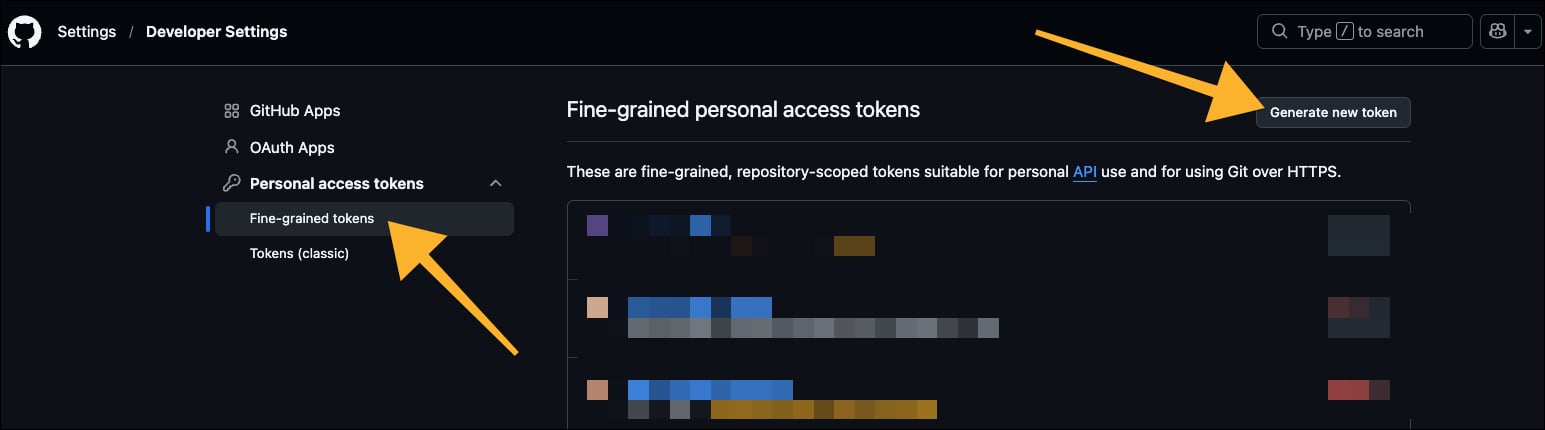
- Give your GitHub any name and scope it to your fork of the tutorial repository.
- Add four permissions: Contents (Read and write), Metadata (Read-only), Pull requests (Read and write), and Issues (Read and write).
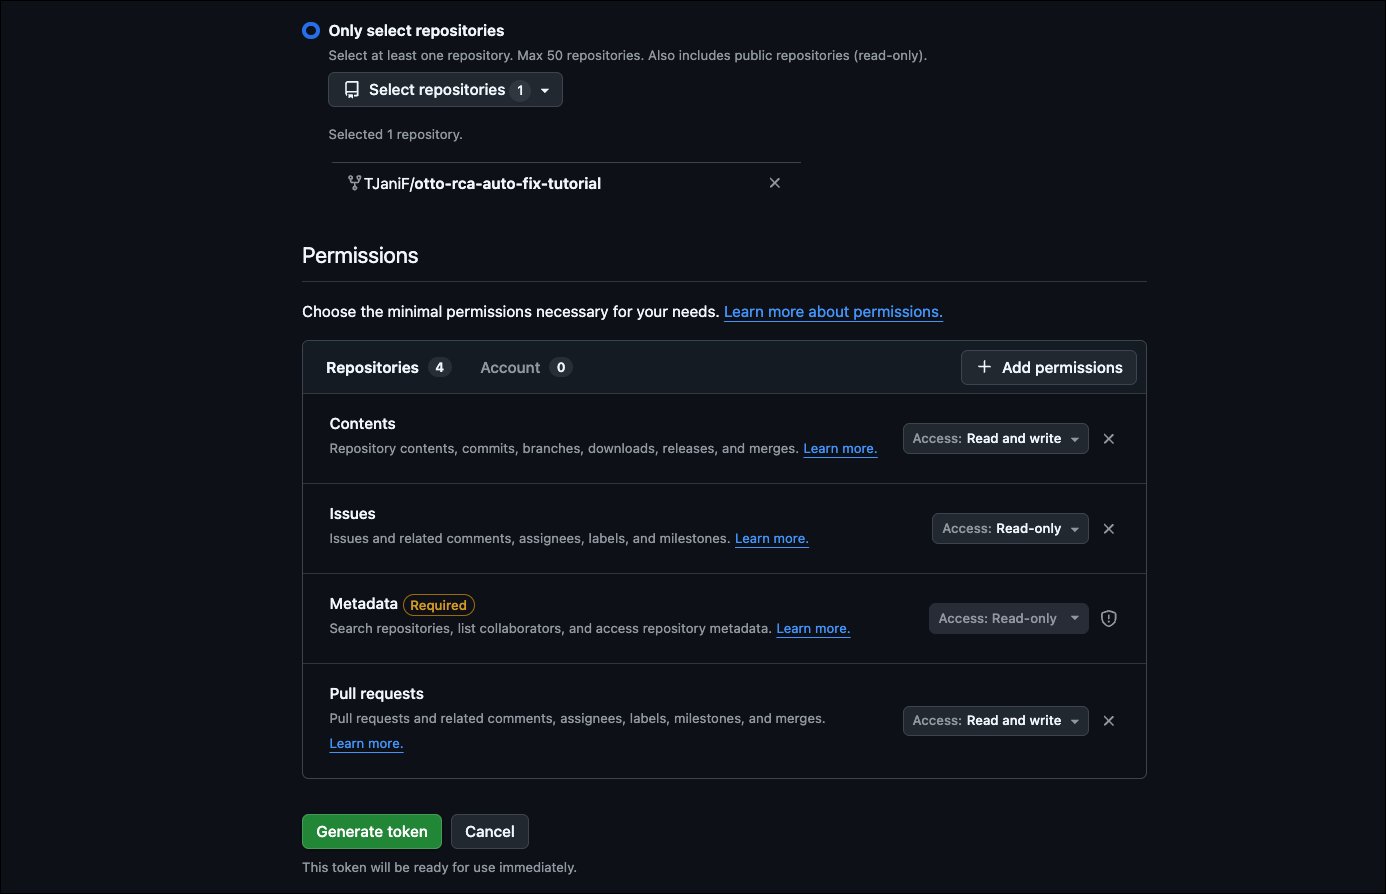
- Create the token and copy it to a safe location.
Step 7: Add environment variables and a connection
The last set up step is to add the necessary environment variables and the Airflow connection to your model provider to your Deployment.- Go to your Astro Deployment and click Environment, then Environment Variables and Edit Deployment Variables.
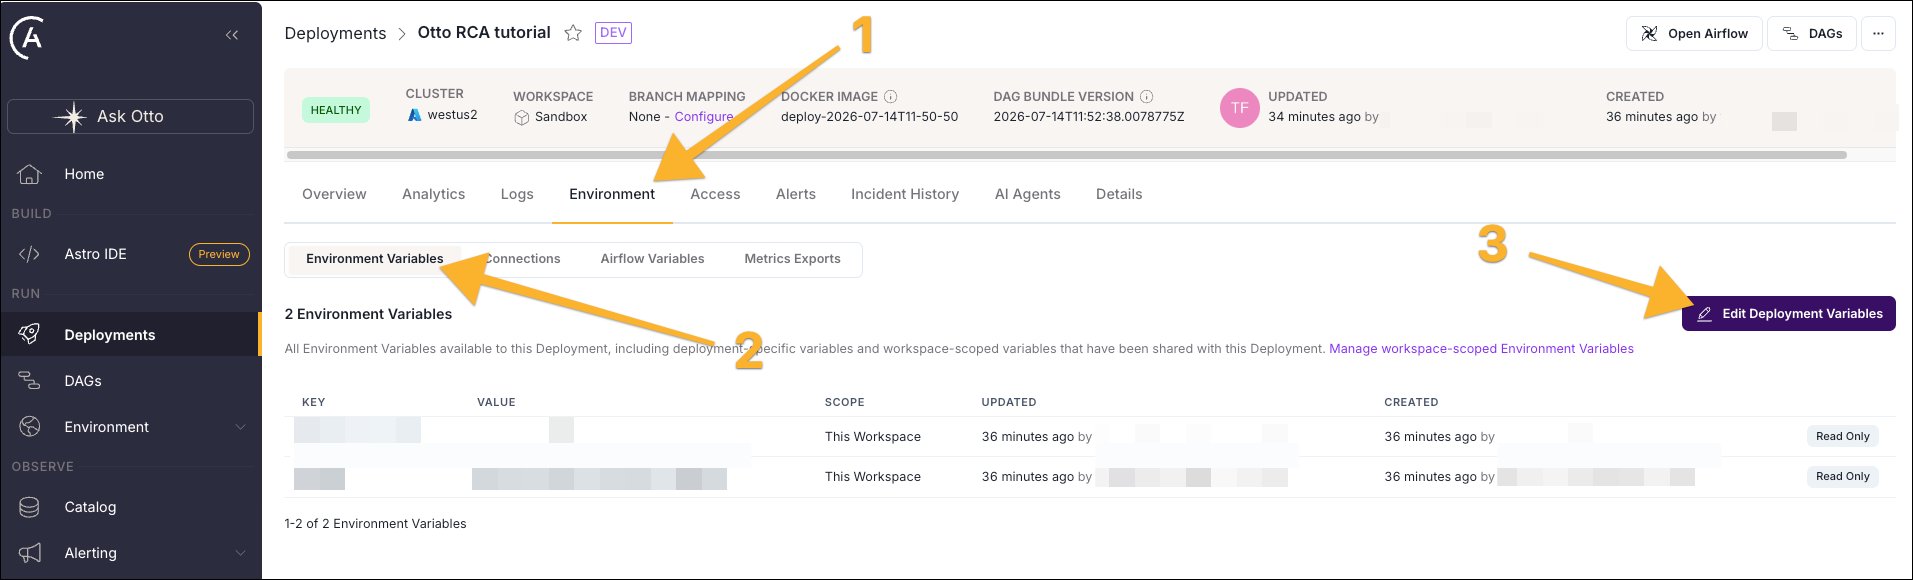
-
Add the following three environment variables, marking all tokens and keys as
SECRETwith the toggle.ASTRO_API_TOKEN: You can reuse the same Astro Deployment token you created in step Step 4. This is the credential the Airflow task uses to authenticate to Astro in order to be able to run the Otto investigation.GITHUB_REPO: Your fork of the tutorial repository in the format<account>/<repo>.GITHUB_TOKEN: Your GitHub token, retrieved in Step 6.
- Click Update Environment Variables to save your changes.
-
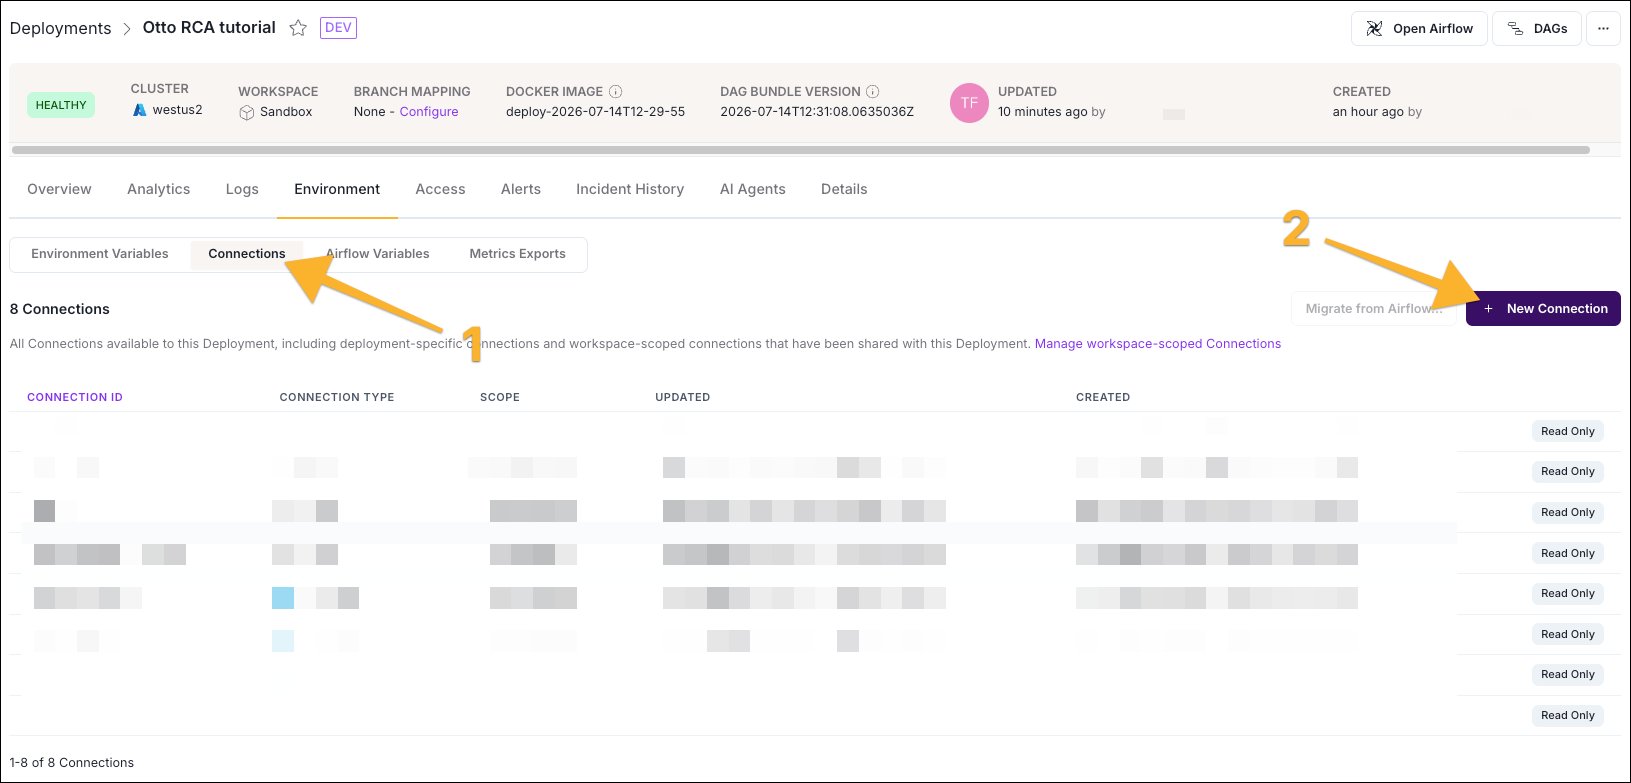
Still on your Deployment’s environment tab, click Connections to add your Pydantic AI connection for the
@task.agenttask that drafts your PR.
-
Select the
Genericconnection form and create a connection to your LLM provider. If you are using OpenAI, add the following values.- Connection ID:
pydanticai_default - Connection Type:
pydanticai - Password: Your OpenAI API Key.
- Extra:
{"model":"openai:gpt-5"}. You can use any valid model for your model provider.
- Connection ID:
Alternatively, you can use another LLM provider, as long as it is compatible with Pydantic AI and you adjust the extra provided to the
pydantic-ai-slim[<your LLM provider>] in the requirements.txt file for your Astro project. For more options on how to configure the Pydantic AI connection used with the Common AI provider’s @task.agent decorator, see the Common AI provider connection documentation.Step 8: Test the Dag
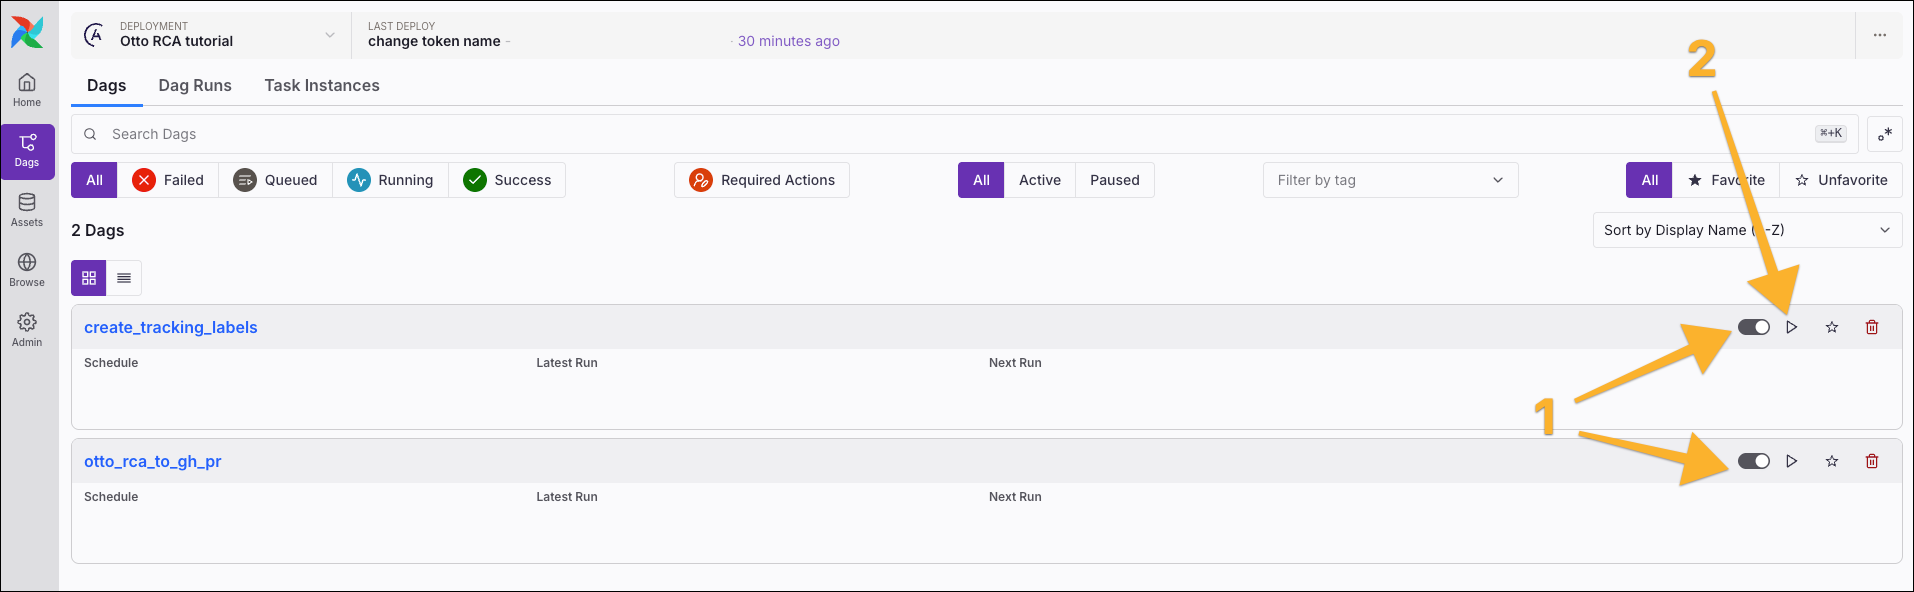
Now it is time to test this setup!- Go to the Airflow UI and make sure both Dags are unpaused.
-
Run the
create_tracking_labelsDag manually. It should fail its last task with aKeyError. -
The failing Dag causes the Astro alert to run, and automatically triggers the
otto_rca_to_gh_pr, which investigates the failure and proposes a fix. - Wait for the Dag to finish, then check your GitHub repository for a new PR.