


Note: To learn more about ETL/ELT with Snowflake and Airflow we recommend you also check out our Orchestrate Snowflake Queries with Airflow integration tutorial.
ETL is one of the most common data engineering use cases, and it’s one where Airflow really shines. In this webinar, we cover everything you need to get started as a new Airflow user, and dive into how to implement ETL pipelines as Airflow DAGs using Snowflake.
If you’re new to Apache Airflow®, check out the articles where we walk you through all the core concepts and components. You can also watch our Intro to Airflow Webinar.
Flexibility of Data Pipelines as Code
Having your data pipelines in code gives you great flexibility. While using provider packages and external Airflow services you can implement a complex pipeline in Airflow (as shown in the example below) without writing a lot of code.
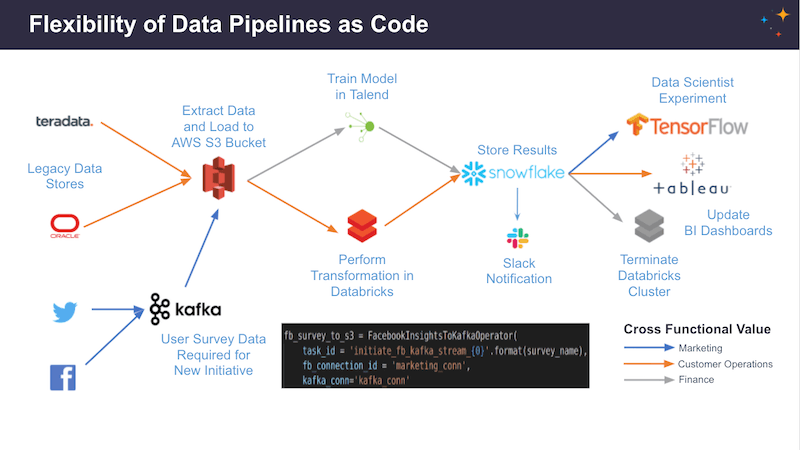
In today’s webinar, we’re focusing on the Snowflake provider.
Apache Airflow® walkthrough - the UI
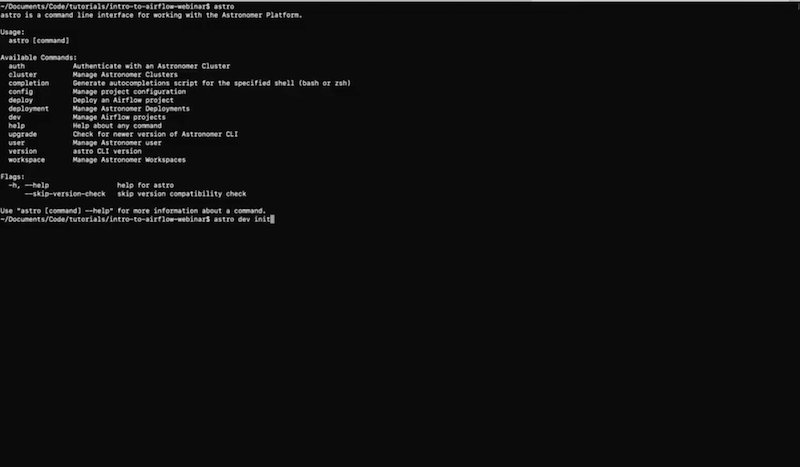
You should have Apache Airflow® installed locally on your computer for this demo. To do that go to the Astronomer CLI. It’s the easiest way to get Airflow up and running.
Here is the repo with supporting code examples.
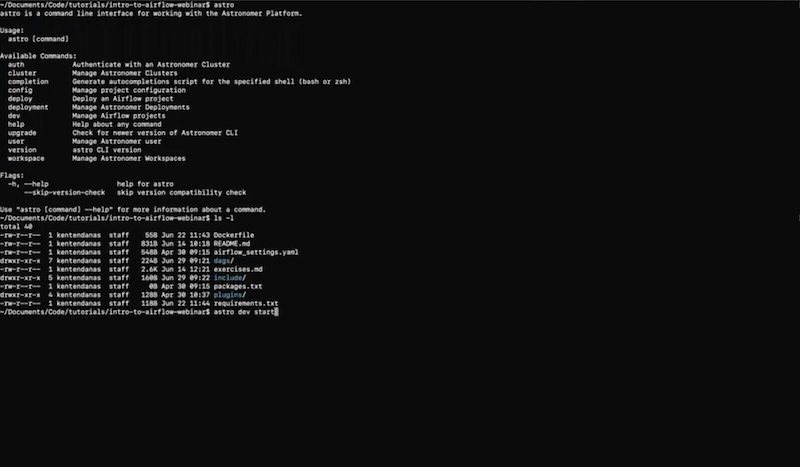
Once you have Apache Airflow® installed, go to the Astronomer CLI and type astro dev init to initialize a project:
Now you have a docker file. Type astro dev start which is going to spin up a couple of containers.
By typing docker ps you should see you have the containers running:

Go to localhost:8080 in your browser and you should see Airflow up and running (we’re using Airflow 2.0 for the purpose of this webinar):
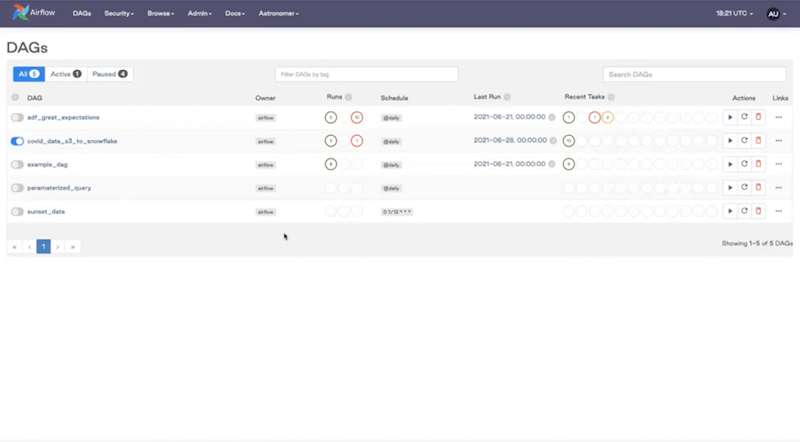
You can see a list of all our example DAGs. The UI has a few interesting view options:
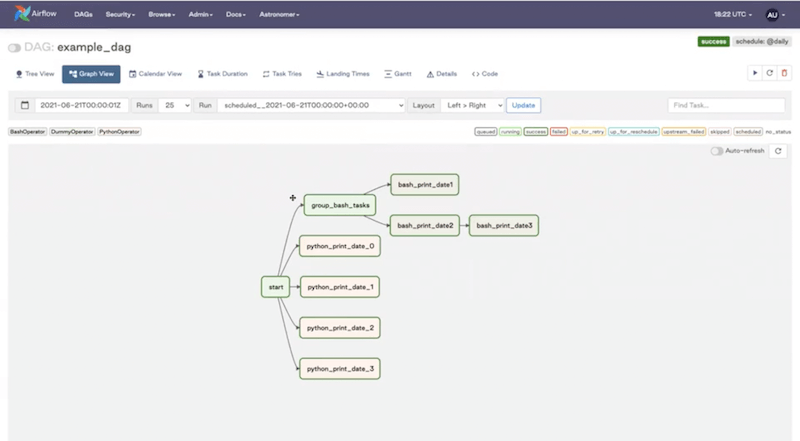
Graph View - very useful for checking what’s going on in a given DAG.
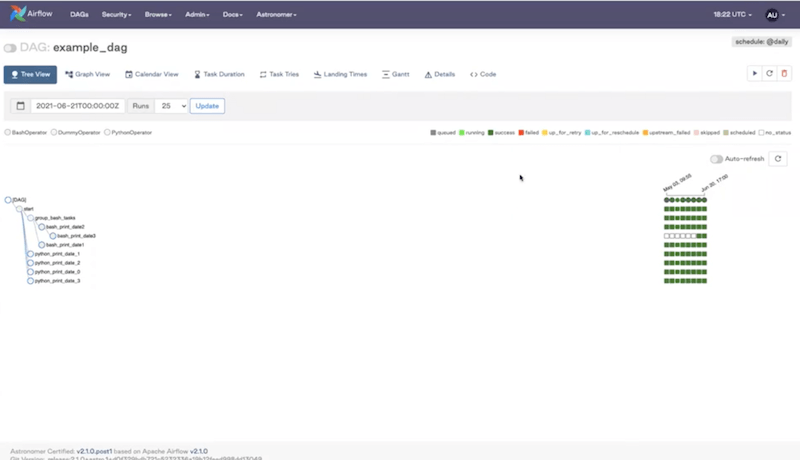
Tree View - shows you a layout of your tasks plus an overview of all your recent DAG runs (color-coded to show the status).
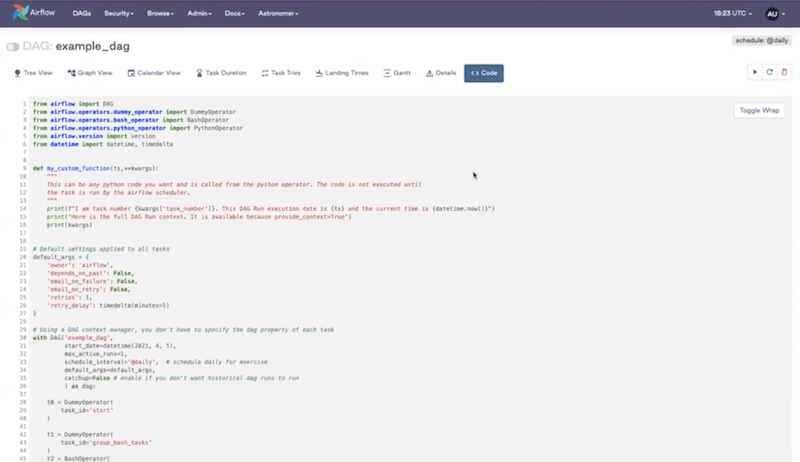
Code View - you can’t edit the code from the UI but it’s helpful to identify what’s going on within the DAG.
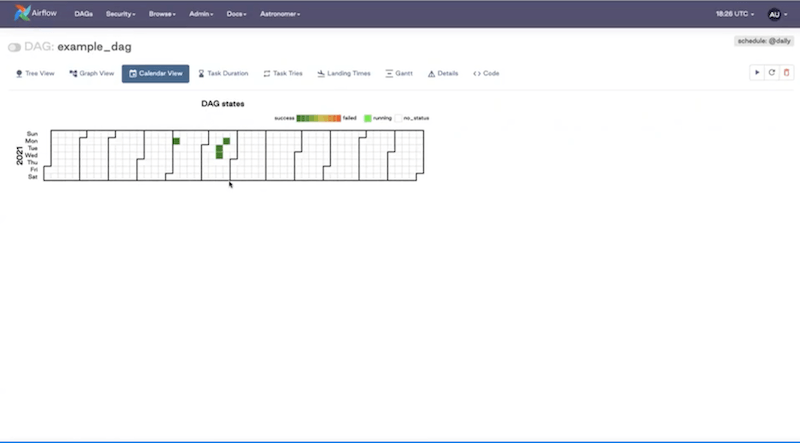
Calendar View - shows all your DAG runs and the status layout in the calendar.
ETL with Snowflake
You can find and install the Snowflake provider from the Astronomer Registry.
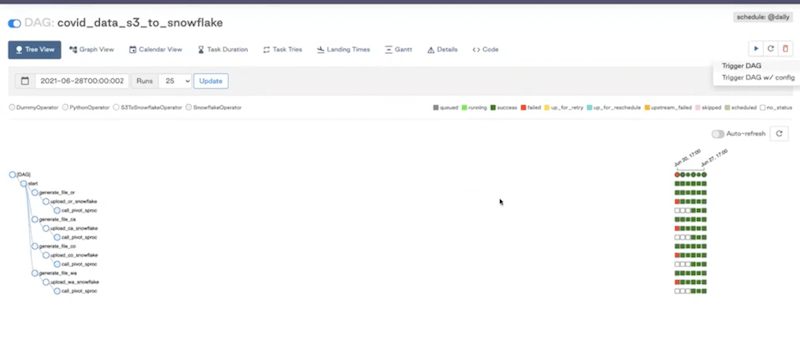
For the purpose of the webinar we’re going to use the covid_data_s3_to_snowflake DAG.
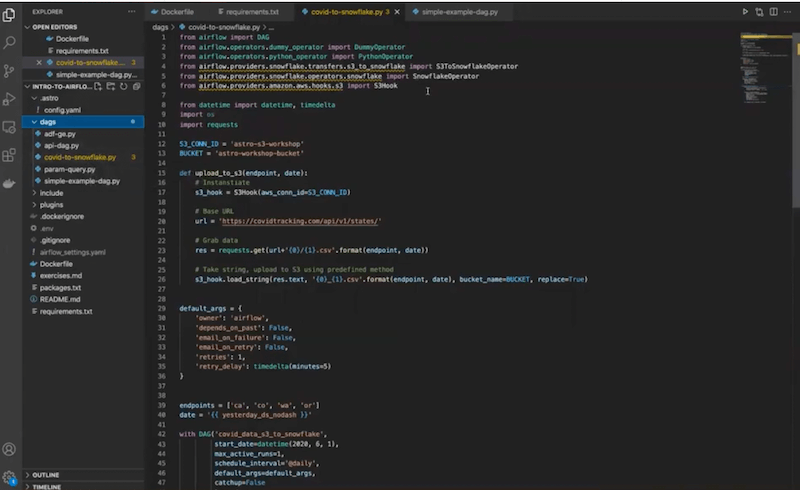
Go back to the code editor. You can see our “dags” folder and the “covid_data_s3_to_snowflake” below. Click on it.
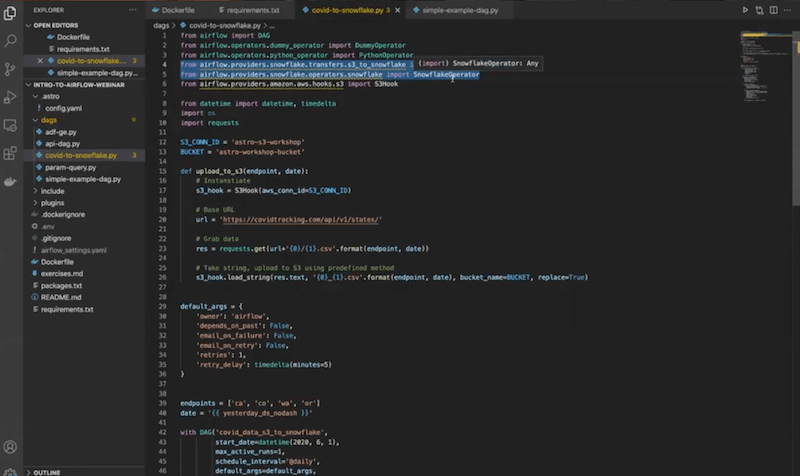
You can see installed Snowflake providers here:
The goal of this DAG is to grab some data from the COVID API, save it to S3, and transfer it from there to our Snowflake instance. We’ll then complete transformations of the data in Snowflake using its built-in compute.
Note, that what we’re describing here is an ELT framework, where we’re doing transformations at the end, offloading them to Snowflake rather than completing them in Apache Airflow®. While you have an option to do transformations in Airflow using Python, Airflow was meant to be an orchestrator, not a processing framework. So, if you have large datasets to deal with, we recommend the ELT approach. Snowflake — a data warehouse — is a great option.
Next, define your Python function that’s going to get your data. In this case we’re grabbing COVID data from the API: https://covidtracking.com/api/v1/states/
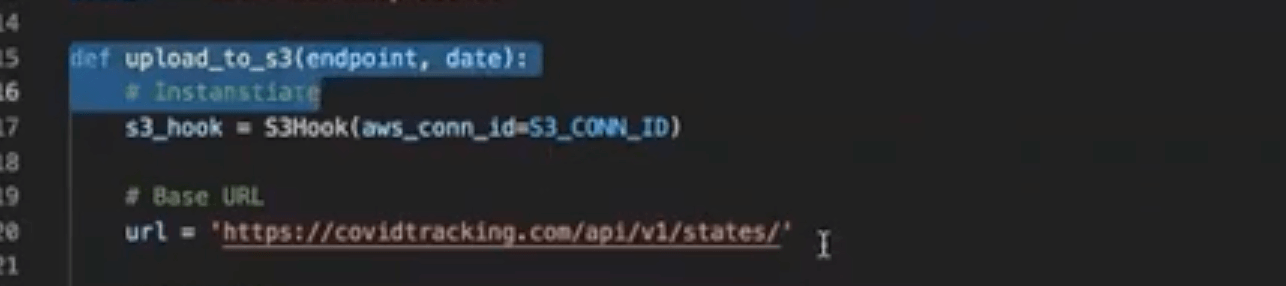
Then, we’re going to save it to a flat file on S3. To do that, we’re using an S3 hook. You can also see the imported Amazon AWS provider package — just another provider we’re using.

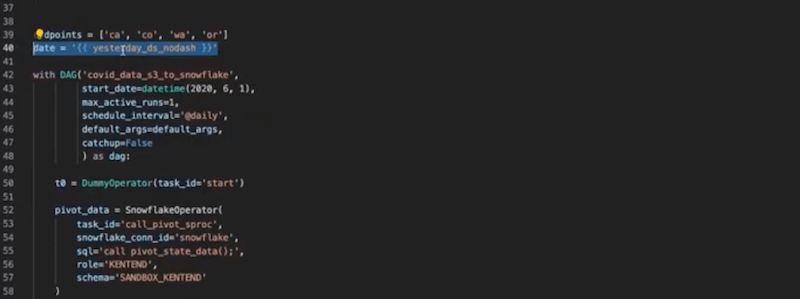
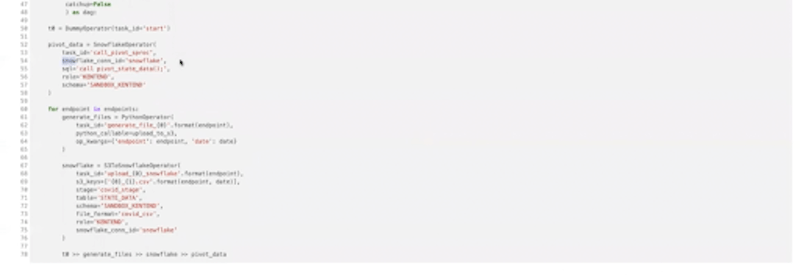
Next, we instantiate our DAG, and provide some basic parameters defining how we want it to behave.

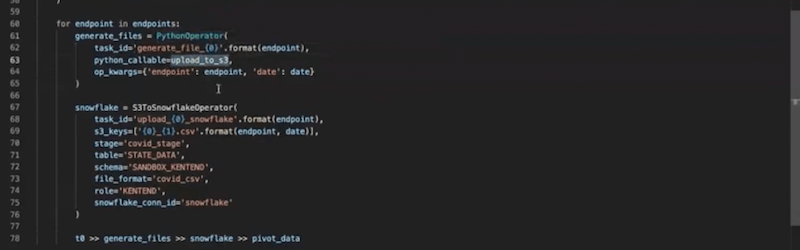
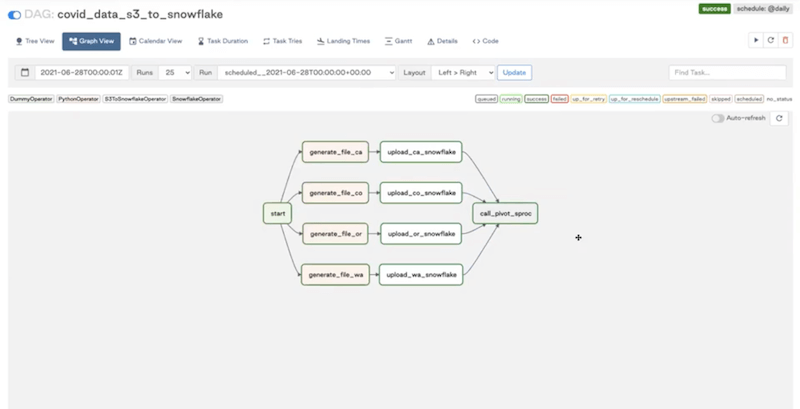
Then, we get into the operators themselves. We’re starting here, where we’re generating these tasks dynamically:
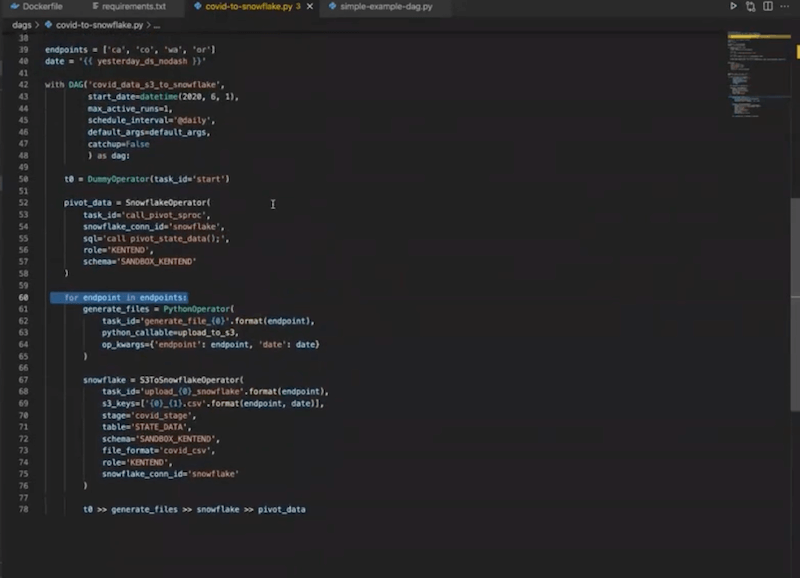
The first block is a set of Python operators which are calling the upload_to_s3 function:
We’re defining the date we want to pull data for, using a built-in Airflow variable.
We’re using the S3ToSnowflakeOperator (ready to go out-of-the-box). We define the task_id, s3_keys, and stage (that you define in your Snowflake instance). We also define where that data is going to go with table, schema and file_format.
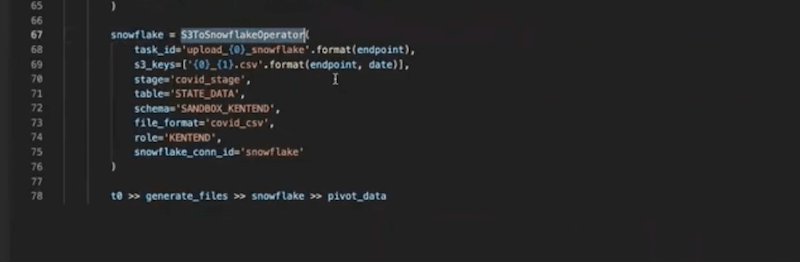
The snowflake_conn_id is going to define how Airflow can connect to Snowflake. More on that later.
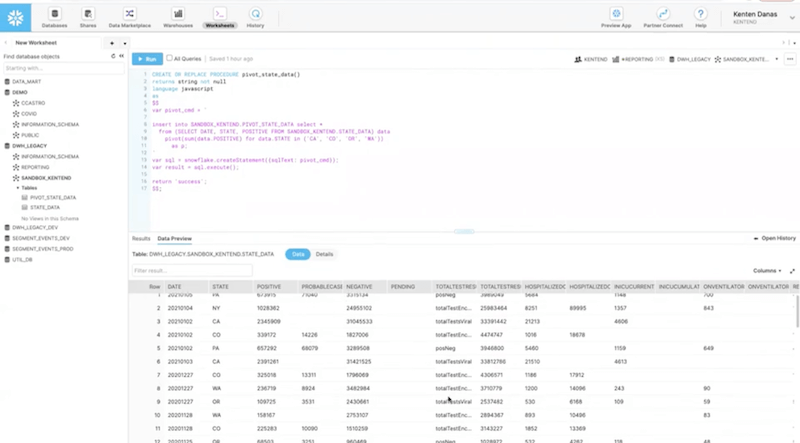
Finally, we perform some transformations on the data using the Snowflake operator, which is why we have a pivot_data task. In this case, we implemented it by defining a stored procedure within Snowflake that does the transformations.

Let’s go back to the Airflow UI. This is what our DAG looks like in the Graph View:
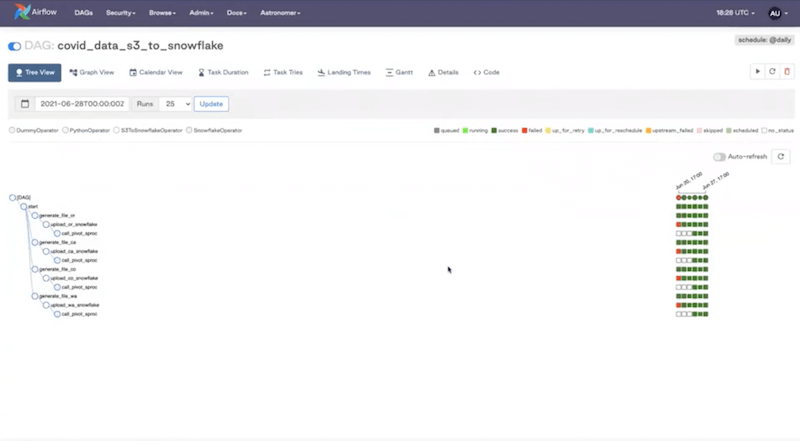
And in the Tree View:
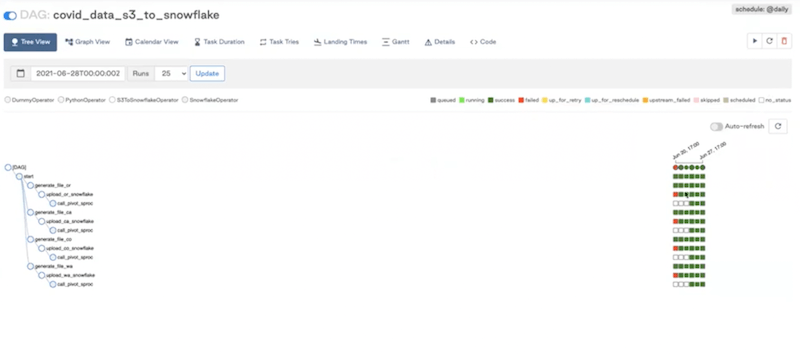
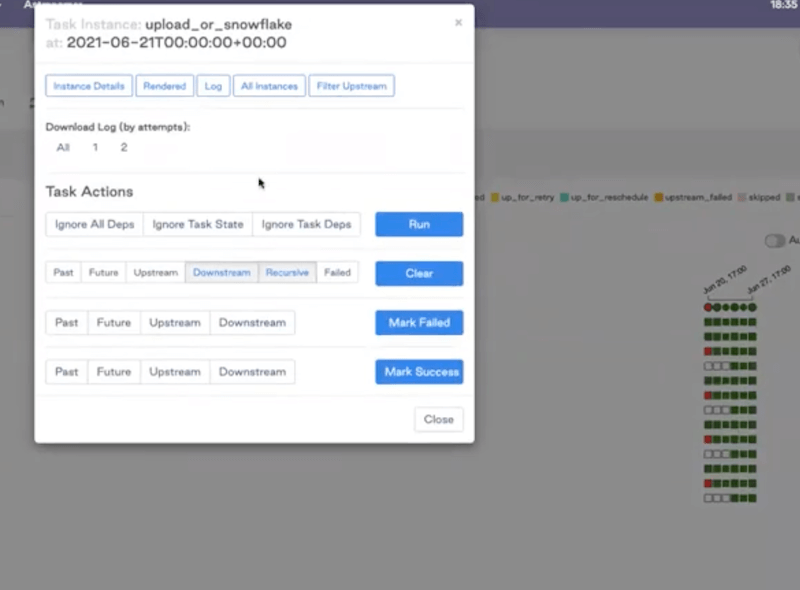
If you see some failures, the UI allows you to investigate any task instance— click on it, and go to the logs to see what’s going on.
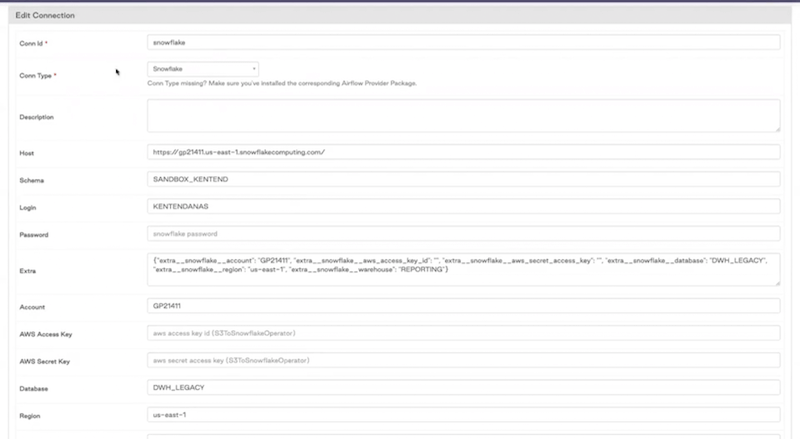
In the Code view, you can see how Airflow is going to connect to Snowflake. For that purpose, we’re defining the snowflake_conn_id:
You can define the Airflow connection by going to the “Admin” and then “Connections”.

As you can see, we have a Snowflake connection listed here:
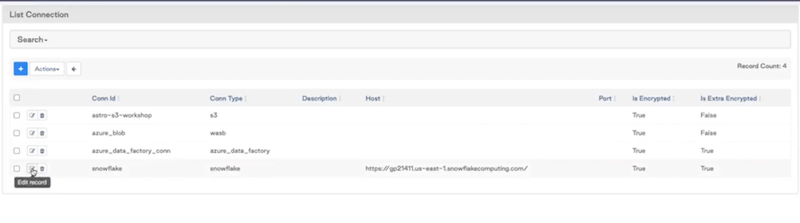
If you click on it you can see all the information that Airflow needs to connect to the Snowflake instance.
From there, you can come back to the DAG view and run it:
You can also check how it looks like in your Snowflake instance.
That’s all! We hope this webinar showed you all the benefits of the ELT framework when using the Snowflake provider package.
See More Resources