Speedrun your first Apache Airflow® Dag run
10 min read |
The Astro IDE allows you to run your first Airflow Dag within X minutes!
Can you beat my time?
I ran my first Airflow Dag in April 2022. New to data engineering, I first had to try to figure out how to spin up an Airflow development environment. Reading about the different options at the time, from standalone to docker-compose, I was a bit lost. I had never used Docker before and it took some trial and error and browsing StackOverflow (it was the time before widely-available LLMs) to eventually figure it out.
I did not track the time but it probably took me about two hours to get that first sweet successful Dag run, back then in the old Tree View. A week later I learned about the Astro CLI, which reduced the setup struggles and time significantly but I and my colleagues still had our share of container engine-related issues over the past years.
Luckily all that is now in the past, Airflow managed services have evolved with new options that help with developing and deploying Airflow Dags. What if I told you, you don’t need to install anything locally anymore to develop, test, and deploy Airflow Dags? No fights with Docker, no Python environment management, no need for a CICD setup (unless you want to).
The solution to all those struggles is the Astro IDE: an in-browser Airflow development environment and the first tool that allows you to truly speedrun Airflow.
It took me 5 minutes 6 seconds from 0 to run a Dag. How fast will you be?
Step 1: Sign up for a free Astro trial
The Astro IDE is part of your free Astro trial, which you can claim by clicking here.
Once you sign up you are asked to select between Professional and Personal use (Figure 1) and name your organization and workspace (Figure 2).
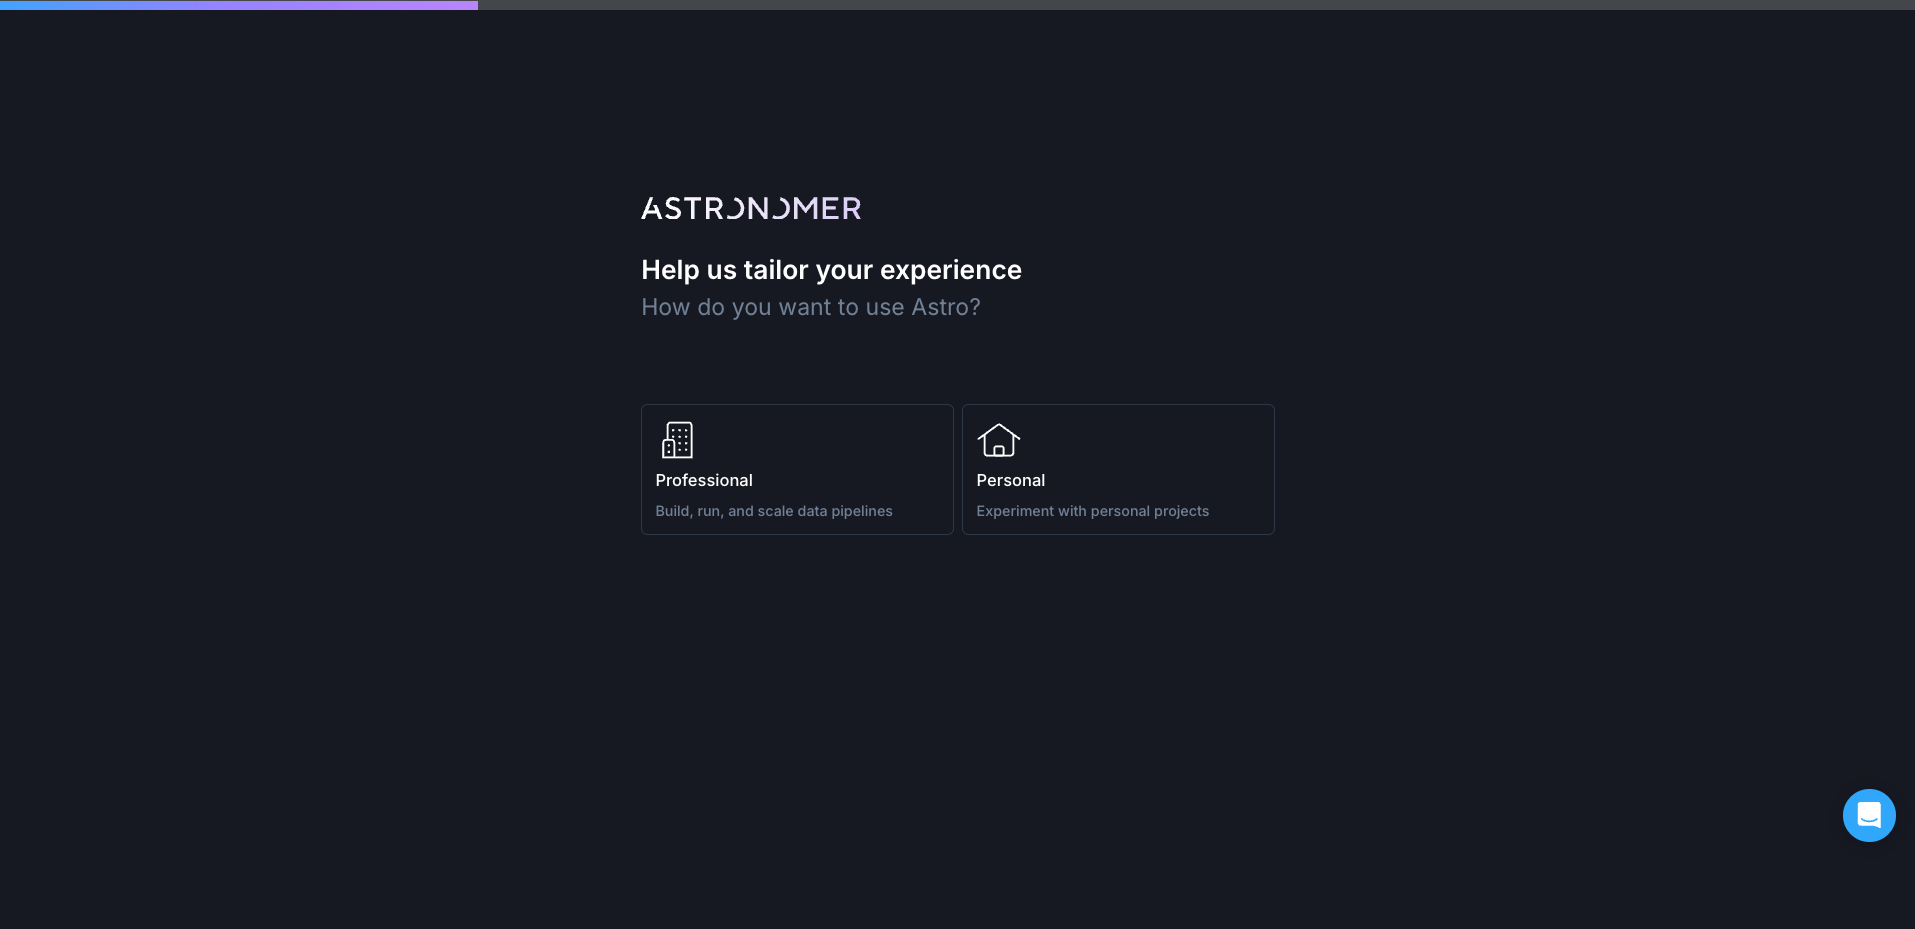 Figure 1: First Screen of the Astro trial flow, asking the user to choose between Professional and Personal use to tailor the trial experience.
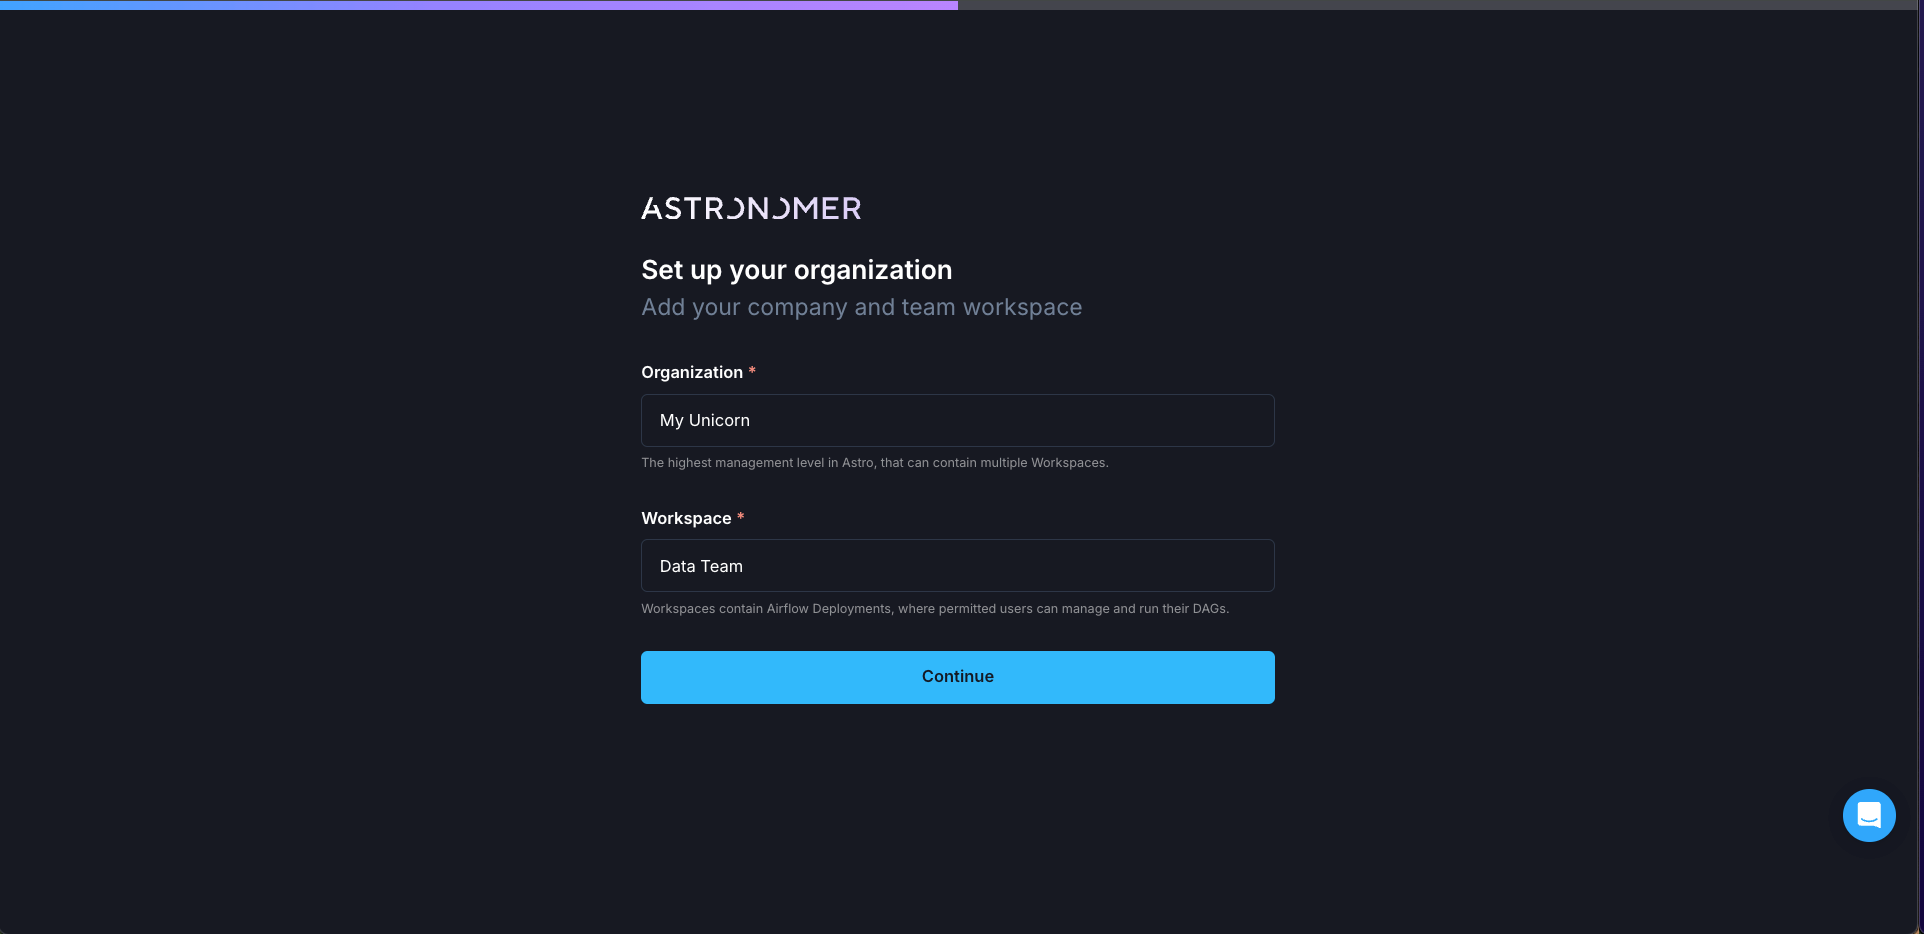 Figure 2: Second screen of the Astro trial flow, asking the user to name their Organization and Workspace
After creating your workspace you can either upload your own existing Dags or start with one of the Astronomer-provided templates (Figure 3). Let’s choose the Learning Airflow template to run your first Dag (Figure 4), which will tell you who is up in space right now!
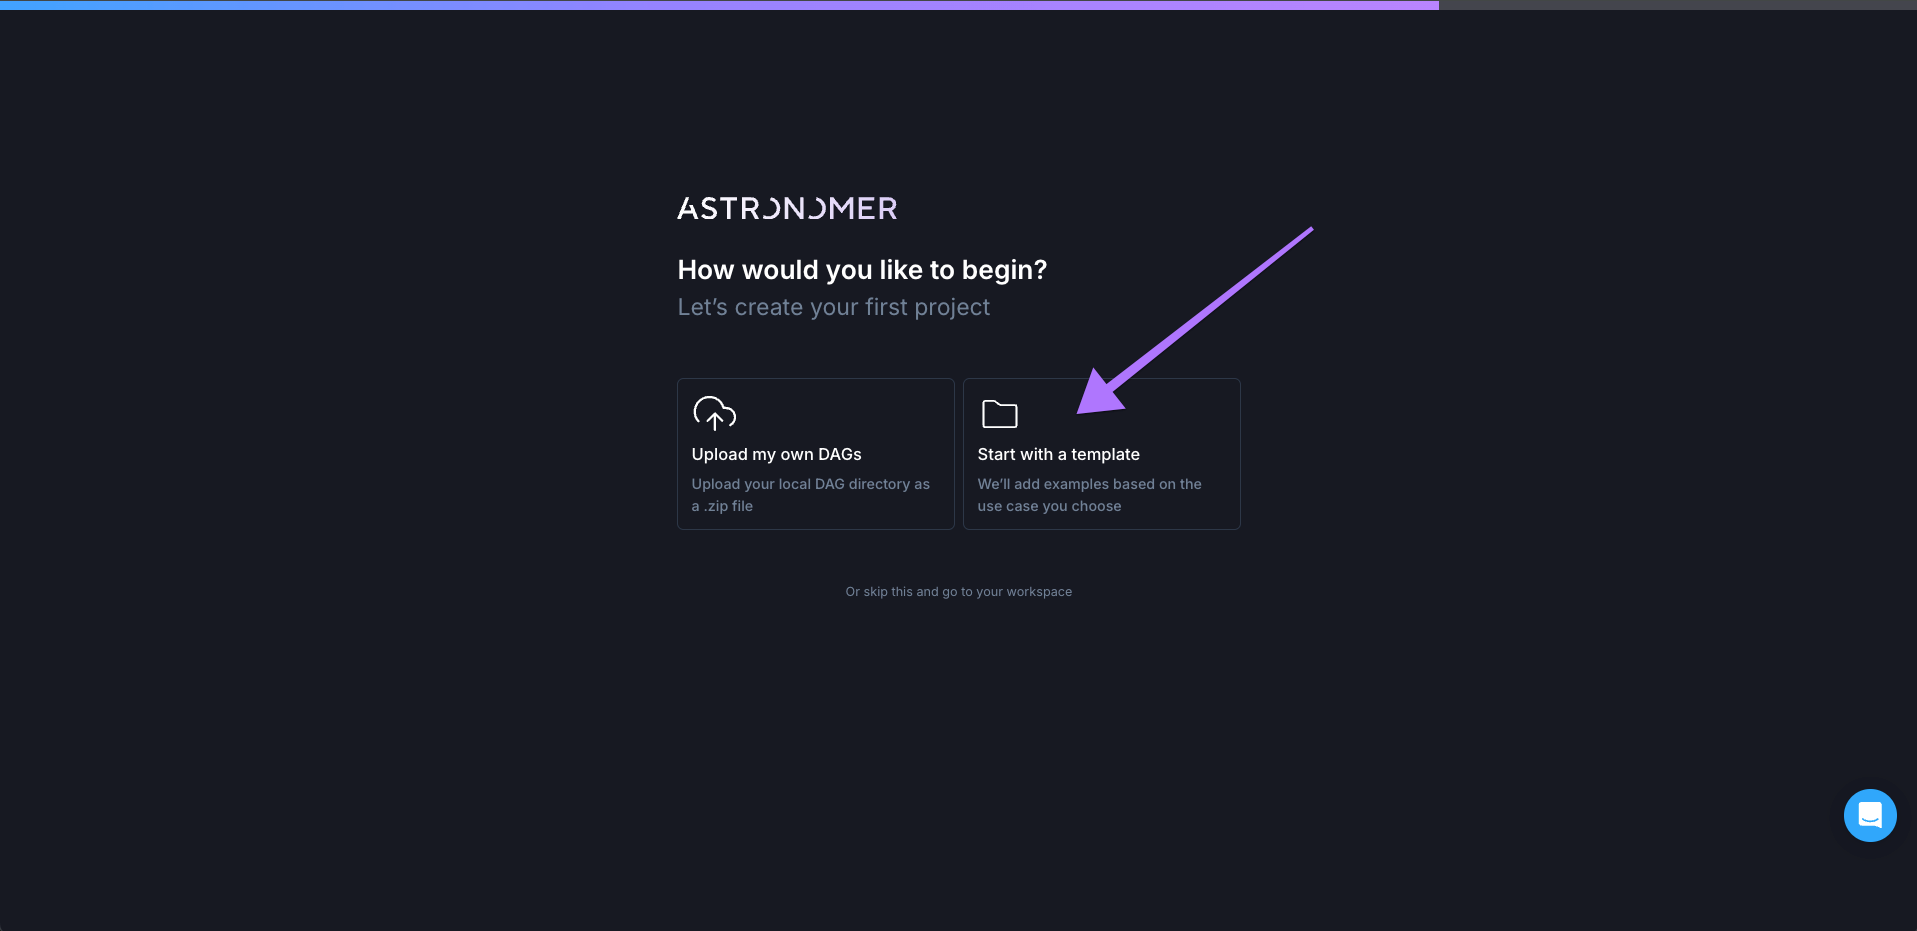 Figure 3: Third screen of the Astro trial flow, providing the user with a choice between uploading their own Dags or starting with a template.
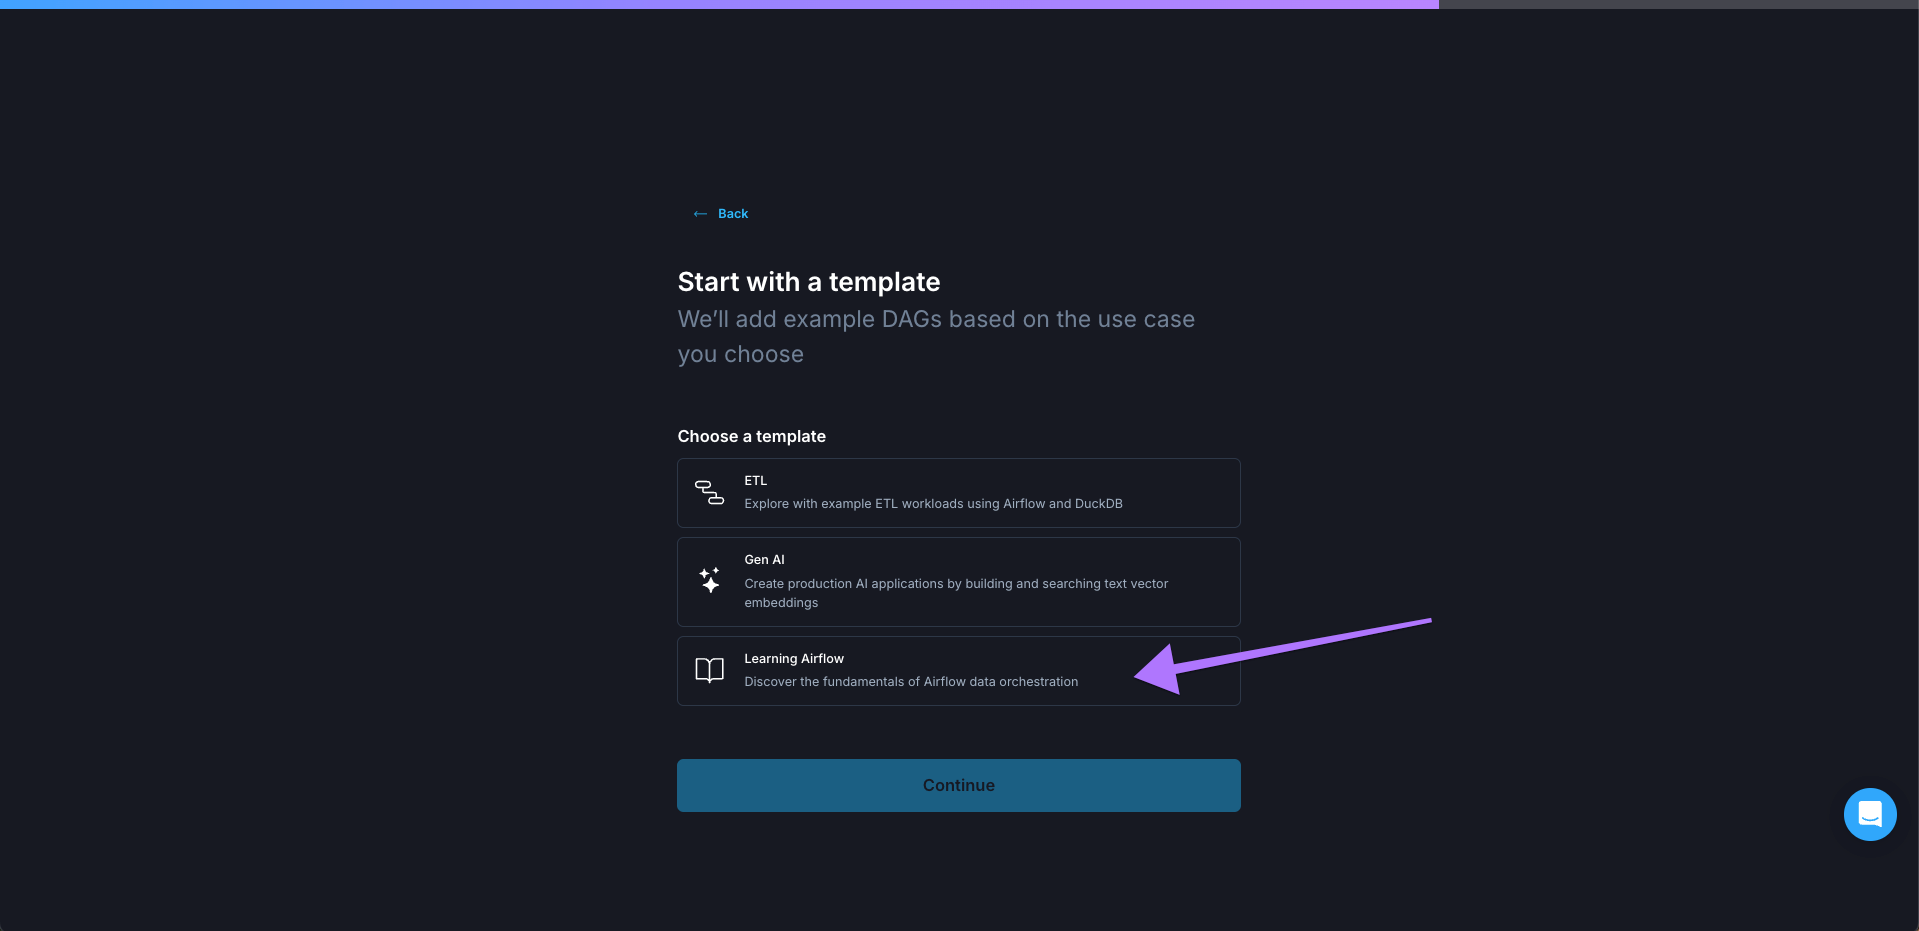 Figure 4: Final screen of the Astro trial flow listing all available templates.
Step 2: Start an Astro IDE Test Deployment
Congrats! You are now inside the Astro IDE, with the template project loaded in. Of course the Astro IDE has many exciting features: From synching your code to a Github repository to using the Astro AI for expert help when writing Dags, but we are on a timer! What’s the fastest way to a Dag run?
The template project’s dags folder already contains one Dag called example_astronauts. This Dag interacts with an API to pull a list of all astronauts who are currently in space and then prints a message about each of them!
Clicking on the example_astronauts.py file (Figure 5) opens the code in the code editor to the right (Figure 6). You can make any changes here (or ask the AI to make changes), but we can just run this Dag as-is!
 Figure 5: The Astro IDE showing the AI chat interface to the left and how to select the example Dag file from the file structure in the middle.
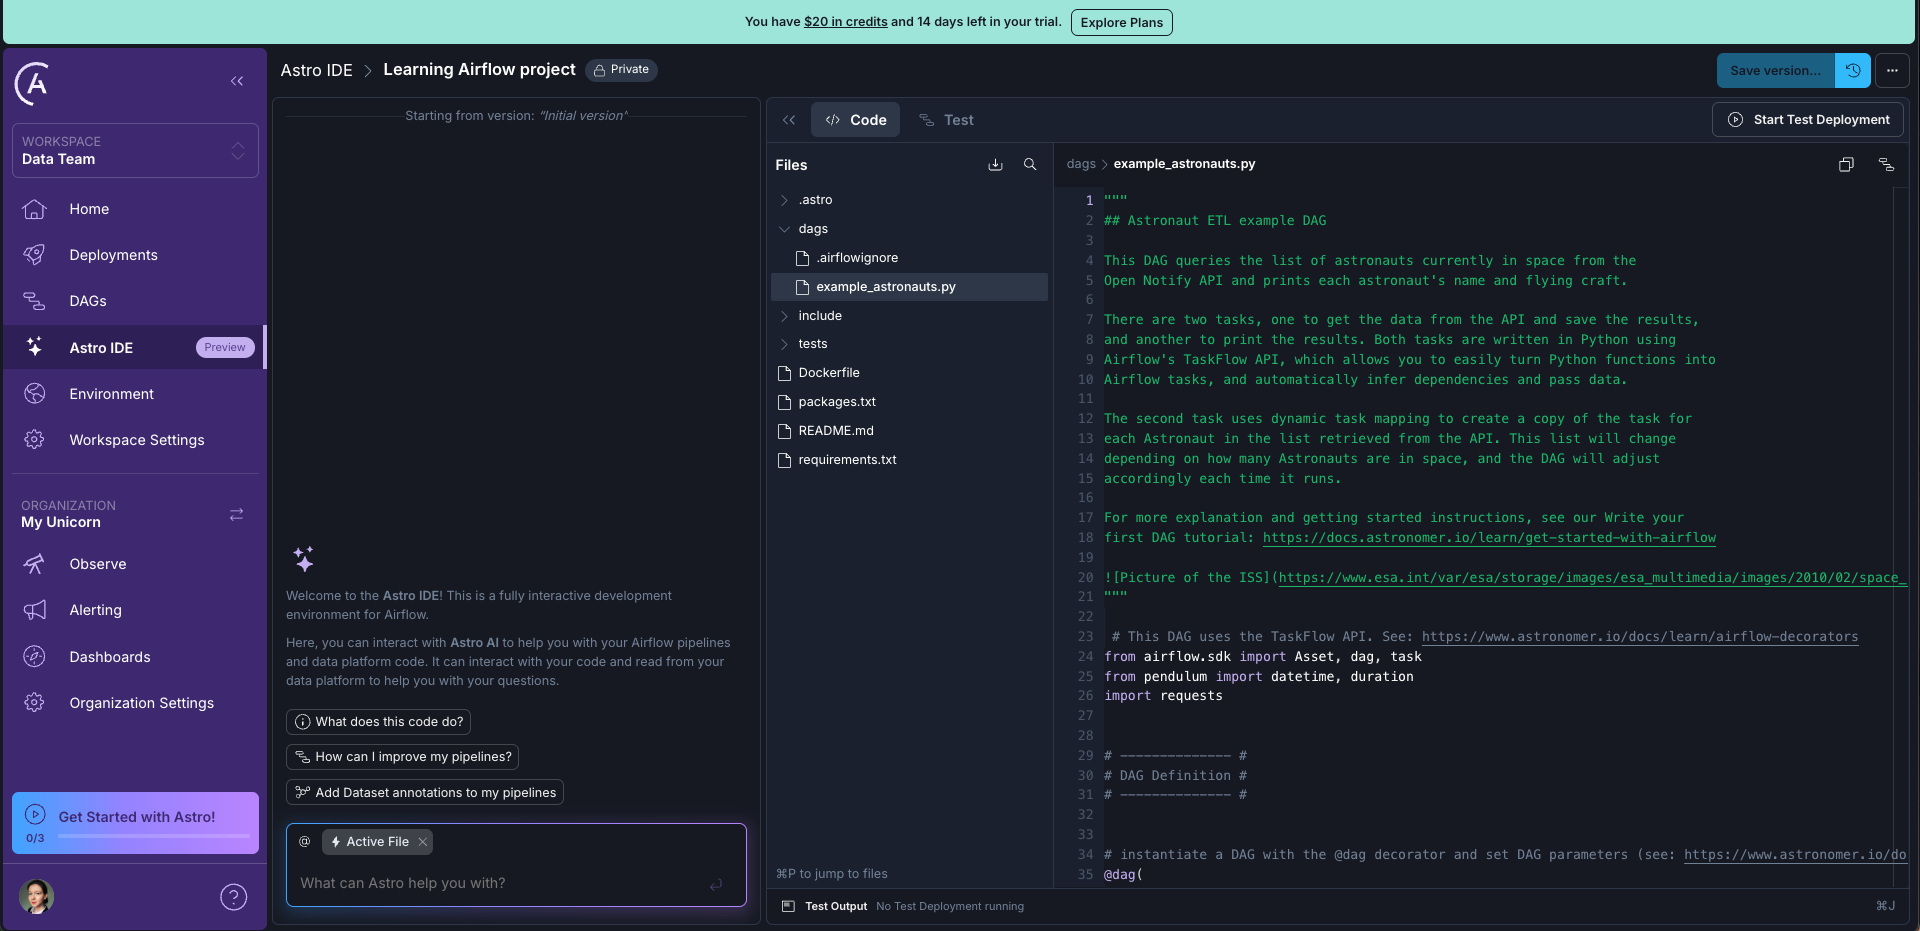 Figure 6: The Astro IDE showing the code in the example Dag in the code editor to the right.
The only thing you have to do is to start up the test Deployment by clicking on the Start Test Deployment button (Figure 7). This will automatically create an Airflow Deployment on Astro as a fully featured testing environment for your Dags and deploy the code you currently have in the Astro IDE, including our example Dag!
The big advantage of using the Astro IDE, compared to working locally, is that you do not need to install anything or manage containers. Additionally, the Astro IDE has access to the context of your Astro environment, from the AI agent knowing about your assets stored in Astro Observe to being able to use connections already defined in the Astro Environment Manager.
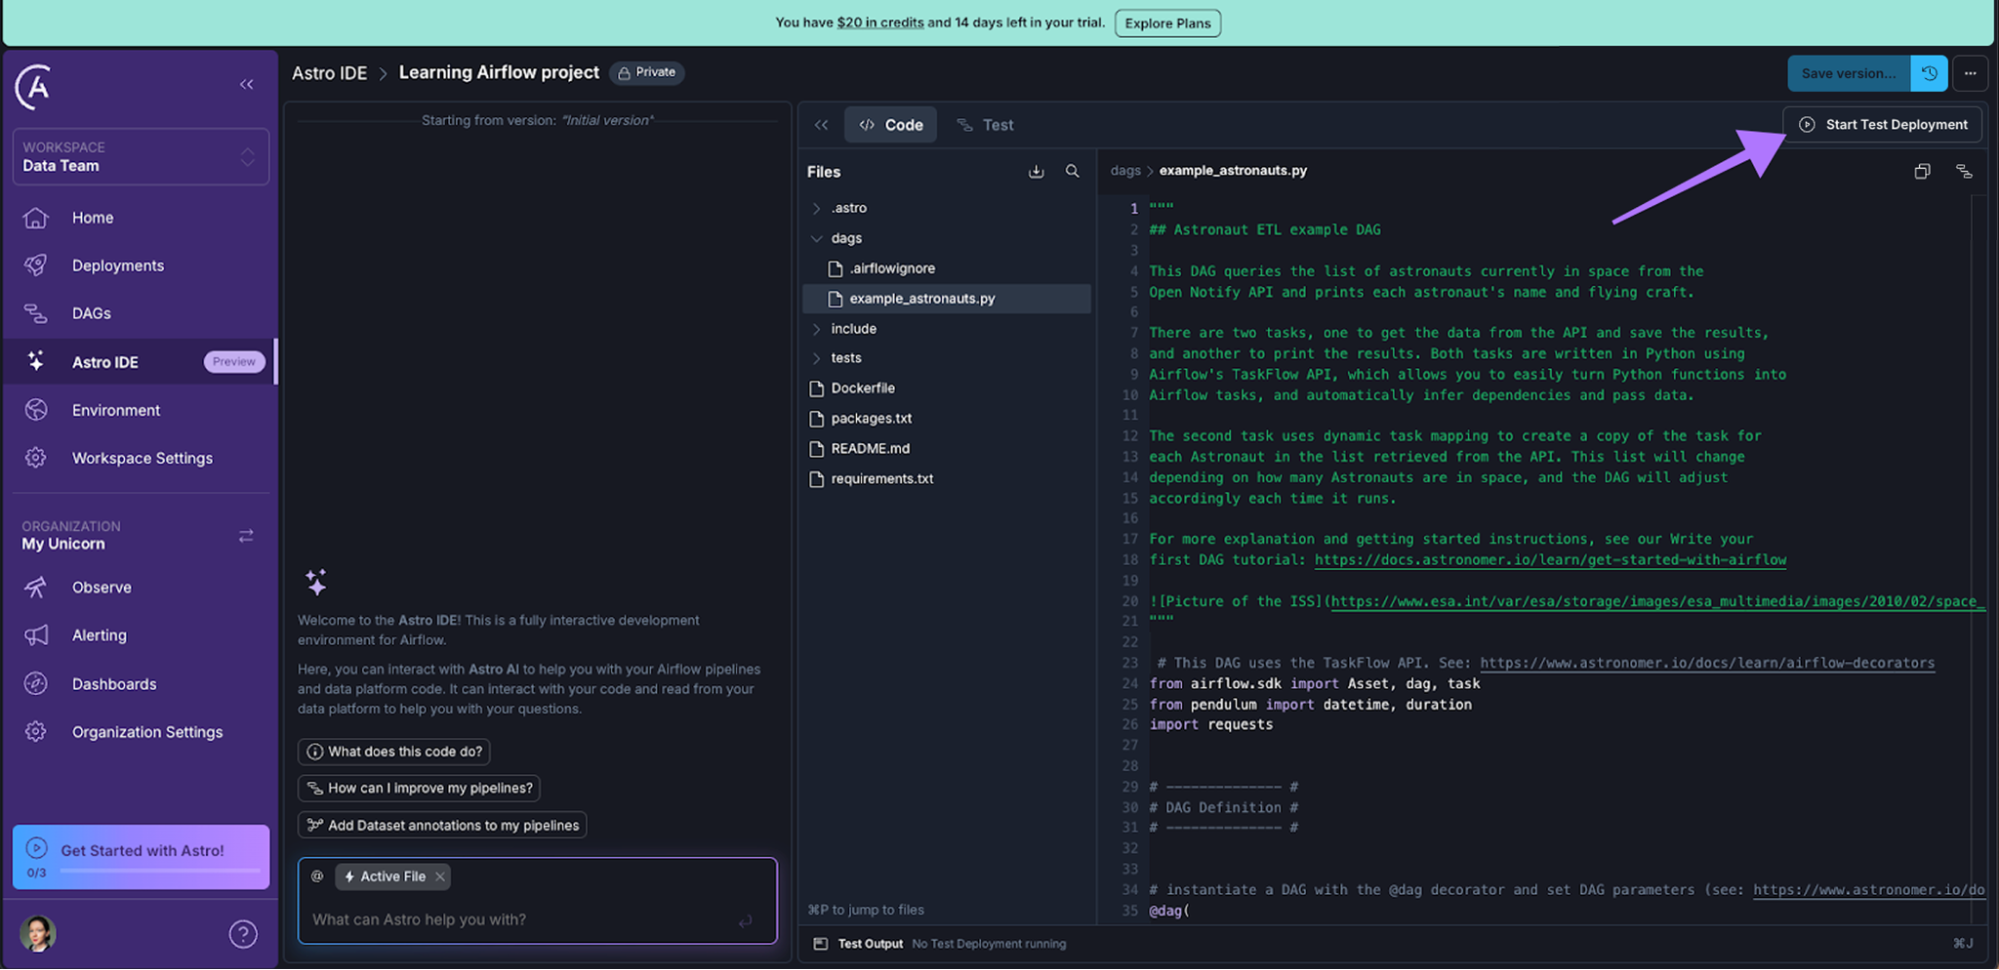 Figure 7: The location of the Start Test Deployment button in the top right corner of the Astro IDE.
Step 3: Run your Dag in the Airflow UI
After 2-3 minutes your Deployment is ready and you can open the Airflow UI you are familiar with by clicking on the Open Airflow option in the Dropdown Menu beside Sync to Test (Figure 8).
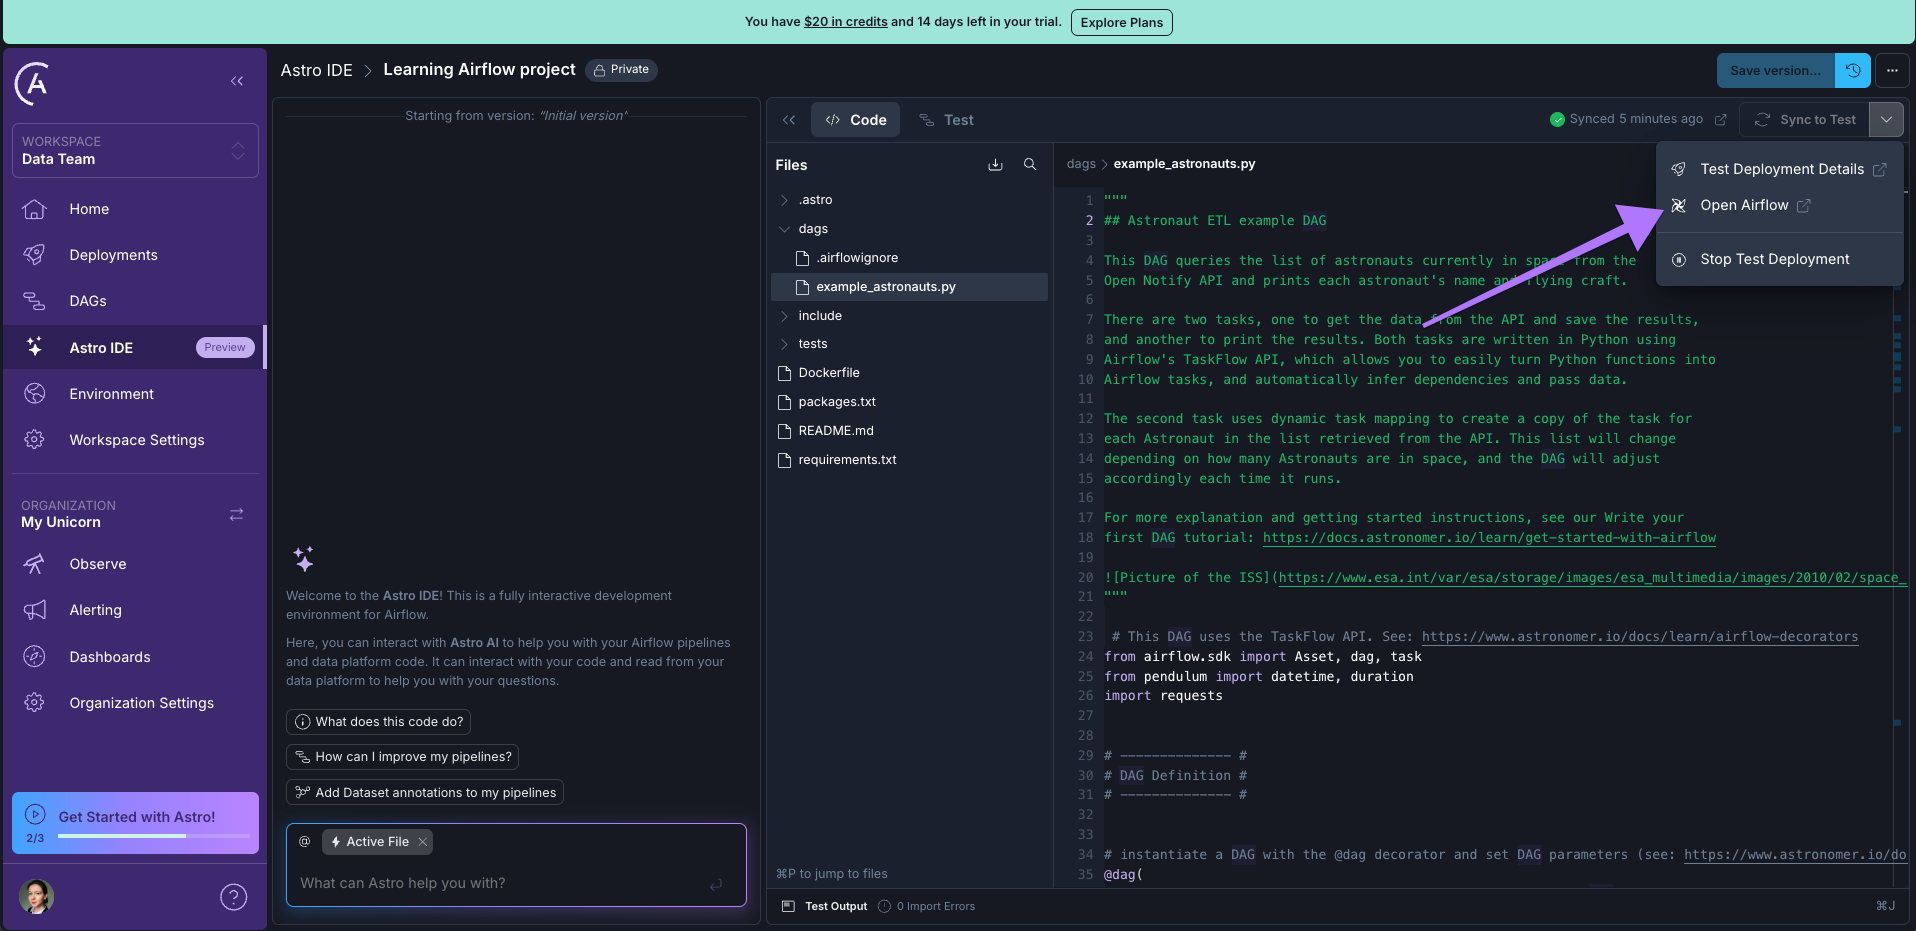 Figure 8: The dropdown menu in the top right corner next to Sync to Test includes a link to the Airflow UI.
There you are in the Airflow 3 UI! Click on the Dags button in the sidebar on the left to open your list of Dags (Figure 9).
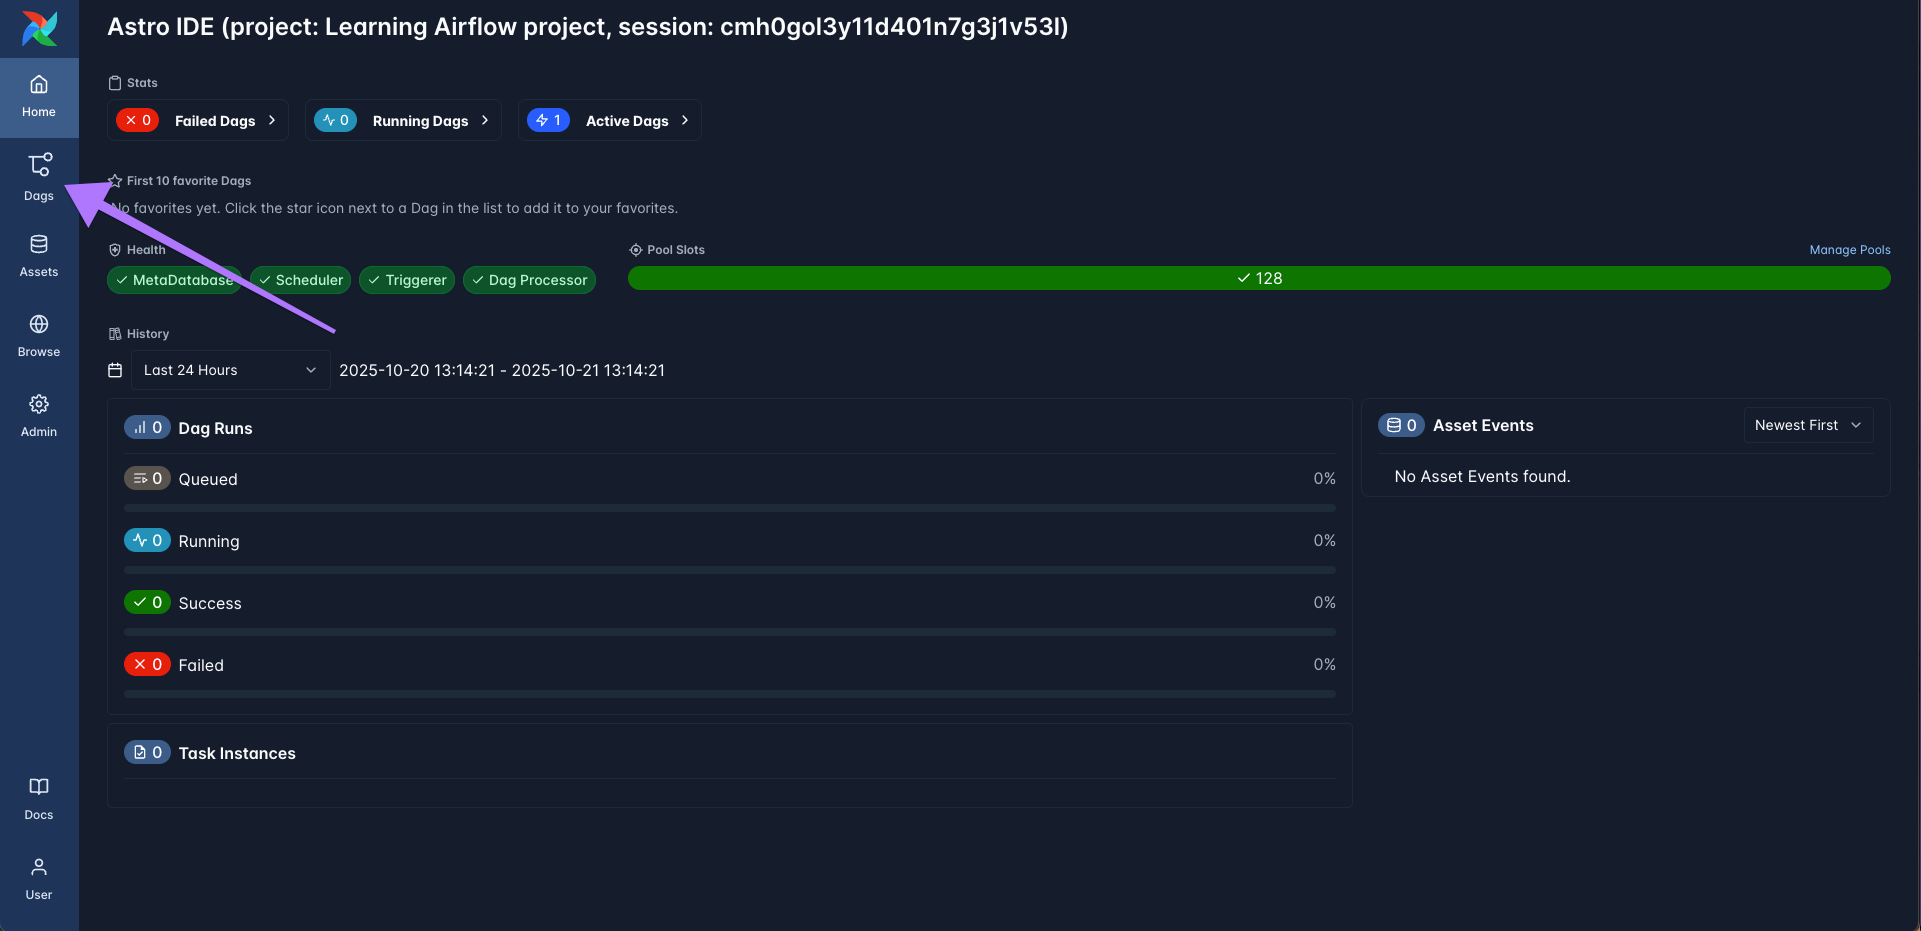 Figure 9: The Airflow 3.1 UI Home view showing how to navigate to the Dags view that lists all Dags in the Deployment.
You can see the example_astronaut Dag from the template project, it is ready to be run! Click on the Play button at the right of the screen (Figure 10) and then on Trigger (Figure 11) to start the Dag run!
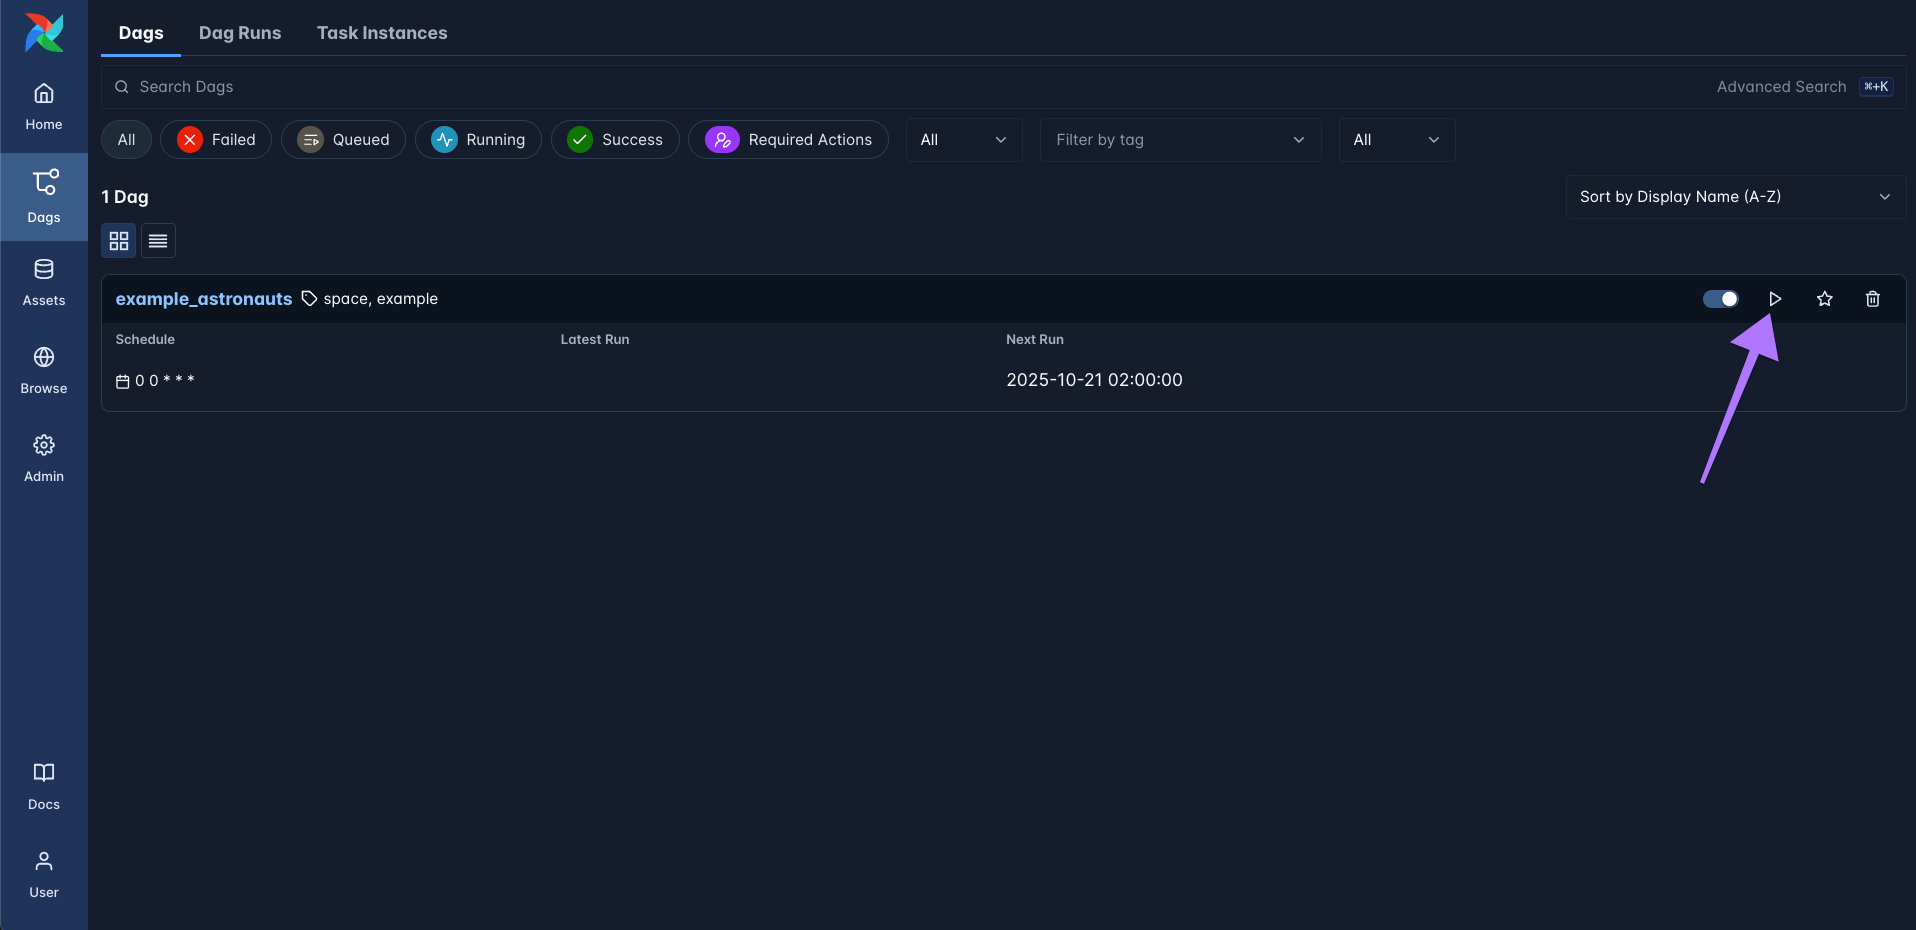 Figure 10: The Dags view showing the one Dag in the template project called
 example_astronauts. At the right of the Dag entry there is a play button which opens the Trigger Dag dialog.
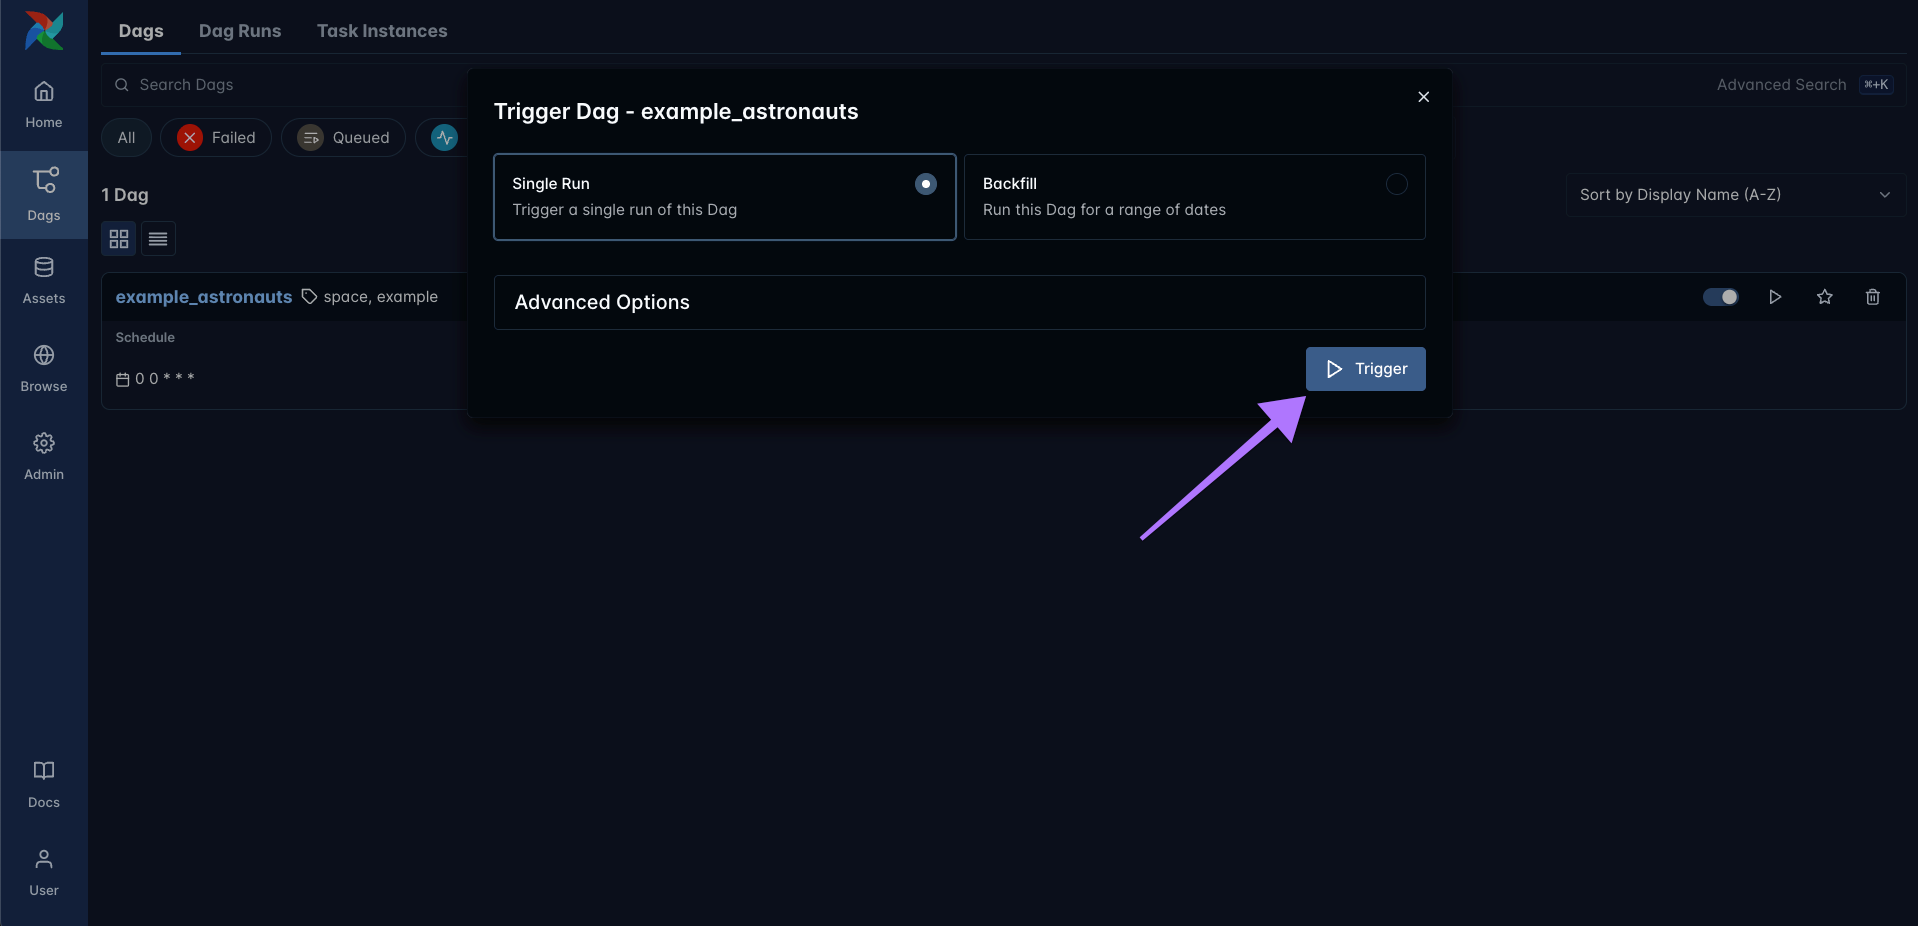 Figure 11: The trigger Dag dialogue. Click the Trigger button to start a new Dag run.
Step 4: Check out the Dag graph and task logs
As soon as the Dag has finished successfully you will see one green bar to the right and an entry in the Last Run column (Figure 12). You did it, you ran your first Airflow Dag! Don’t forget to stop your stopwatch and record your speed run time. :)
You can now relax and click on the Last Run timestamp (Figure 12) to explore more details about your Dag run.
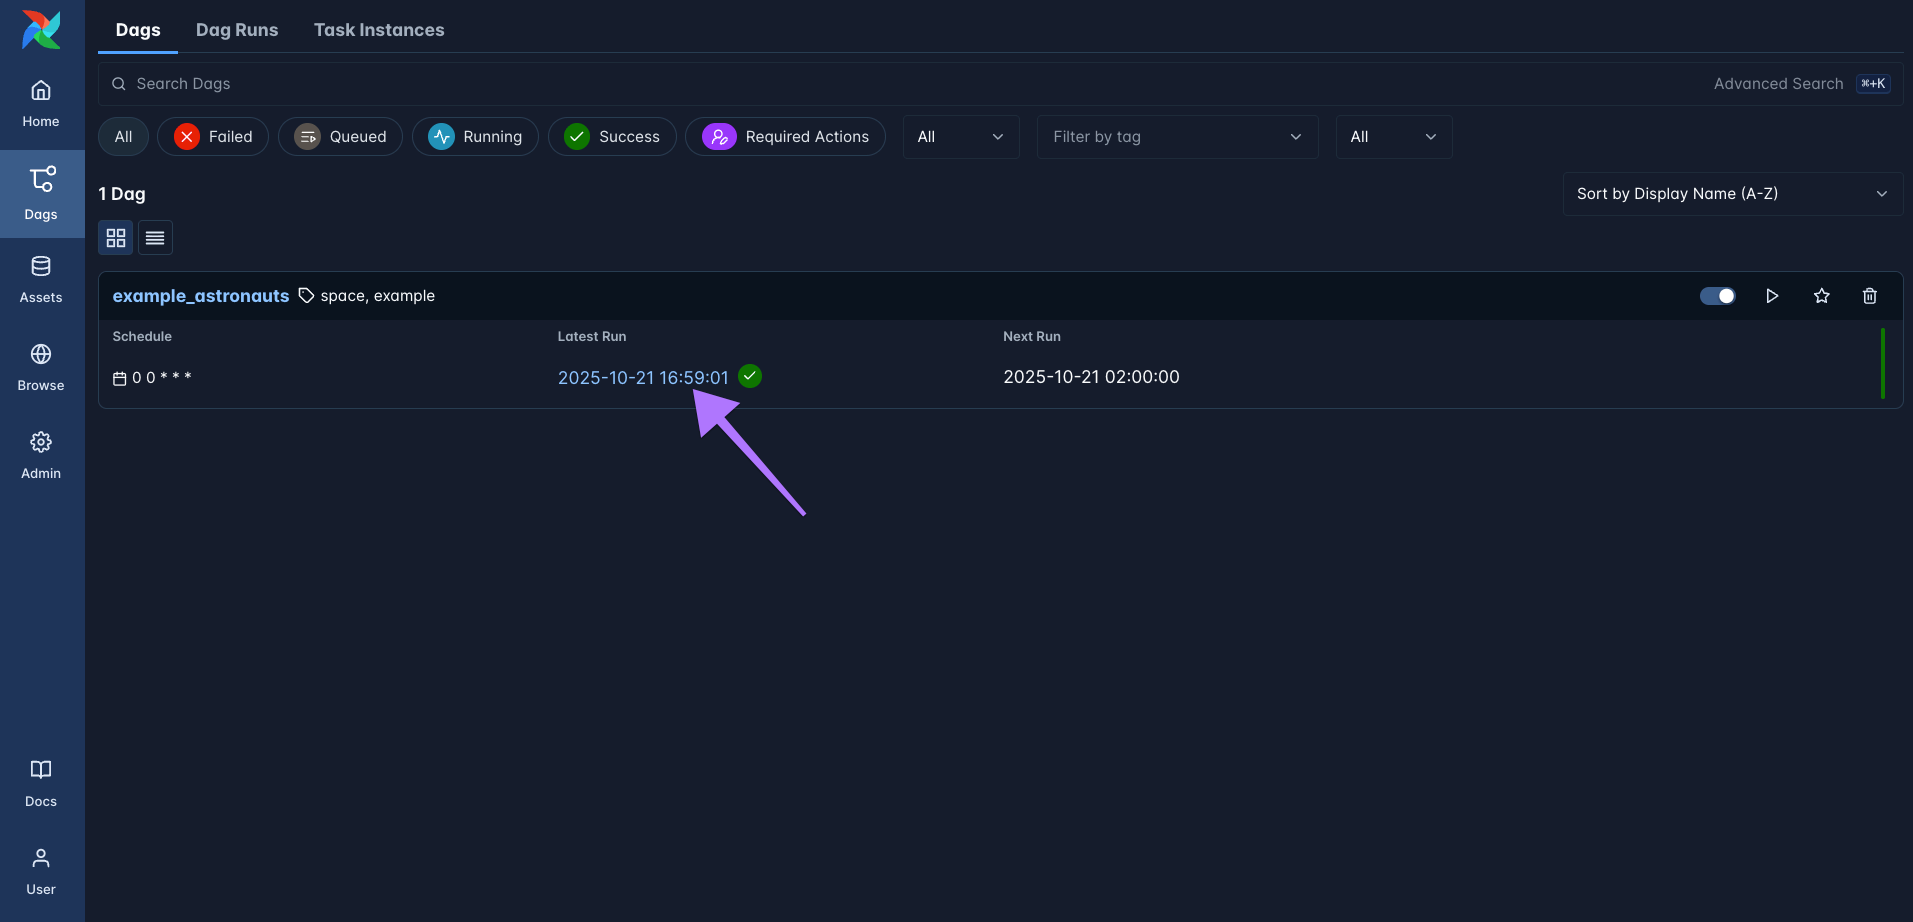 Figure 12: The Dags list after the
 example_astronauts Dag has had its first successful run. You can open more details about a Dag either by clicking on the Dag name or the Last Run timestamp (arrow).
The Dag run is opened in the grid view first, where each bar represents a Dag run and each (hopefully) green square represents a task instance, meaning one run of a task in this specific Dag run. You switch between grid and graph view using the toggle in the top left corner (or by pressing g on your keyboard) and navigate to the logs of a task instance by clicking their Task ID in the list on the right (Figure 13).
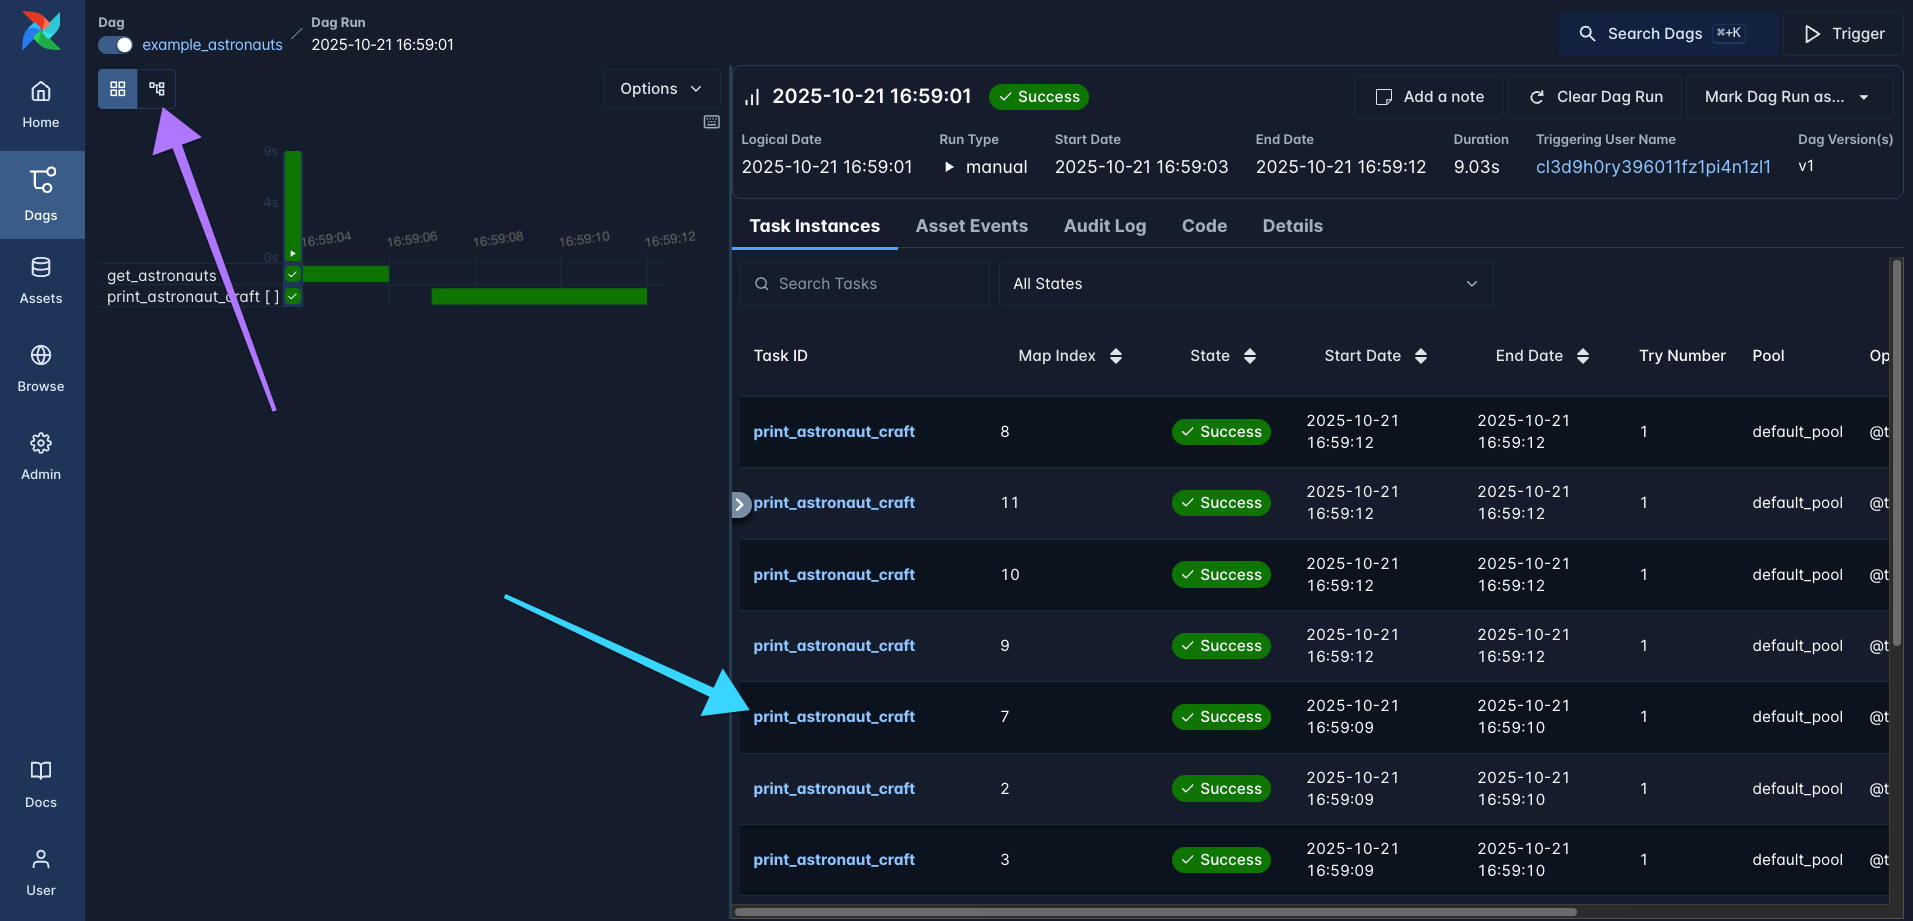 Figure 13: The grid view of the
 example_astronauts Dag with the successful Dag run selected. You can toggle between grid and graph view in the top left corner (violet arrow) and open the logs of individual task instances by clicking their Task ID in the Task Instances list on the right (cyan arrow).
Selecting one of the instances of the print_astronaut_craft tasks I learn about one astronaut who is currently in space, Butch Wilmore (Figure 14)!
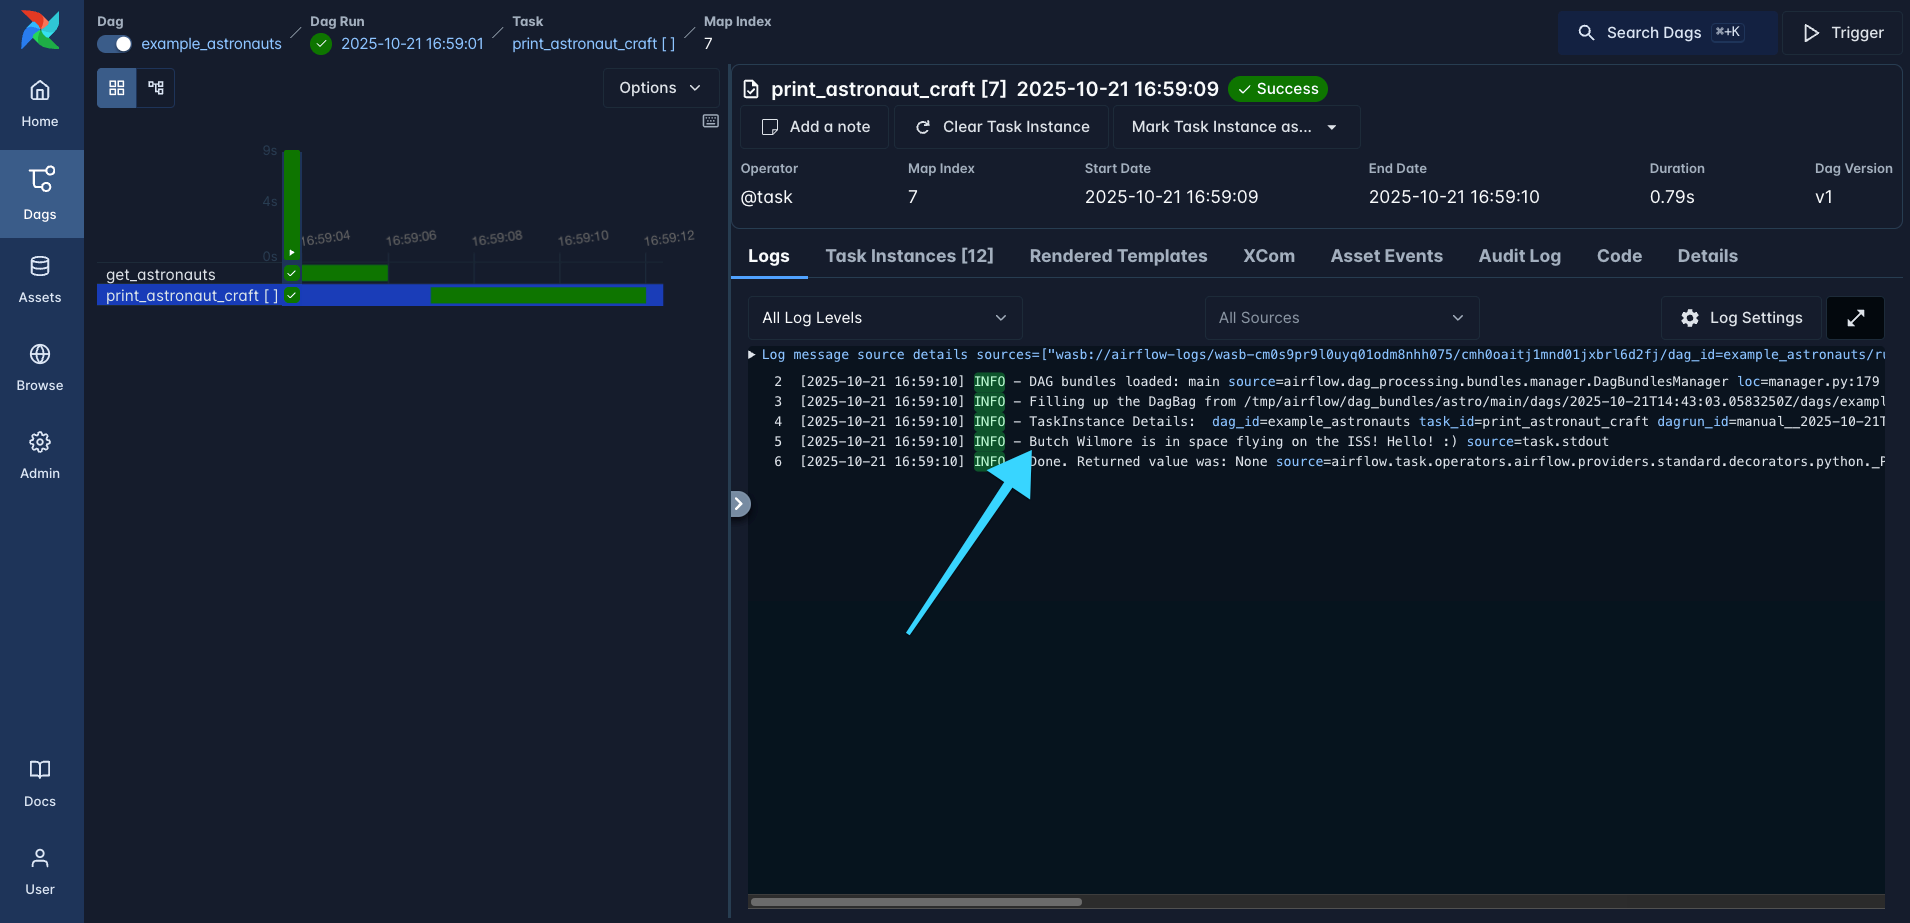 Figure 14: The logs of one of the
 print_astronaut_craft tasks showing that Butch Wilmore is on the ISS right now.
Next Steps
Now that you’ve learned how to run your first Dag you can go back to the Astro IDE and either make changes to the existing example Dag or add your very own (with or without the help of our Airflow-specialized AI).
To sync your change to the Test Deployment simply click on the Sync to Test button, your Dags will automatically be deployed to your Test Deployment.
As for what you can do with Airflow? Well, pretty much anything you can imagine, using the @task decorator as shown in the example Dag enables you to turn any Python function into an Airflow task.
If you’d like to learn more about different Airflow features check out the following resources:
- The Astro IDE documentation diving deeper into Astro IDE features including how to deploy your code to a permanent Astro Deployment to run in production.
- Guides and tutorials on individual Airflow features.
- Video courses with full learning paths and the opportunity to get Airflow certified.
And if you haven’t yet, sign up now for a free trial of Astro to (speed)run your own Dags!

Get started free.
OR
By proceeding you agree to our Privacy Policy, our Website Terms and to receive emails from Astronomer.