Manage Workspaces and Deployments on Astro Private Cloud
A Workspace is the highest level of organization in Astro Private Cloud. From a Workspace, you can manage a collection of Clusters (which function as data planes).
With the separated control plane (CP)/data plane (DP) architecture in Astro Private Cloud:
- The CP hosts the Astro Private Cloud UI, API, and global services.
- A Cluster represents a DP and is where Airflow Deployments are created and run.
- Each Workspace can span multiple Clusters, giving admins the flexibility to organize Deployments across environments such as dev, staging, and production.
If you’re not a member of any Workspaces, you’ll be prompted to create one the first time you sign in to the Astro Private Cloud UI. If you already have access to at least one Workspace, you can create a new one at any time using the New Workspace button in the sidebar.
This page covers creating and managing Workspaces as a Workspace Admin. It’s organized by the four tabs available from a Workspace’s menu in the Astro Private Cloud UI:
- Workspace Settings > General
- Workspace Settings > Users
- Workspace Settings > Teams
- Workspace Settings > Service Accounts
Deployments
The most important function of Workspaces is to create and manage access to one or more Clusters and their associated Airflow Deployments.
An Airflow Deployment is an instance of Apache Airflow running within a Cluster (data plane). Each Deployment includes a scheduler, webserver, and one or more workers if you’re running the Celery Executor or Kubernetes executor.
To create a new Deployment, go to the Deployments tab in your Workspace and select New Deployment. You can also create Deployments using the Astro CLI as described in the CLI Quickstart.
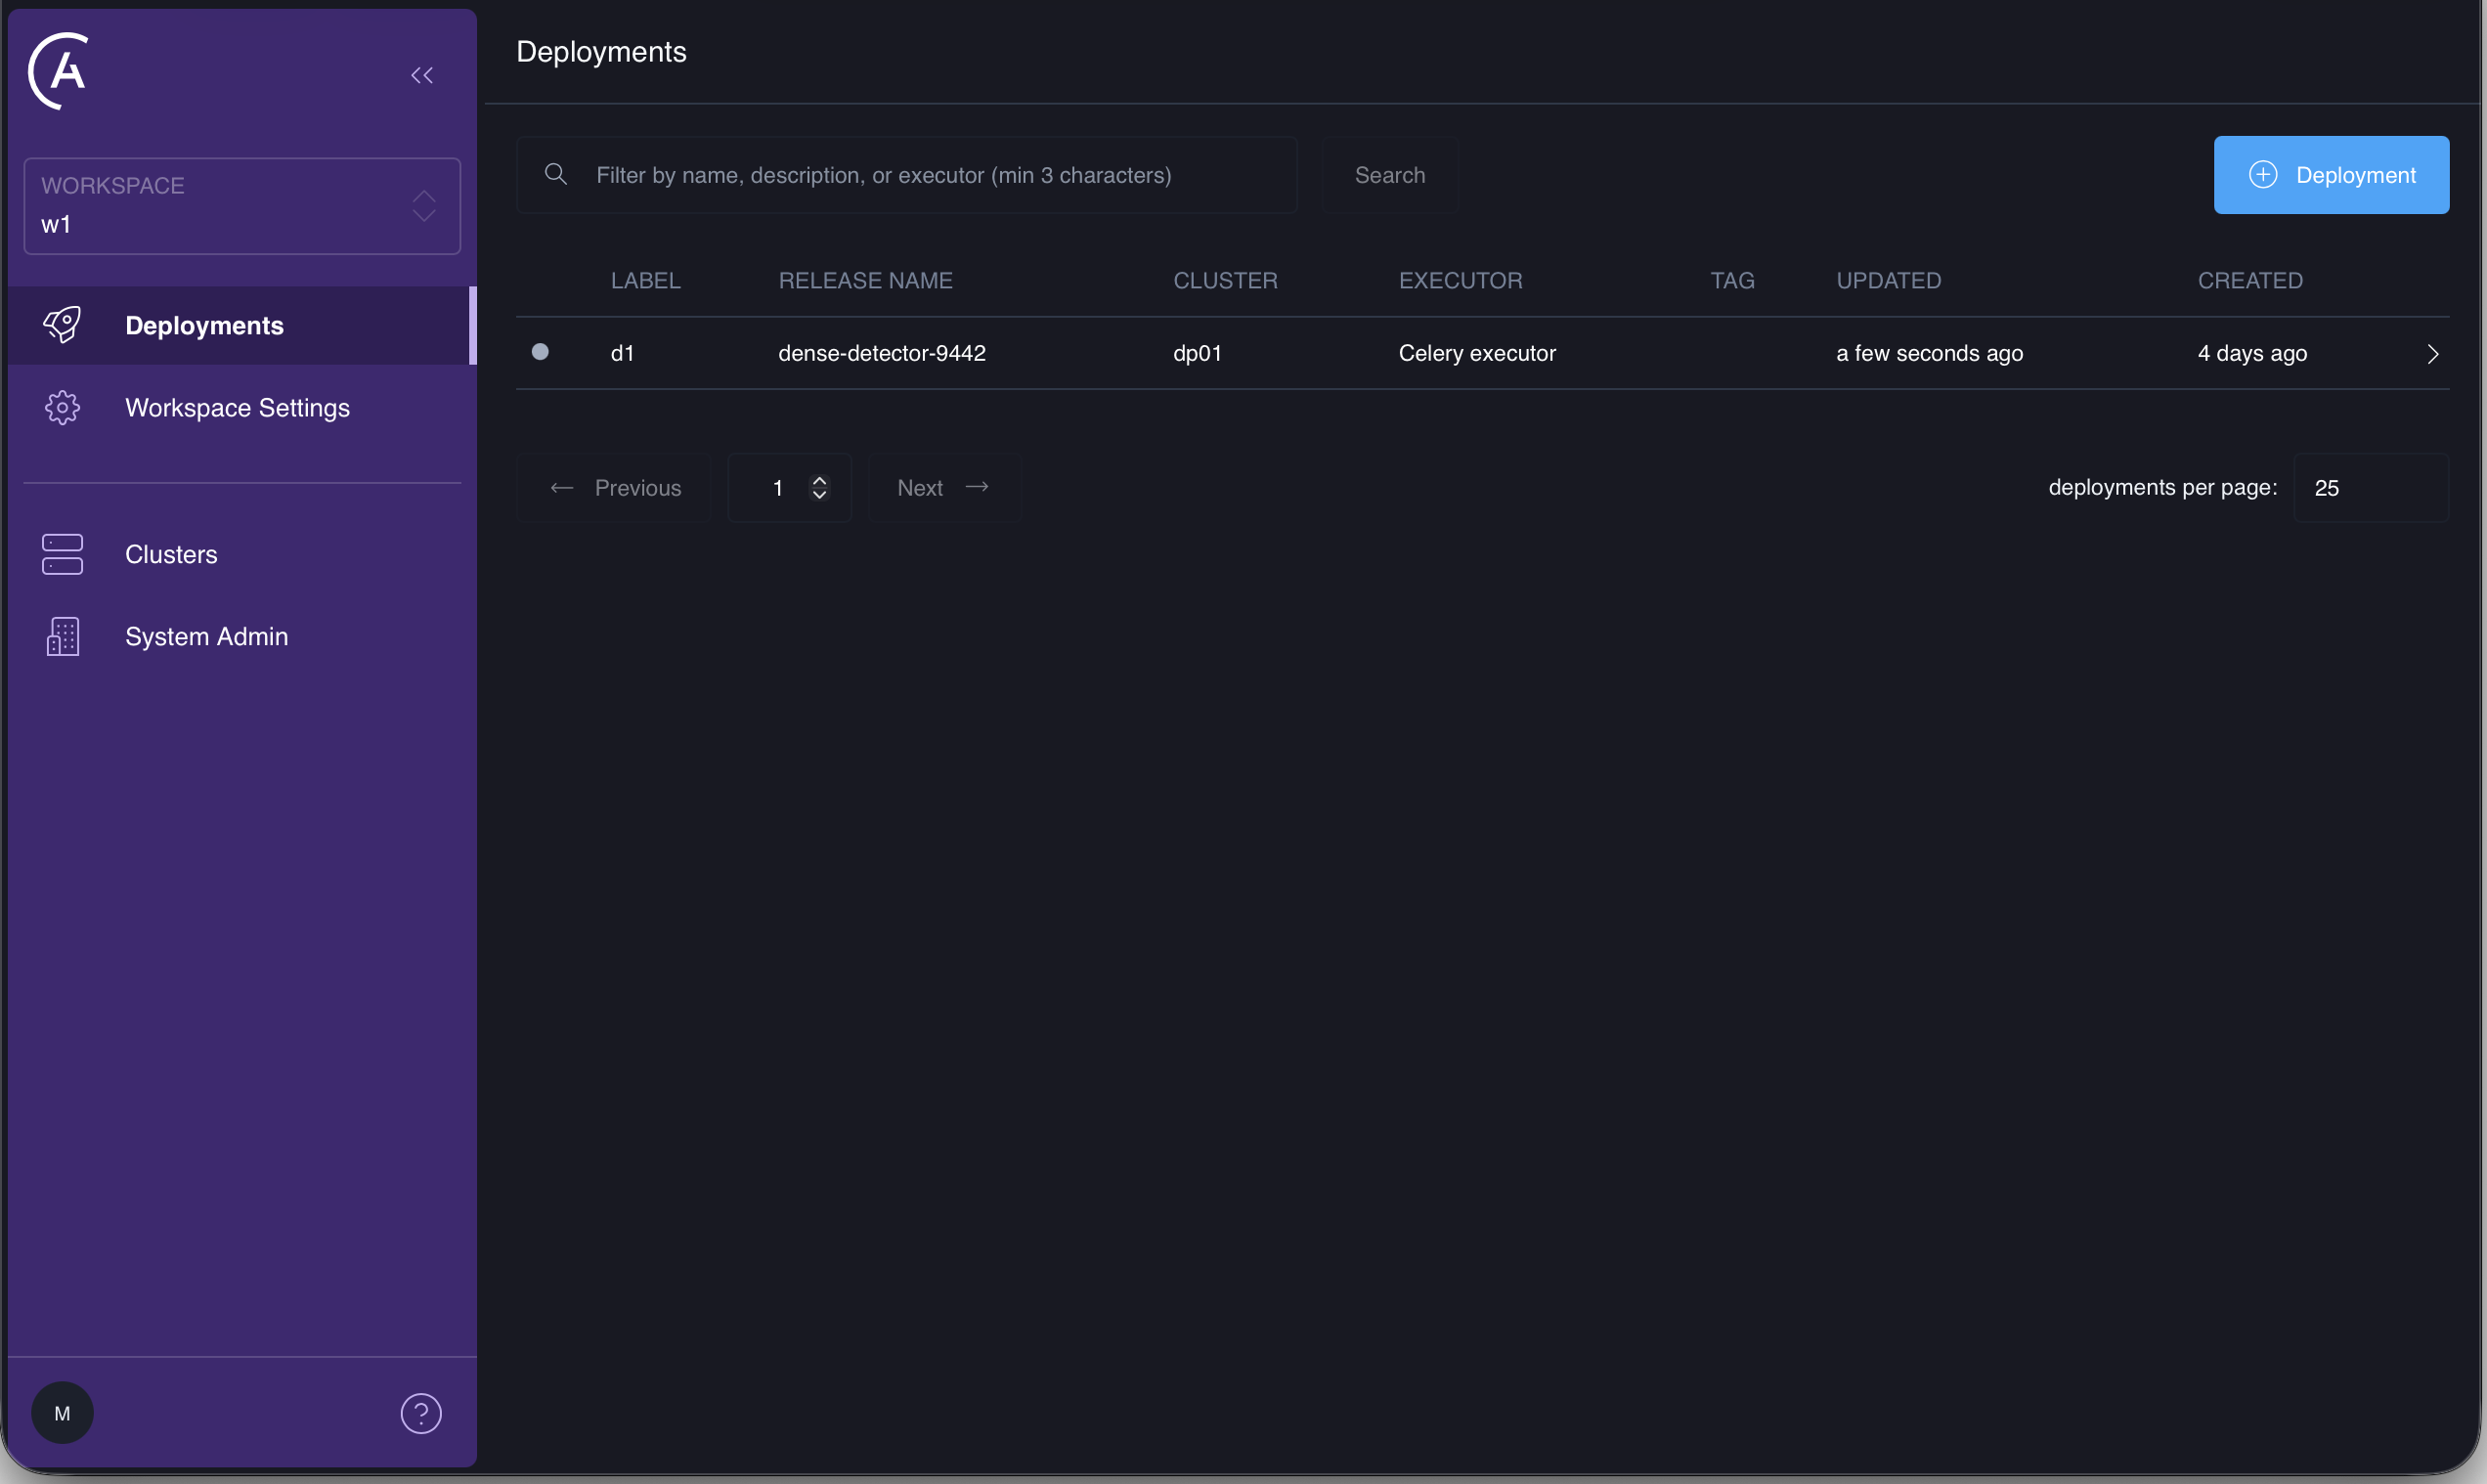
You can’t use or share Deployments across Workspaces. You can push local Dags and code to any Deployment at any time, but there is no way to move an existing Airflow Deployment from one Workspace to another once created.
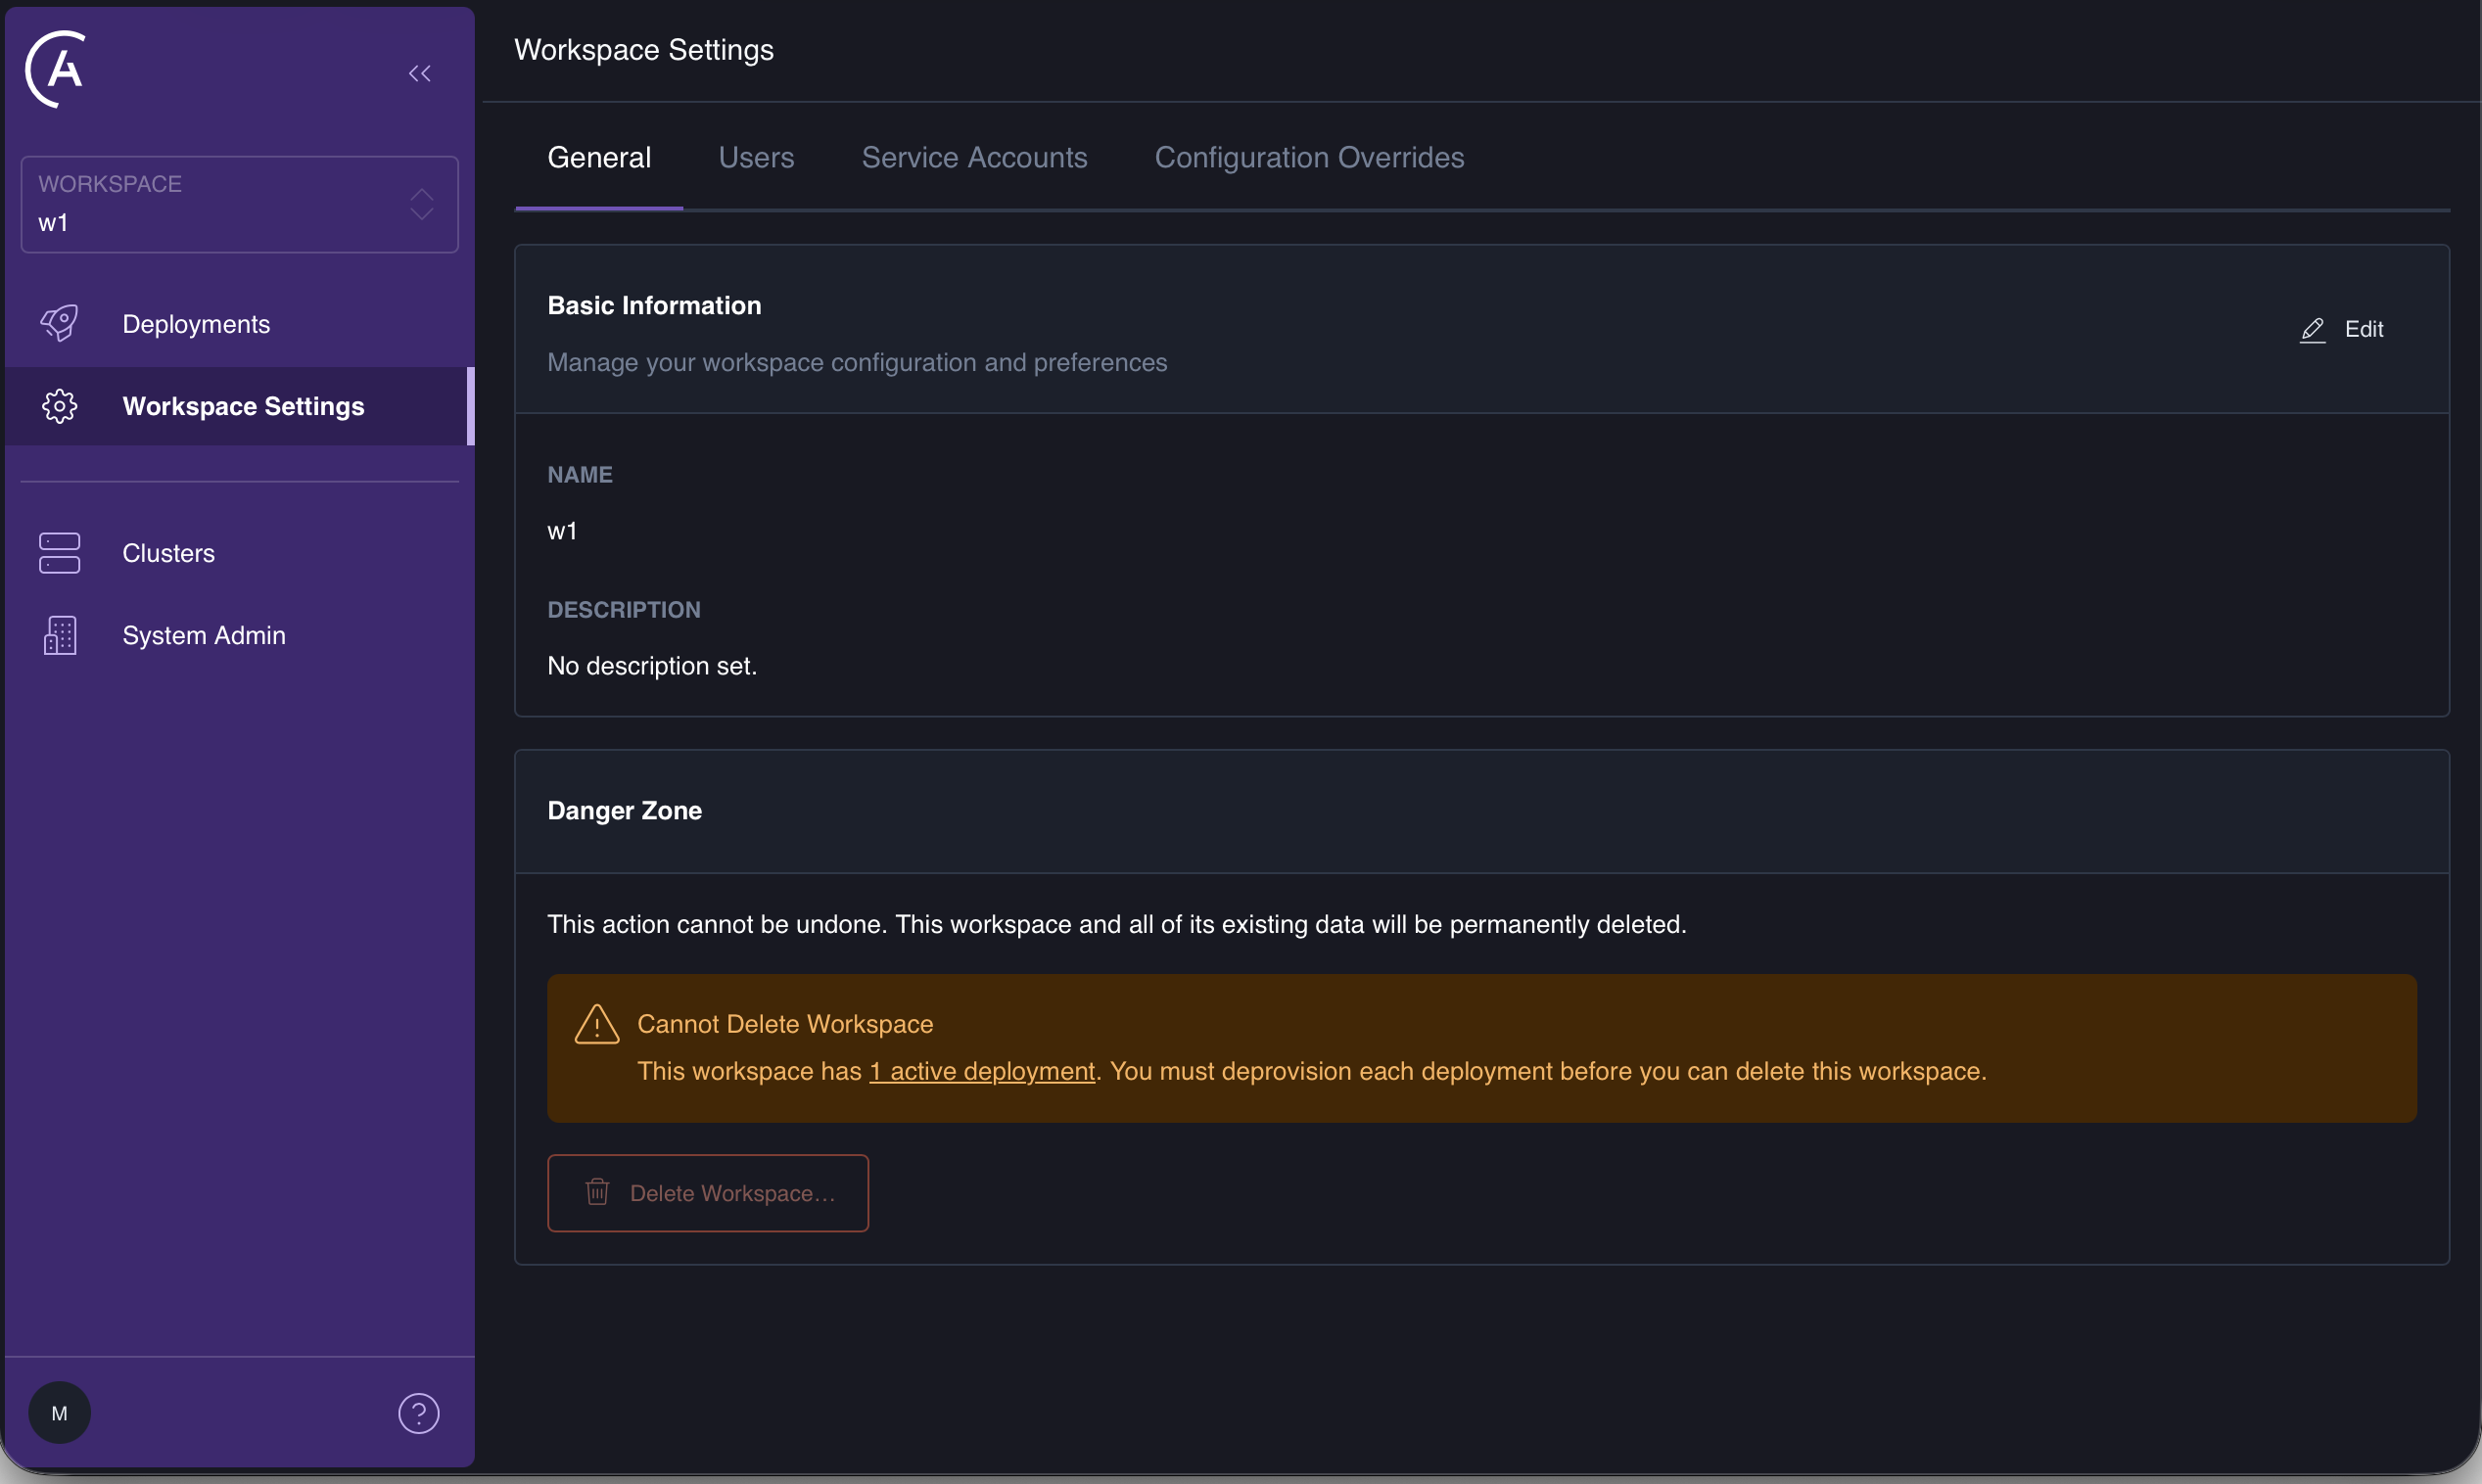
Settings
You can rename your Workspace or update its description in the Workspace Settings tab. While these fields have no effect on how tasks are executed, Astronomer recommends configuring them to give users an idea of the Workspace’s purpose and scope.
Users
You can see who has access to the Workspace in the Users tab of the Workspace Settings.
If you want to share access to other members of your organization, invite them to a Workspace you’re a part of. Once your team members are part of your Workspace, Deployment Admins can grant them varying levels of access to Airflow Deployments within the Workspace. Likewise, Workspace Admins can grant them varying levels of access to the entire Workspace.
For a full breakdown of user roles and permissions, see Astro Private Cloud user role and permission reference.
In addition, Astro Private Cloud system admins can add or remove specific permissions for each type of user role. For more information on this feature, read Customize Permissions.
Teams
Use the Teams tab in Workspace Settings to manage group-based access controls. Teams allow you to assign permissions to groups of users.
The Teams tab displays a list of all teams with access to the Workspace, including their provider, description, and Workspace role. You can search for teams within the Workspace using the search bar.
To add a team to the Workspace, select the + Team button. In the Add Team to Workspace panel, search for and select an existing team. Assign the appropriate Workspace role, Viewer, Editor, or Admin, to define the team’s access level. Optionally, assign Deployment-level roles for individual Airflow Deployments by selecting Deployments and choosing the required role for each.
You can also apply Deployment roles in bulk by using the Select All option and applying the desired role to multiple Deployments simultaneously.
Service accounts
Use the Service Accounts tab of the Workspace Settings to create a Workspace-level service account. Service accounts generate a permanent API key that you can use to automate any action at the Workspace level, such as deploying to your Workspace’s Airflow Deployments using a CI/CD tool of your choice.
To automate actions at the Deployment level, create a Deployment service account. For more information on this feature, read Deploy via CI/CD.