Execute a Jupyter notebook with Airflow
Info
This page has not yet been updated for Airflow 3. The concepts shown are relevant, but some code may need to be updated. If you run any examples, take care to update import statements and watch for any other breaking changes.
Jupyter notebooks are a popular open source notebook tool for quickly developing code and presenting data visualizations. They are frequently used in exploratory data analysis, data science, analytics, and reporting. This tutorial demonstrates how to run a Jupyter notebook from Airflow using the Papermill provider package. The PapermillOperator contained in this package executes a notebook as an Airflow task.
After you complete this tutorial, you’ll be able to:
- Add a Jupyter notebook to your Astro CLI project.
- Run your Jupyter notebook from an Airflow DAG.
- Pass parameters to your Jupyter notebook from Airflow.
- Understand what use cases are ideal for orchestrating Jupyter notebooks with Airflow.
Time to complete
This tutorial takes approximately 30 minutes to complete.
Assumed knowledge
To get the most out of this guide, you should have an understanding of:
- Airflow operators. See Operators 101.
- Creating Jupyter notebooks. See Try Jupyter.
Prerequisites
To complete this tutorial, you need:
- The Astro CLI.
- The Jupyter Notebook package.
Step 1: Create an Astro project and a Jupyter notebook
To run a DAG that executes a Jupyter notebook, you first need to create an Astro project, which contains the set of files necessary to run Airflow locally.
-
Create a new directory for your Astro project:
-
Open the directory:
-
Run the following Astro CLI command to initialize an Astro project in the directory:
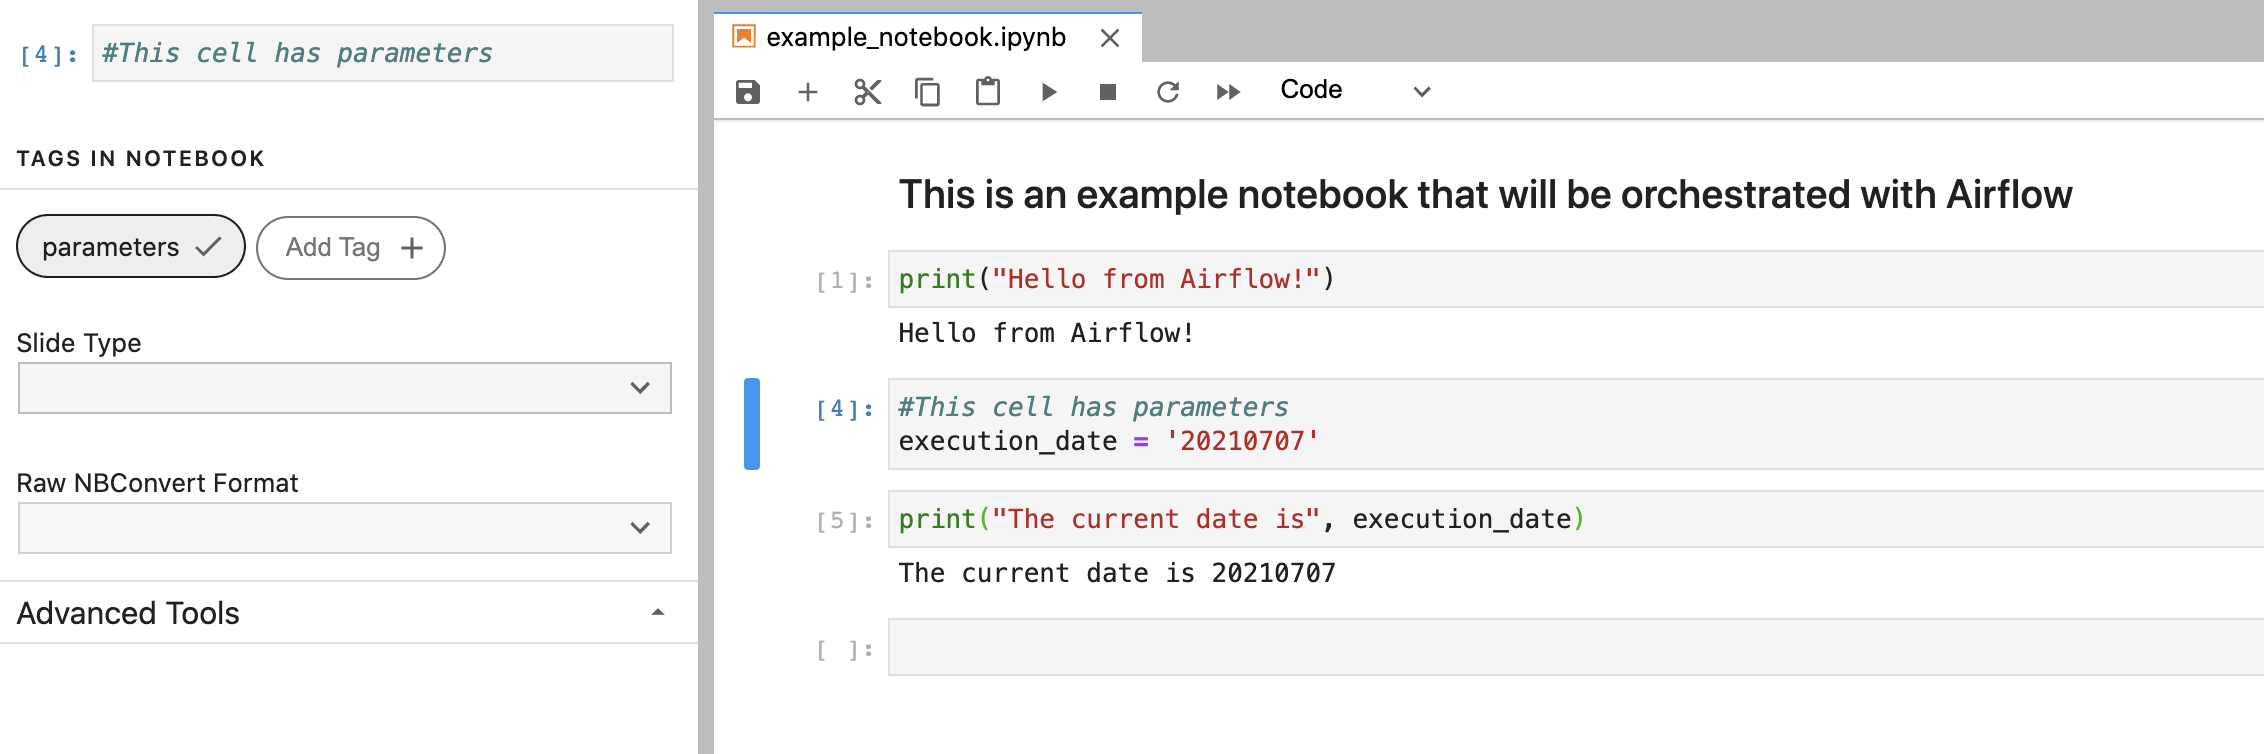
Next, create a Jupyter notebook called example_notebook.ipynb and save it to the include/ directory of the Astro project you created.
Step 2: Parameterize your Jupyter notebook (optional)
Parameterize any cells in your notebook as needed. If you need to pass any information to your notebook at run time, tag the cell in your notebook as described in the Papermill usage documentation.
The following notebook prints a simple statement with the current date. The second cell is parameterized so that the execution_date is dynamic.
Step 3: Install supporting packages
Install the Papermill provider and supporting packages required to run the notebook kernel.
Add the following to the requirements.txt file of your Astro project:
The PapermillOperator is designed to run a notebook locally, so you need to supply a kernel engine for your Airflow environment to execute the notebook code. This tutorial uses the ipykernel package to run the kernel, but there are other options available such as the jupyter package.
Step 4: Create your DAG
Create your DAG with the PapermillOperator to execute your notebook. Use your favorite code editor or text editor to copy-paste the following code into a .py file in your project’s dags/ directory:
The PapermillOperator requires the following arguments:
input_nb: The notebook you want to run.output_nb: The path to your output notebook (i.e. the notebook which shows the results of the notebook execution).parameters: A JSON dictionary of any parameters you are passing to your notebook.
Note that the built-in execution_date Airflow variable is used so that the DAG is idempotent. Parameters for your notebook can come from anywhere, but Astronomer recommends using Airflow macros and environment variables to avoid hard-coding values in your DAG file.
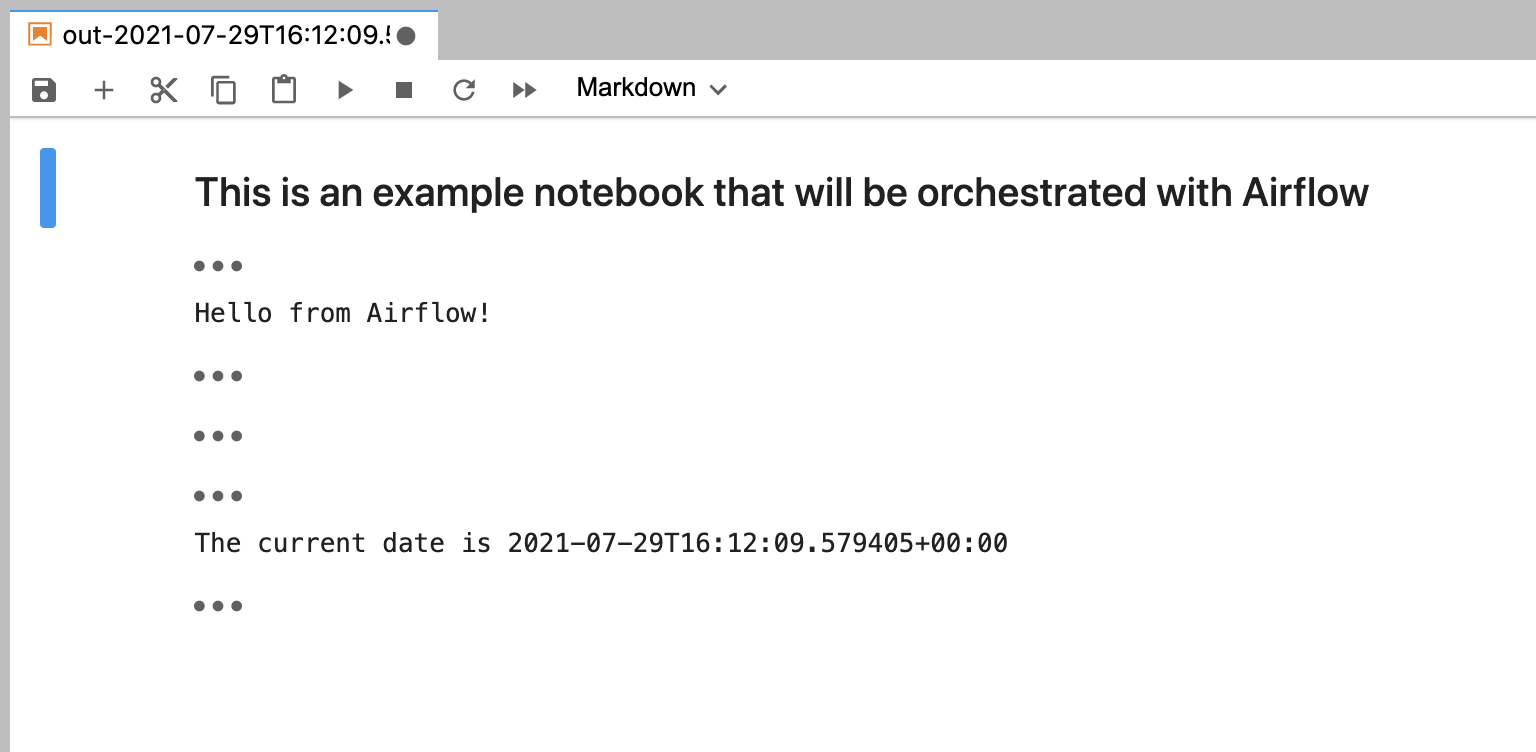
Step 5: Run your DAG to execute your notebook
Trigger your DAG to execute the example_notebook.ipynb and generate an output notebook with a name that includes the execution date. Open the output notebook in your include/ directory to see the results of the run:
Info
With some versions of
papermillyou might encounter a bug when writing grammar tables as described in this GitHub issue. The error would say something likeWriting failed: [Errno 2] No such file or directory: '/home/astro/.cache/black/21.7b0/tmpzpsclowd'. If this occurs, a workaround is to manually add that directory to your Airflow environment. If using an Astro project, you can addRUN mkdir -p /home/astro/.cache/black/21.7b0/to your project’sDockerfile.
Additional considerations
Running Jupyter notebooks from Airflow is a great way to accomplish many common data science and data analytics use cases like generating data visualizations, performing exploratory data analysis, and training small machine learning models.
However, there are several cases where this might not be the best approach:
- Because the Jupyter notebook runs within your Airflow environment, this method is not recommended for notebooks that process large data sets. For notebooks that are computationally intensive, Databricks or notebook instances from cloud providers like AWS or GCP may be more appropriate.
- Notebooks are run in their entirety during each DAG run and do not maintain state between runs. This means you will run every cell in your notebook on every DAG run. For this reason, if you have code that takes a long time to run (such as a large ML model), a better approach may be to break up the code into distinct Airflow tasks using other tools.