Integrate an auth system on Astronomer Software
Astronomer Software by default allows users to create an account with and authenticate using one of the 3 methods below:
- Google OAuth
- GitHub OAuth
- Local username/password
Authentication methods are entirely customizable. In addition to the 3 defaults above, we provide the option to integrate any provider that follows the Open Id Connect (OIDC) protocol. This includes (but is not limited to):
The doc below will walk through how to both enable local authentication and configure any OIDC provider, including step-by-step instructions for the 3 providers listed above.
The following setups assume that you are using Astronomer's default implicit flow as your authorization flow. To implement a custom authorization flow, read Configure a Custom OAuth Flow.
Local auth
To let users authenticate to Astronomer with a local username and password", follow the steps below."
- Enable Local Auth in your
config.yamlfile:
astronomer:
  houston:
    config:
      auth:
        local:
          enabled: true
- Push the configuration change to your platform as described in Apply a config change.
General OIDC configuration
If you'd like to integrate an OIDC provider with Astronomer Software, you can enable that configuration in the config.yaml file of your astronomer directory.
Example:
astronomer:
  houston:
    config:
      auth:
        openidConnect:
          clockTolerance: 0 # A field that can optionally be set to adjust for clock skew on the server.
          <provider-name>:
            enabled: true
            discoveryUrl: <provider-discovery-url> # Note this must be a URL that with an https:// prefix
            clientId: <provider-client-id>
            authUrlParams: # Additional required params set on case-by-case basis
Replace the values above with those of the provider of your choice. If you want to configure Microsoft Entra ID, Okta or Auth0 read below for specific guidelines.
AWS Cognito
Create a user pool in Cognito
Start by creating a user pool in Cognito. You can either review the default settings or step through them to customize.
Make sure that you create an App client, which is the OpenID client configuration that we will use to authenticate against. You do not need to generate a client secret, as Astronomer is a public client that uses implicit flow.
Once the pool and app client are created, head over to the App integration >App client settings tab and configure these settings:
- Select an identity provider to use (either the built-in cognito user pool or a federated identity provider).
- Set the callback URL parameter to
https://houston.BASEDOMAIN/v1/oauth/redirect/. - Enable
Implicit grantinAllowed OAuth Flows. Leave the other settings disabled. - Enable
email,openid, andprofileinAllowed OAuth Scopes.
Then switch over to the Domain name tab and select a unique domain name to use for your hosted Cognito components.
This should give you a minimally working user pool configuration.
Edit your Astronomer configuration
Add the following values to your config.yaml file in the astronomer/ directory:
astronomer:
  houston:
    config:
      auth:
        openidConnect:
          cognito:
            enabled: true
            clientId: <client_id>
            discoveryUrl: https://cognito-idp.<AWS-REGION>.amazonaws.com/<COGNITO-POOL-ID>/.well-known/openid-configuration
            authUrlParams:
              response_type: token
Your Cognito pool ID can be found in the General settings tab of the Cognito portal. Your client ID is found in the App clients tab.
Once you've saved your config.yaml file with these values, push it to your platform as described in Apply a config change.
Microsoft Entra ID
Register the Application using App Registrations on Azure
To start, register the application. As you do so, make sure to specify the Redirect URI as https://houston.BASEDOMAIN/v1/oauth/redirect/.
Replace BASEDOMAIN with your own. For example, if your basedomain were astronomer-development.com, your registration would look like the following:

Enable Access and ID Tokens
From there, head over to 'Authentication' to:
- Make sure that Access Tokens and ID tokens are enabled
- Verify the Redirect URI
Example:

Enable Microsoft Entra ID in your config.yaml file
Make sure the config.yaml file in your astronomer directory is updated with the proper values:
astronomer:
  houston:
    config:
      auth:
        openidConnect:
          google:
            enabled: false
          microsoft:
            enabled: true
            clientId: <client_id>
            discoveryUrl: https://login.microsoftonline.com/<tenant-id>/v2.0/
        github:
          enabled: false
Then, push the configuration change to your platform as described in Apply a config change.
Okta
To integrate Okta with Astronomer, you'll need to make configuration changes both within Okta and on Astronomer.
Follow the steps below.
Okta configuration
-
If you haven't already, create an Okta account.
-
In your Okta account, create a new web app for Astronomer.
-
In Okta, under General Settings > Application, set
Login redirect URIstohttps://houston.BASEDOMAIN/v1/oauth/redirect/, whereBASEDOMAINis the domain where you're hosting your Software installation. -
Under Allowed grant types, select
Implicit (Hybrid). -
Save the
Client IDgenerated for this Okta app for use in the next steps. -
To ensure that an Okta tile appears, set
Initiate Login URItohttps://houston.BASEDOMAIN/v1/oauth/start?provider=okta(Optional).
Enable Okta in your config.yaml file
Add the following to your config.yaml file in your astronomer directory:
astronomer:
  houston:
    config:
      auth:
        openidConnect:
          okta:
            enabled: true
            clientId: "<okta-client-id>"
            discoveryUrl: "https://<okta-base-domain>/.well-known/openid-configuration"
Then, push the configuration change to your platform as described in Apply a config change.
Note:
okta-base-domainwill be different from the basedomain of your Software installation. You can read Okta's docs on finding your domain if you are unsure what this value should be.
Auth0
Auth0 Configuration
Create an Auth0 account
You'll need an Auth0 account in order to set up connections with the identity management provider of your choice. Sign up for an Auth0 account if you need to.
Create Auth0 tenant domain
When you log into Auth0 you'll be prompted to create a tenant domain. You can use the default or your own unique tenant-name. Your full tenant domain will look something like astronomer.auth0.com.
Note: Your full tenant domain may differ if you've created it outside of the United States.
Create a connection between Auth0 and your identity management provider
Depending on the Identity Management Provider you'd like to use, the steps required to establish a connection will vary.
For instructions, navigate to Auth0's connection guides and select the identity provider of your choice. Once your connection is established, read below.
Configure Auth0 application settings
Enable / disable desired connections:
- Navigate to
https://manage.auth0.com/dashboard/us/<tenant-name>/applications. - Under
Applications, selectDefault App. - Click the
Connectionstab. You should see your connection created in Step 3 listed here. Enable your new connection, and disable any connections that you won't be using.
Edit the Default App settings:
- Navigate to
https://manage.auth0.com/dashboard/us/<tenant-name>/applications. - Under
Applications, selectDefault App. - Click the
Settingstab. - Under
Allowed Callback URLs, addhttps://houston.<your-astronomer-base-domain>/v1/oauth/redirect/. - Under
Allowed Logout URLs, addhttps://app.<your-astronomer-base-domain>/logout. - Under
Allowed Origins (CORS), addhttps://*.<your-astronomer-base-domain>.
Create Auth0 API:
- Navigate to
https://manage.auth0.com/dashboard/us/<tenant-name>/apis. - Click
+ Create API. - Under
Name, enterastronomer-ee. - Under
Identifier, enterastronomer-ee. - Leave the value under
Signing AlgorithmasRS256.
Enable Auth0 in your config.yaml file
Add the following to your config.yaml file in your astronomer directory:
astronomer:
  houston:
    config:
      auth:
        openidConnect:
          auth0:
            enabled: true
            clientId: "<default-app-client-id>"
            discoveryUrl: https://<tenant-name>.auth0.com
Then, push the configuration change to your platform as described in Apply a config change.
Note: You can find your
clientIDvalue athttps://manage.auth0.com/dashboard/us/<tenant-name>/applicationslisted next to 'Default App'.
Running behind an HTTPS proxy
Overview
Integrating an external identity provider with Astronomer requires that the platform's Houston API component is able to make outbound HTTPS requests to those identity providers in order to fetch discovery documents, sign keys, and ask for user profile information upon login/signup.
If your install is configured without a direct connection to the internet you will need to configure an HTTPS proxy server for Houston.
Configure an HTTPS proxy server for Houston
To configure the proxy server used we need to set the GLOBAL_AGENT_HTTPS_PROXY Environment Variable for the Houston deployment.
To do so, add the following to the Houston section of the config.yaml file in your astronomer directory:
astronomer:
  houston:
    config:
      auth:
        openidConnect:
          <provider>:
            enabled: true
            clientId: ...
            discoveryUrl: ...
    env:
      - name: GLOBAL_AGENT_HTTPS_PROXY
        value: http://my-proxy:3129
Then, push the configuration change to your platform as described in Apply a config change.
Configure a custom OAuth flow
Starting with Astronomer v0.27, you can set up a custom OAuth authorization flow as an alternative to Astronomer's default implicit flow. You can customize Astronomer's existing Okta, Google, and GitHub OAuth flows or import an entirely custom OAuth flow.
This setup must be completed only during a scheduled maintenance window. There should be no active users on your installation until the setup has been finalized.
Step 1: Configure your authorization flow on Astronomer
To use a custom Oauth authorization code flow:
-
In your
config.yamlfile, set theastronomer.houston.auth.openidConnect.flowvalue to"code":auth:
# Local database (user/pass) configuration.
local:
enabled: true
openidConnect:
# Valid values are "code" and "implicit"
flow: "code" -
Configure the section of your
config.yamlfile specific to your identity provider with each of the following values:enabled: Set this value totrueunder the section for your own identity provider.clientIdandclientSecret: Your Client ID and Client secretdiscoveryURL: Your base Discovery URLauthUrlParams: Additional parameters to append to your discovery URL. At a minimum, you must configureaudience. Refer to your identity provider's documentation for information on how to find this value (Auth0 maintains this information in their glossary, for example).
For example, a custom configuration of Okta might look like the following.
    okta:
      enabled: true
      clientId: ffhsdf78f734h2fsd
      clientSecret: FSDFSLDFJELLGJLSDFGJL42353425
      # URL works only when IdP group imports are disabled. To import IdP groups from Okta to Software,
      # use "https://<MYIdP>.okta.com/oauth2/default/.well-known/openid-configuration" instead
      discoveryUrl: "https://<MYIdP>.okta.com/.well-known/openid-configuration"
      authUrlParams:
audience: "GYHWEYHTHR443fFEW"- Push your configuration changes to your platform as described in Apply a config change.
You can also pass your auth configurations as environment variables in the Houston section of your config.yaml file. If you choose to configure your installation this way, set the following variables in the astronomer.houston.env list instead of setting values in astronomer.auth:
# Replace <idp-provider> with OKTA, AUTH0, or CUSTOM
AUTH__OPENID_CONNECT__<idp-provider>__ENABLED="true"
AUTH__OPENID_CONNECT__<idp-provider>__CLIENT_ID="<client-id>"
AUTH__OPENID_CONNECT__<idp-provider>__CLIENT_SECRET="<client-secret>"
AUTH__OPENID_CONNECT__<idp-provider>__DISCOVERY_URL="<discovery-url>
AUTH__OPENID_CONNECT__<idp-provider>__AUTH_URL_PARAMS__AUDIENCE="<audience>"
AUTH__OPENID_CONNECT__FLOW="implicit" # or "code"
AUTH__OPENID_CONNECT__<idp-provider>__BASE_DOMAIN="<base-domain>"
AUTH__OPENID_CONNECT__CUSTOM__DISPLAY_NAME="Custom OAuth" # Only used for custom flows
Step 2: Configure your identity provider
To finalize your configuration, configure the following key values in your identity provider's settings:
- Grant Code: Set to "Code" or "Auth Code" depending on your identity provider.
- Sign-in Redirect URI: Set to
https://houston.<BASE_DOMAIN>/v1/oauth/callback/. Be sure to include the trailing/.
Step 3: Confirm your installation
When you complete this setup, you should be able to see the differences in login flow when logging in at <BASE_DOMAIN>.astronomer.io.
If you configured a fully custom OAuth flow, you should see a new Log in with Custom Oauth button on the Astronomer login screen:
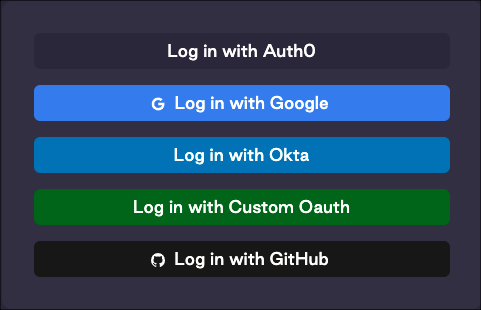
You can see the name you configured in AUTH__OPENID_CONNECT__CUSTOM__DISPLAY_NAME when authenticating using the Astro CLI.