> ## Documentation Index
> Fetch the complete documentation index at: https://astronomer.io/docs/llms.txt
> Use this file to discover all available pages before exploring further.
# Create DAG documentation in Apache Airflow
This page hasn't yet been updated for Airflow 3. The concepts shown are relevant, but some code may need to be updated. If you run any examples, take care to update import statements and watch for any other breaking changes.
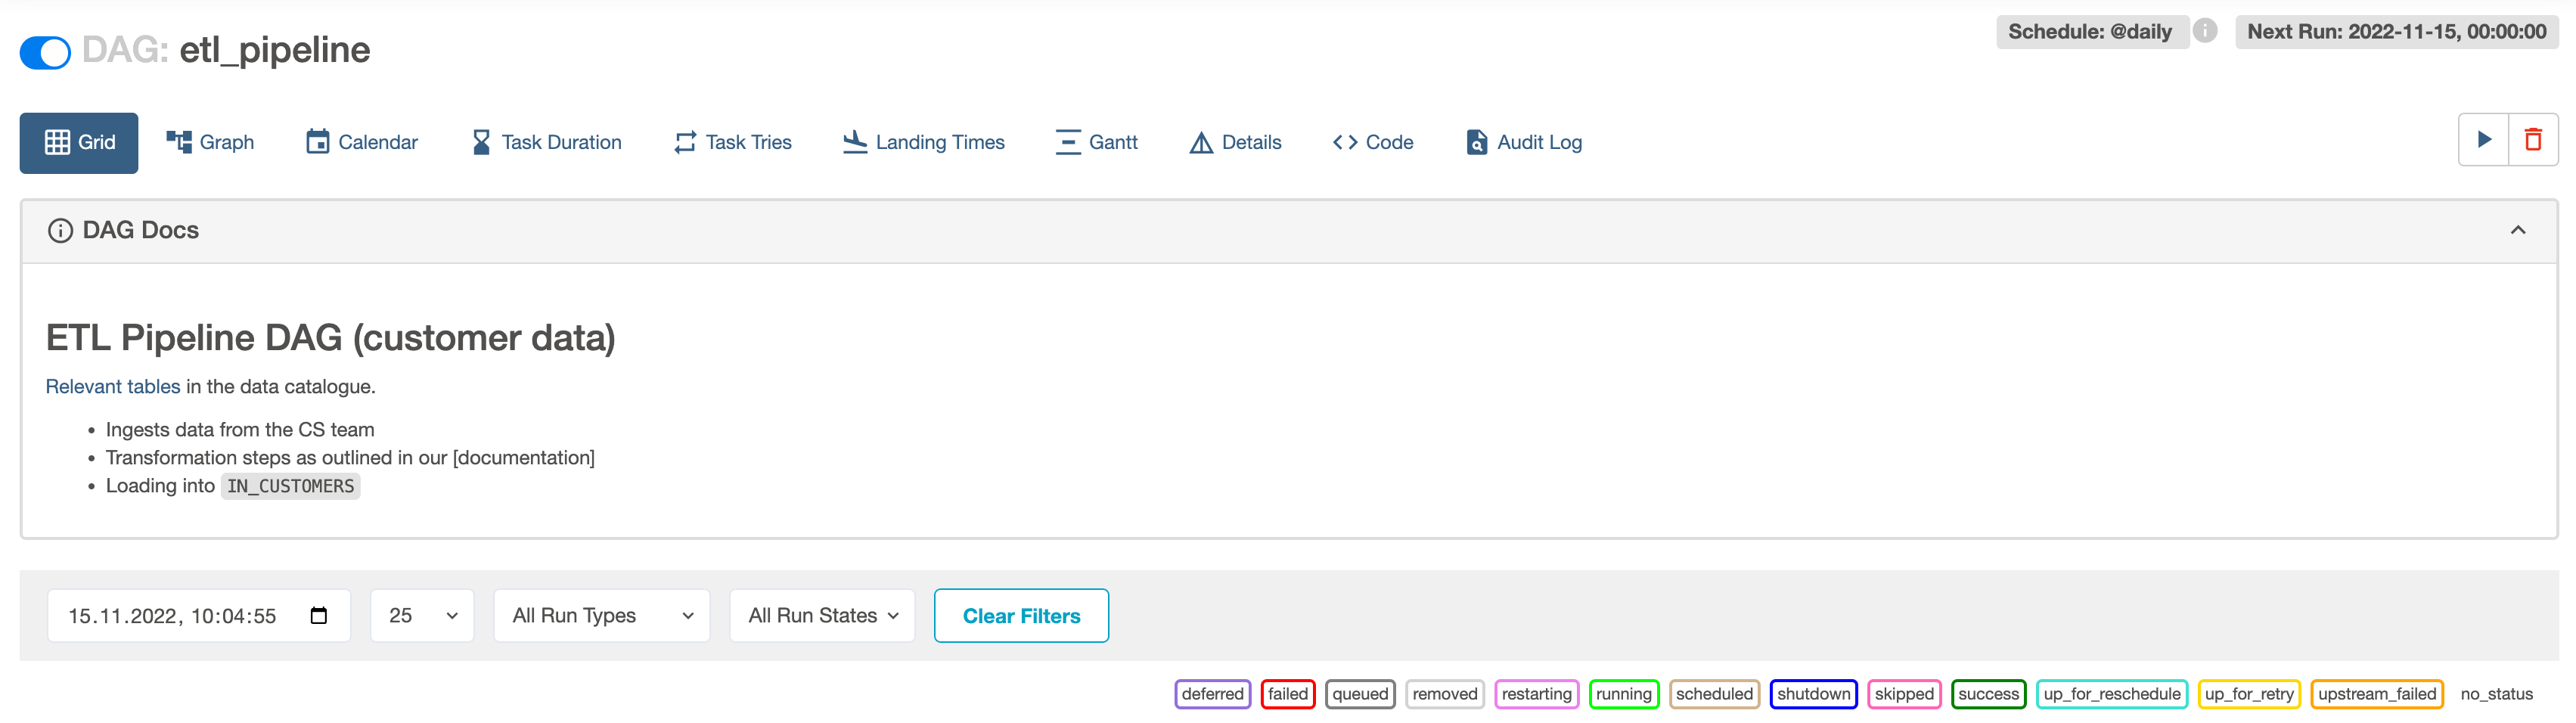
One of the more powerful and lesser-known features of Airflow is that you can create Markdown-based DAG documentation that appears in the Airflow UI
 After you complete this tutorial, you'll be able to:
* Add custom doc strings to an Airflow DAG.
* Add custom doc strings to an Airflow task.
## Time to complete
This tutorial takes approximately 15 minutes to complete.
## Assumed knowledge
* Basic Airflow concepts. See [Introduction to Apache Airflow](/docs/learn/intro-to-airflow).
* Basic Python. See the [Python Documentation](https://docs.python.org/3/tutorial/index.html).
## Prerequisites
* The [Astro CLI](/docs/cli/v1.43/install-cli).
## Step 1: Create an Astro project
To run Airflow locally, you first need to create an Astro project.
1. Create a new directory for your Astro project:
```sh wrap theme={null}
mkdir && cd
```
2. Run the following Astro CLI command to initialize an Astro project in the directory:
```sh wrap theme={null}
astro dev init
```
3. To enable raw HTML in your Markdown DAG descriptions, add the following Airflow config environment variable to your `.env` file. This will allow you to use HTML in your DAG descriptions. If you don't want to enable this setting due to security concerns you will still be able to use Markdown in your DAG descriptions and the HTML shown in this tutorial will be displayed as raw content.
```text wrap theme={null}
AIRFLOW__WEBSERVER__ALLOW_RAW_HTML_DESCRIPTIONS=True
```
4. Start your Airflow instance by running:
```sh wrap theme={null}
astro dev start
```
## Step 2: Create a new DAG
1. In your `dags` folder, create a file named `docs_example_dag.py`.
2. Copy and paste one of the following DAGs based on which coding style you're most comfortable with.
After you complete this tutorial, you'll be able to:
* Add custom doc strings to an Airflow DAG.
* Add custom doc strings to an Airflow task.
## Time to complete
This tutorial takes approximately 15 minutes to complete.
## Assumed knowledge
* Basic Airflow concepts. See [Introduction to Apache Airflow](/docs/learn/intro-to-airflow).
* Basic Python. See the [Python Documentation](https://docs.python.org/3/tutorial/index.html).
## Prerequisites
* The [Astro CLI](/docs/cli/v1.43/install-cli).
## Step 1: Create an Astro project
To run Airflow locally, you first need to create an Astro project.
1. Create a new directory for your Astro project:
```sh wrap theme={null}
mkdir && cd
```
2. Run the following Astro CLI command to initialize an Astro project in the directory:
```sh wrap theme={null}
astro dev init
```
3. To enable raw HTML in your Markdown DAG descriptions, add the following Airflow config environment variable to your `.env` file. This will allow you to use HTML in your DAG descriptions. If you don't want to enable this setting due to security concerns you will still be able to use Markdown in your DAG descriptions and the HTML shown in this tutorial will be displayed as raw content.
```text wrap theme={null}
AIRFLOW__WEBSERVER__ALLOW_RAW_HTML_DESCRIPTIONS=True
```
4. Start your Airflow instance by running:
```sh wrap theme={null}
astro dev start
```
## Step 2: Create a new DAG
1. In your `dags` folder, create a file named `docs_example_dag.py`.
2. Copy and paste one of the following DAGs based on which coding style you're most comfortable with.
TaskFlow API
```python wrap theme={null}
from airflow.decorators import task, dag
from pendulum import datetime
import requests
@dag(
start_date=datetime(2022,11,1),
schedule="@daily",
catchup=False
)
def docs_example_dag():
@task
def tell_me_what_to_do():
response = requests.get("https://bored-api.appbrewery.com/random")
return response.json()["activity"]
tell_me_what_to_do()
docs_example_dag()
```
Traditional
```python wrap theme={null}
from airflow.models.dag import DAG
from airflow.operators.python import PythonOperator
from pendulum import datetime
import requests
def query_api():
response = requests.get("https://bored-api.appbrewery.com/random")
return response.json()["activity"]
with DAG(
dag_id="docs_example_dag",
start_date=datetime(2022,11,1),
schedule=None,
catchup=False,
):
tell_me_what_to_do = PythonOperator(
task_id="tell_me_what_to_do",
python_callable=query_api,
)
```
This DAG has one task called `tell_me_what_to_do`, which queries an [API](https://bored-api.appbrewery.com/random) that provides a random activity for the day and prints it to the logs.
## Step 3: Add docs to your DAG
You can add Markdown-based documentation to your DAGs that will render in the **Grid**, **Graph** and **Calendar** pages of the Airflow UI.
1. In your `docs_example_dag.py` file, add the following doc string above the definition of your DAG:
```python wrap theme={null}
doc_md_DAG = """
### The Activity DAG
This DAG will help me decide what to do today. It uses the [BoredAPI](https://bored-api.appbrewery.com/random) to do so.
Before I get to do the activity I will have to:
- Clean up the kitchen.
- Check on my pipelines.
- Water the plants.
Here are some happy plants:
 """
```
This doc string is written in Markdown. It includes a title, a link to an external website, a bulleted list, as well as an image which has been formatted using HTML. To learn more about Markdown, see [The Markdown Guide](https://www.markdownguide.org/).
2. Add the documentation to your DAG by passing `doc_md_DAG` to the `doc_md` parameter of your DAG class as shown in the code snippet below:
"""
```
This doc string is written in Markdown. It includes a title, a link to an external website, a bulleted list, as well as an image which has been formatted using HTML. To learn more about Markdown, see [The Markdown Guide](https://www.markdownguide.org/).
2. Add the documentation to your DAG by passing `doc_md_DAG` to the `doc_md` parameter of your DAG class as shown in the code snippet below:
TaskFlow API
```python wrap theme={null}
@dag(
start_date=datetime(2022,11,1),
schedule="@daily",
catchup=False,
doc_md=doc_md_DAG
)
def docs_example_dag():
```
Traditional
```python wrap theme={null}
with DAG(
dag_id="docs_example_dag",
start_date=datetime(2022,11,1),
schedule="@daily",
catchup=False,
doc_md=doc_md_DAG
):
```
3. Go to the **Grid** view and click the **DAG Docs** banner to view the rendered documentation.
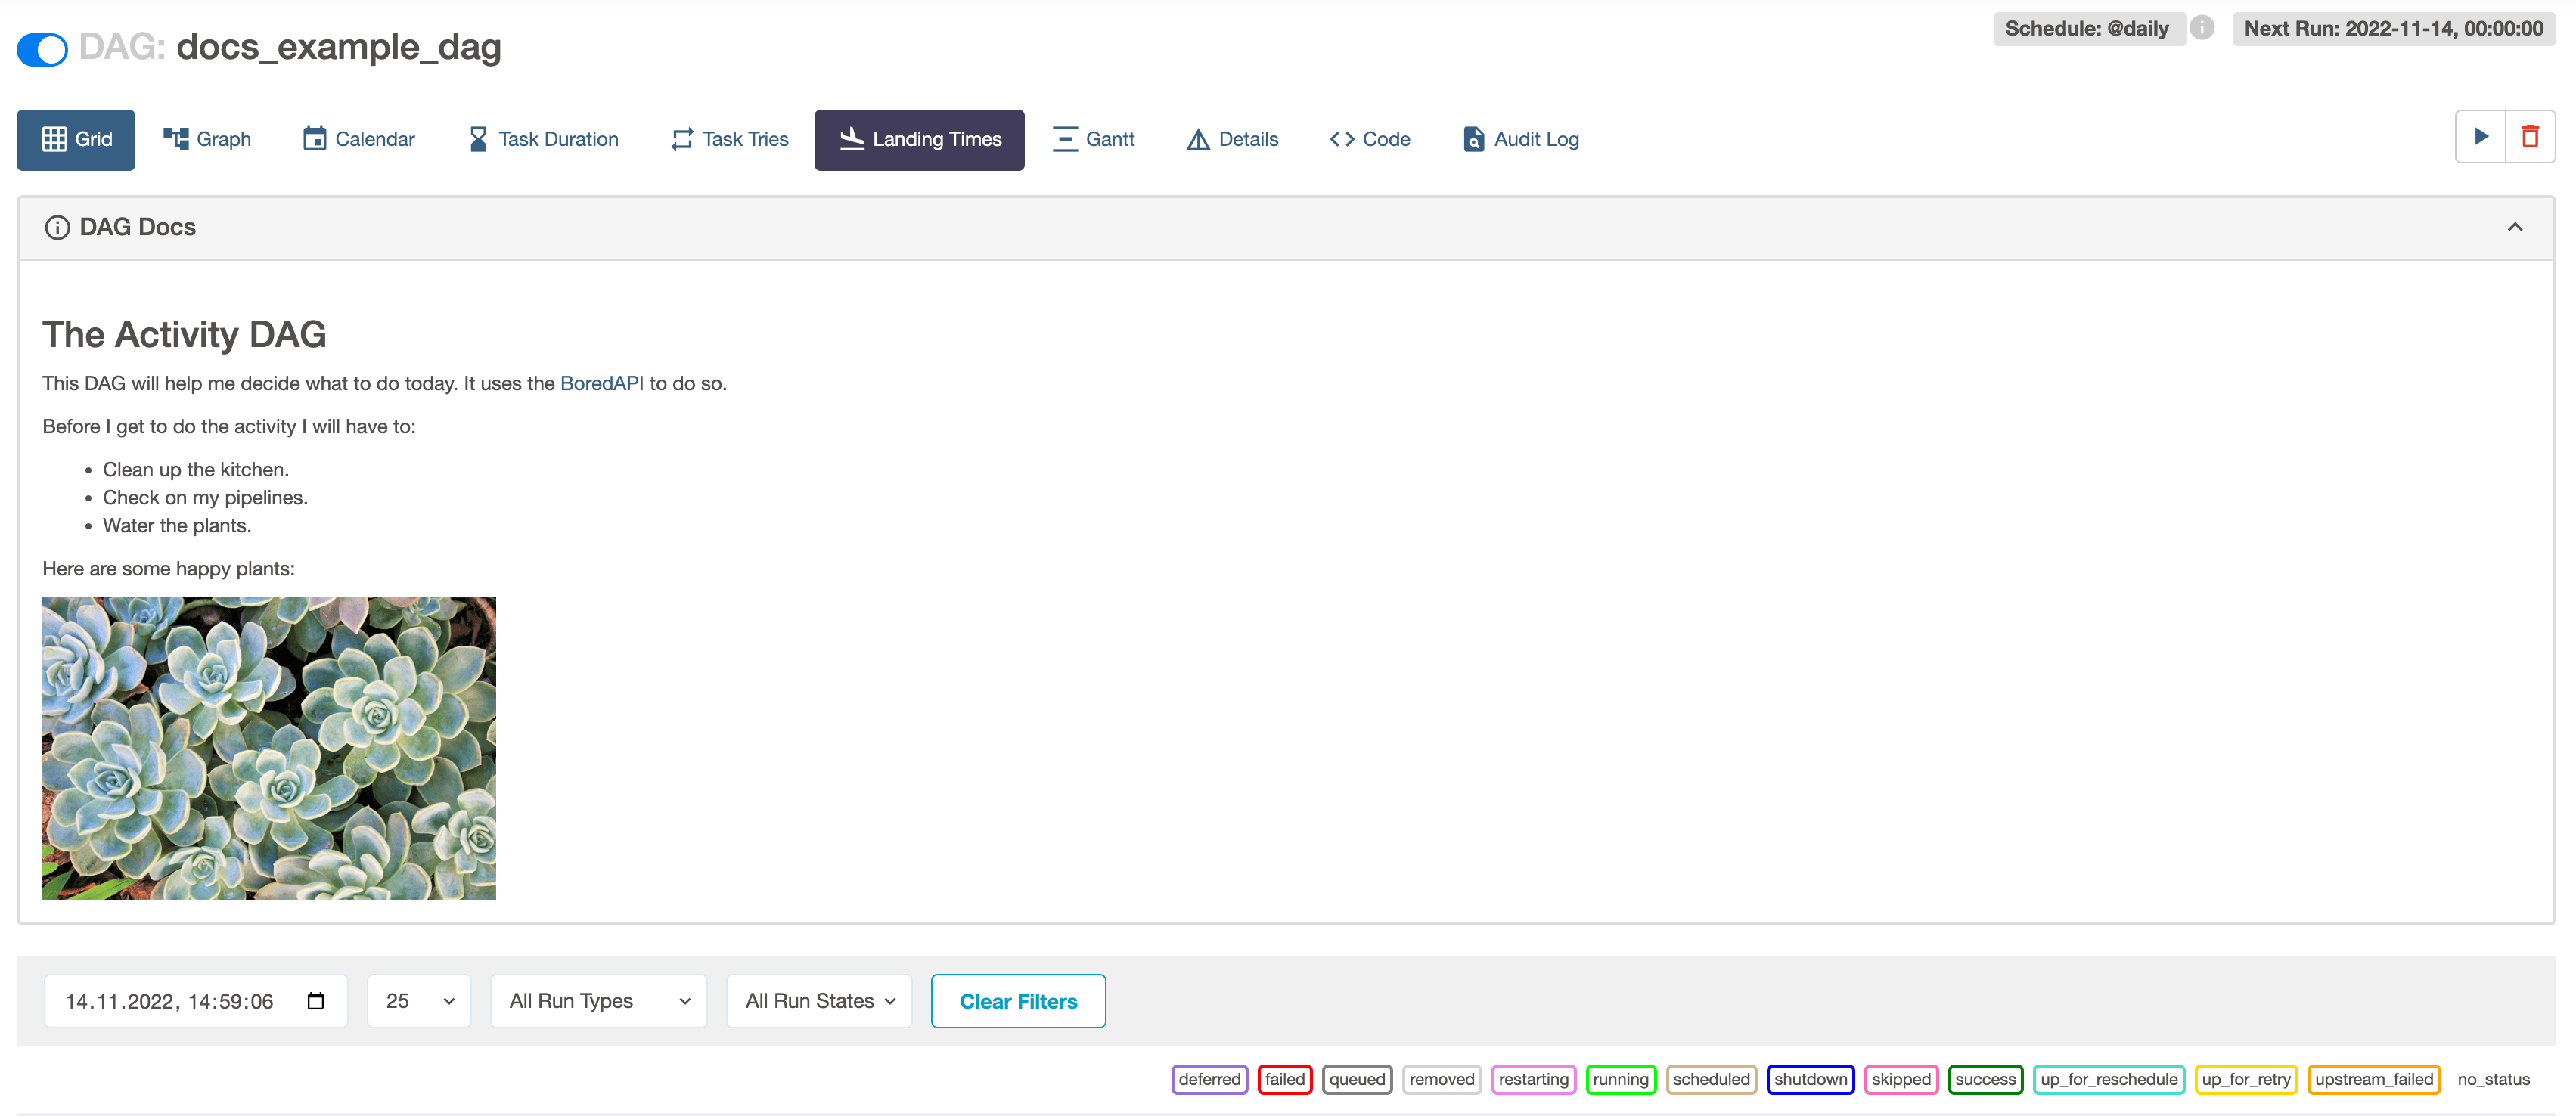 Airflow will automatically pick up a doc string written directly beneath the definition of the DAG context and add it as **DAG Docs**.
Additionally, using `with DAG():` lets you pass the filepath of a Markdown file to the `doc_md` parameter. This can be useful if you want to add the same documentation to several of your DAGs.
## Step 4: Add docs to a task
You can also add docs to specific Airflow tasks using Markdown, Monospace, JSON, YAML or reStructuredText. Note that only Markdown will be rendered and other formats will be displayed as rich content.
To add documentation to your task, follow these steps:
1. Add the following code with a string in Markdown format:
```python wrap theme={null}
doc_md_task = """
### Purpose of this task
This task **boldly** suggests a daily activity.
"""
```
2. Add the following code with a string written in monospace format:
```python wrap theme={null}
doc_monospace_task = """
If you don't like the suggested activity you can always just go to the park instead.
"""
```
3. Add the following code with a string in JSON format:
```python wrap theme={null}
doc_json_task = """
{
"previous_suggestions": {
"go to the gym": ["frequency": 2, "rating": 8],
"mow your lawn": ["frequency": 1, "rating": 2],
"read a book": ["frequency": 3, "rating": 10],
}
}
"""
```
4. Add the following code with a string written in YAML format:
```python wrap theme={null}
doc_yaml_task = """
clothes_to_wear: sports
gear: |
- climbing: true
- swimming: false
"""
```
5. Add the following code containing reStructuredText:
```python wrap theme={null}
doc_rst_task = """
===========
This feature is pretty neat
===========
* there are many ways to add docs
* luckily Airflow supports a lot of them
.. note:: `Learn more about rst here! `__
"""
```
6. Create a task definition as shown in the following snippet. The task definition includes parameters for specifying each of the documentation strings you created. Pick the coding style you're most comfortable with.
Airflow will automatically pick up a doc string written directly beneath the definition of the DAG context and add it as **DAG Docs**.
Additionally, using `with DAG():` lets you pass the filepath of a Markdown file to the `doc_md` parameter. This can be useful if you want to add the same documentation to several of your DAGs.
## Step 4: Add docs to a task
You can also add docs to specific Airflow tasks using Markdown, Monospace, JSON, YAML or reStructuredText. Note that only Markdown will be rendered and other formats will be displayed as rich content.
To add documentation to your task, follow these steps:
1. Add the following code with a string in Markdown format:
```python wrap theme={null}
doc_md_task = """
### Purpose of this task
This task **boldly** suggests a daily activity.
"""
```
2. Add the following code with a string written in monospace format:
```python wrap theme={null}
doc_monospace_task = """
If you don't like the suggested activity you can always just go to the park instead.
"""
```
3. Add the following code with a string in JSON format:
```python wrap theme={null}
doc_json_task = """
{
"previous_suggestions": {
"go to the gym": ["frequency": 2, "rating": 8],
"mow your lawn": ["frequency": 1, "rating": 2],
"read a book": ["frequency": 3, "rating": 10],
}
}
"""
```
4. Add the following code with a string written in YAML format:
```python wrap theme={null}
doc_yaml_task = """
clothes_to_wear: sports
gear: |
- climbing: true
- swimming: false
"""
```
5. Add the following code containing reStructuredText:
```python wrap theme={null}
doc_rst_task = """
===========
This feature is pretty neat
===========
* there are many ways to add docs
* luckily Airflow supports a lot of them
.. note:: `Learn more about rst here! `__
"""
```
6. Create a task definition as shown in the following snippet. The task definition includes parameters for specifying each of the documentation strings you created. Pick the coding style you're most comfortable with.
TaskFlow API
```python wrap theme={null}
@task(
doc_md=doc_md_task,
doc=doc_monospace_task,
doc_json=doc_json_task,
doc_yaml=doc_yaml_task,
doc_rst=doc_rst_task
)
def tell_me_what_to_do():
response = requests.get("https://bored-api.appbrewery.com/random")
return response.json()["activity"]
tell_me_what_to_do()
```
Traditional
```python wrap theme={null}
tell_me_what_to_do = PythonOperator(
task_id="tell_me_what_to_do",
python_callable=query_api,
doc_md=doc_md_task,
doc=doc_monospace_task,
doc_json=doc_json_task,
doc_yaml=doc_yaml_task,
doc_rst=doc_rst_task
)
```
3. Go to the Airflow UI and run your DAG.
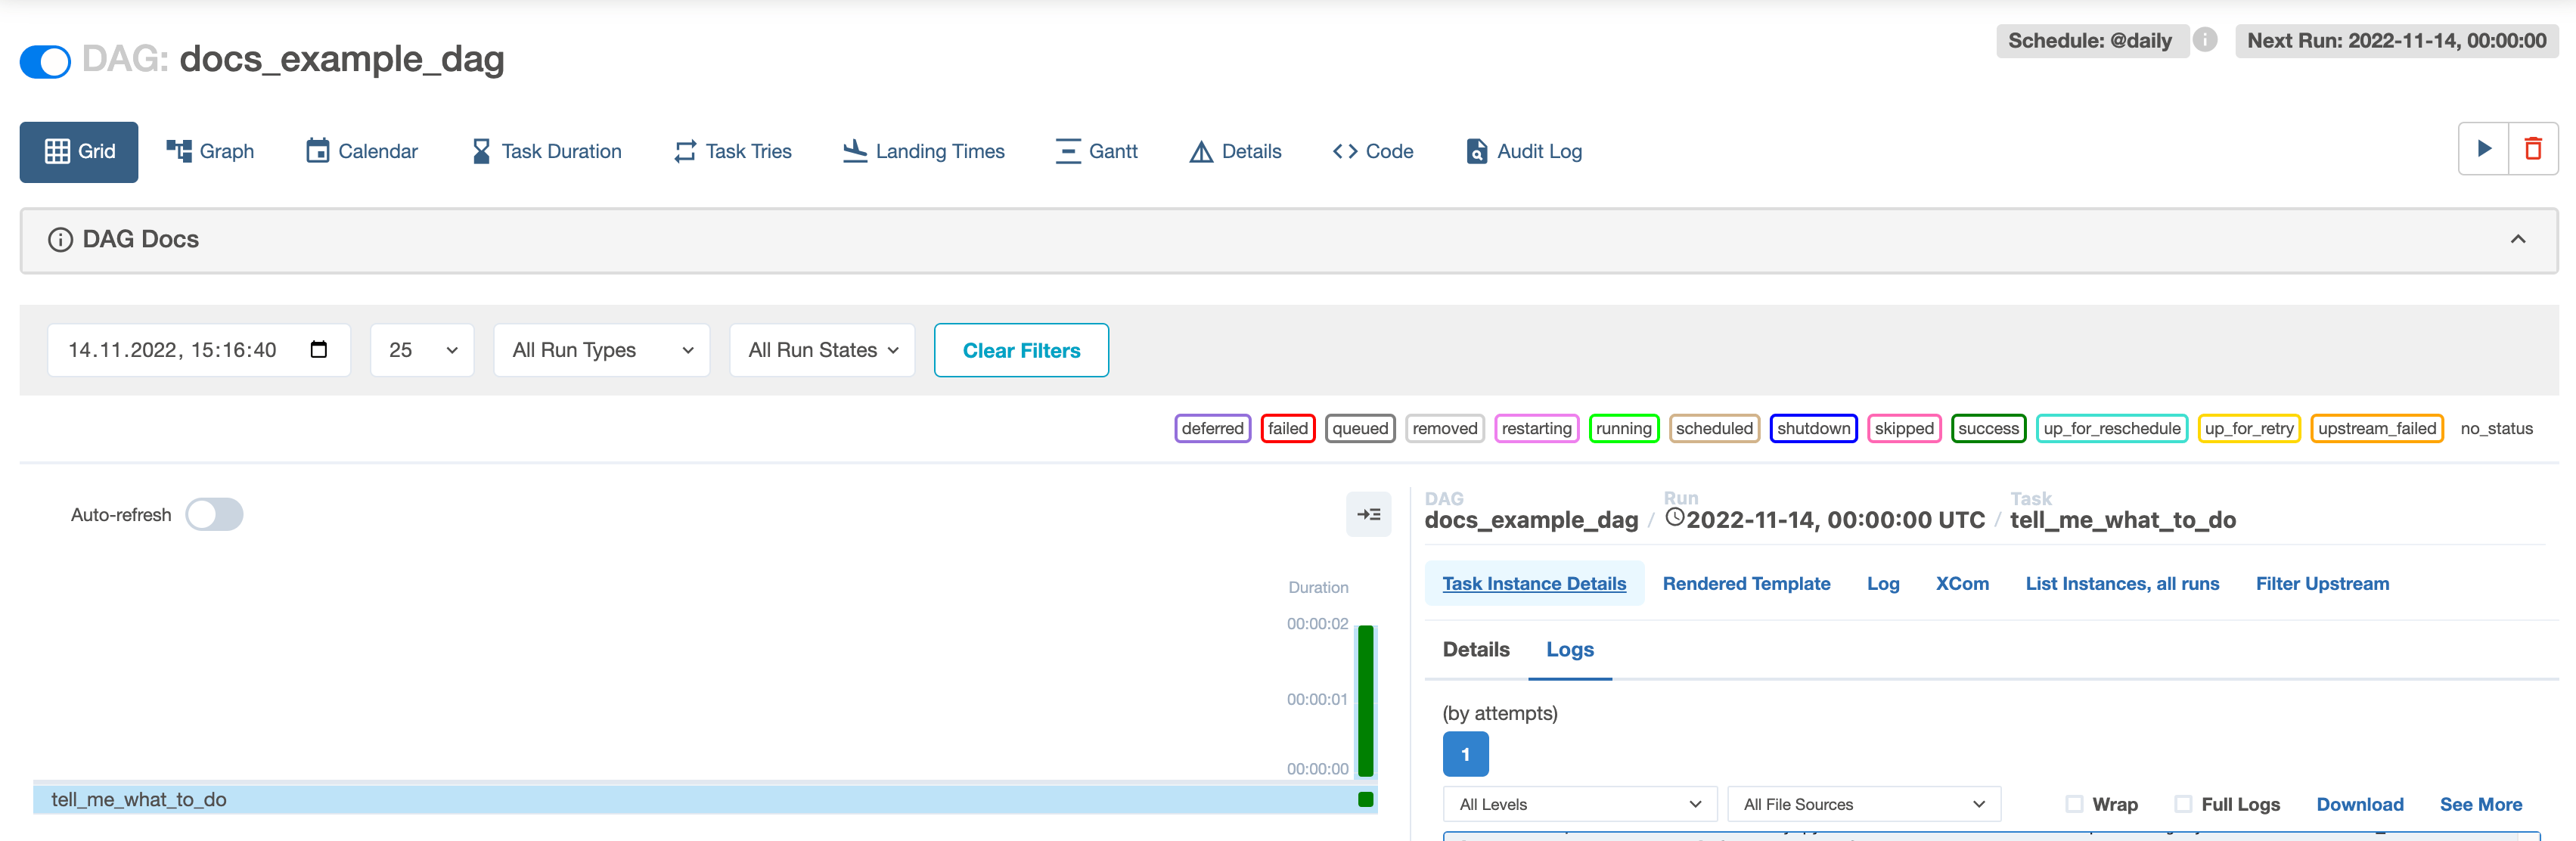
4. In the **Grid** view, click the green square for your task instance.
5. Click **Task Instance Details**.
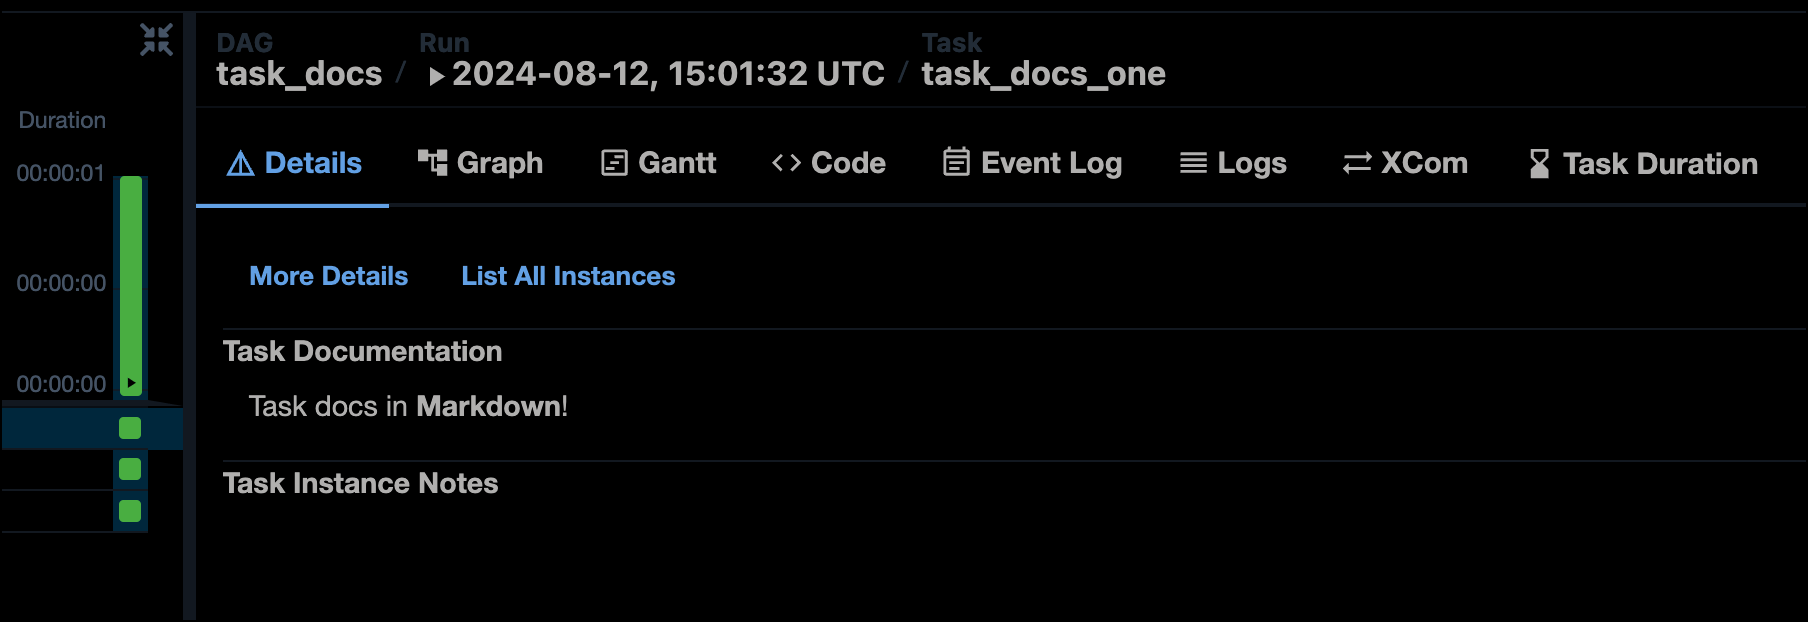
 6. See the docs under their respective attribute:
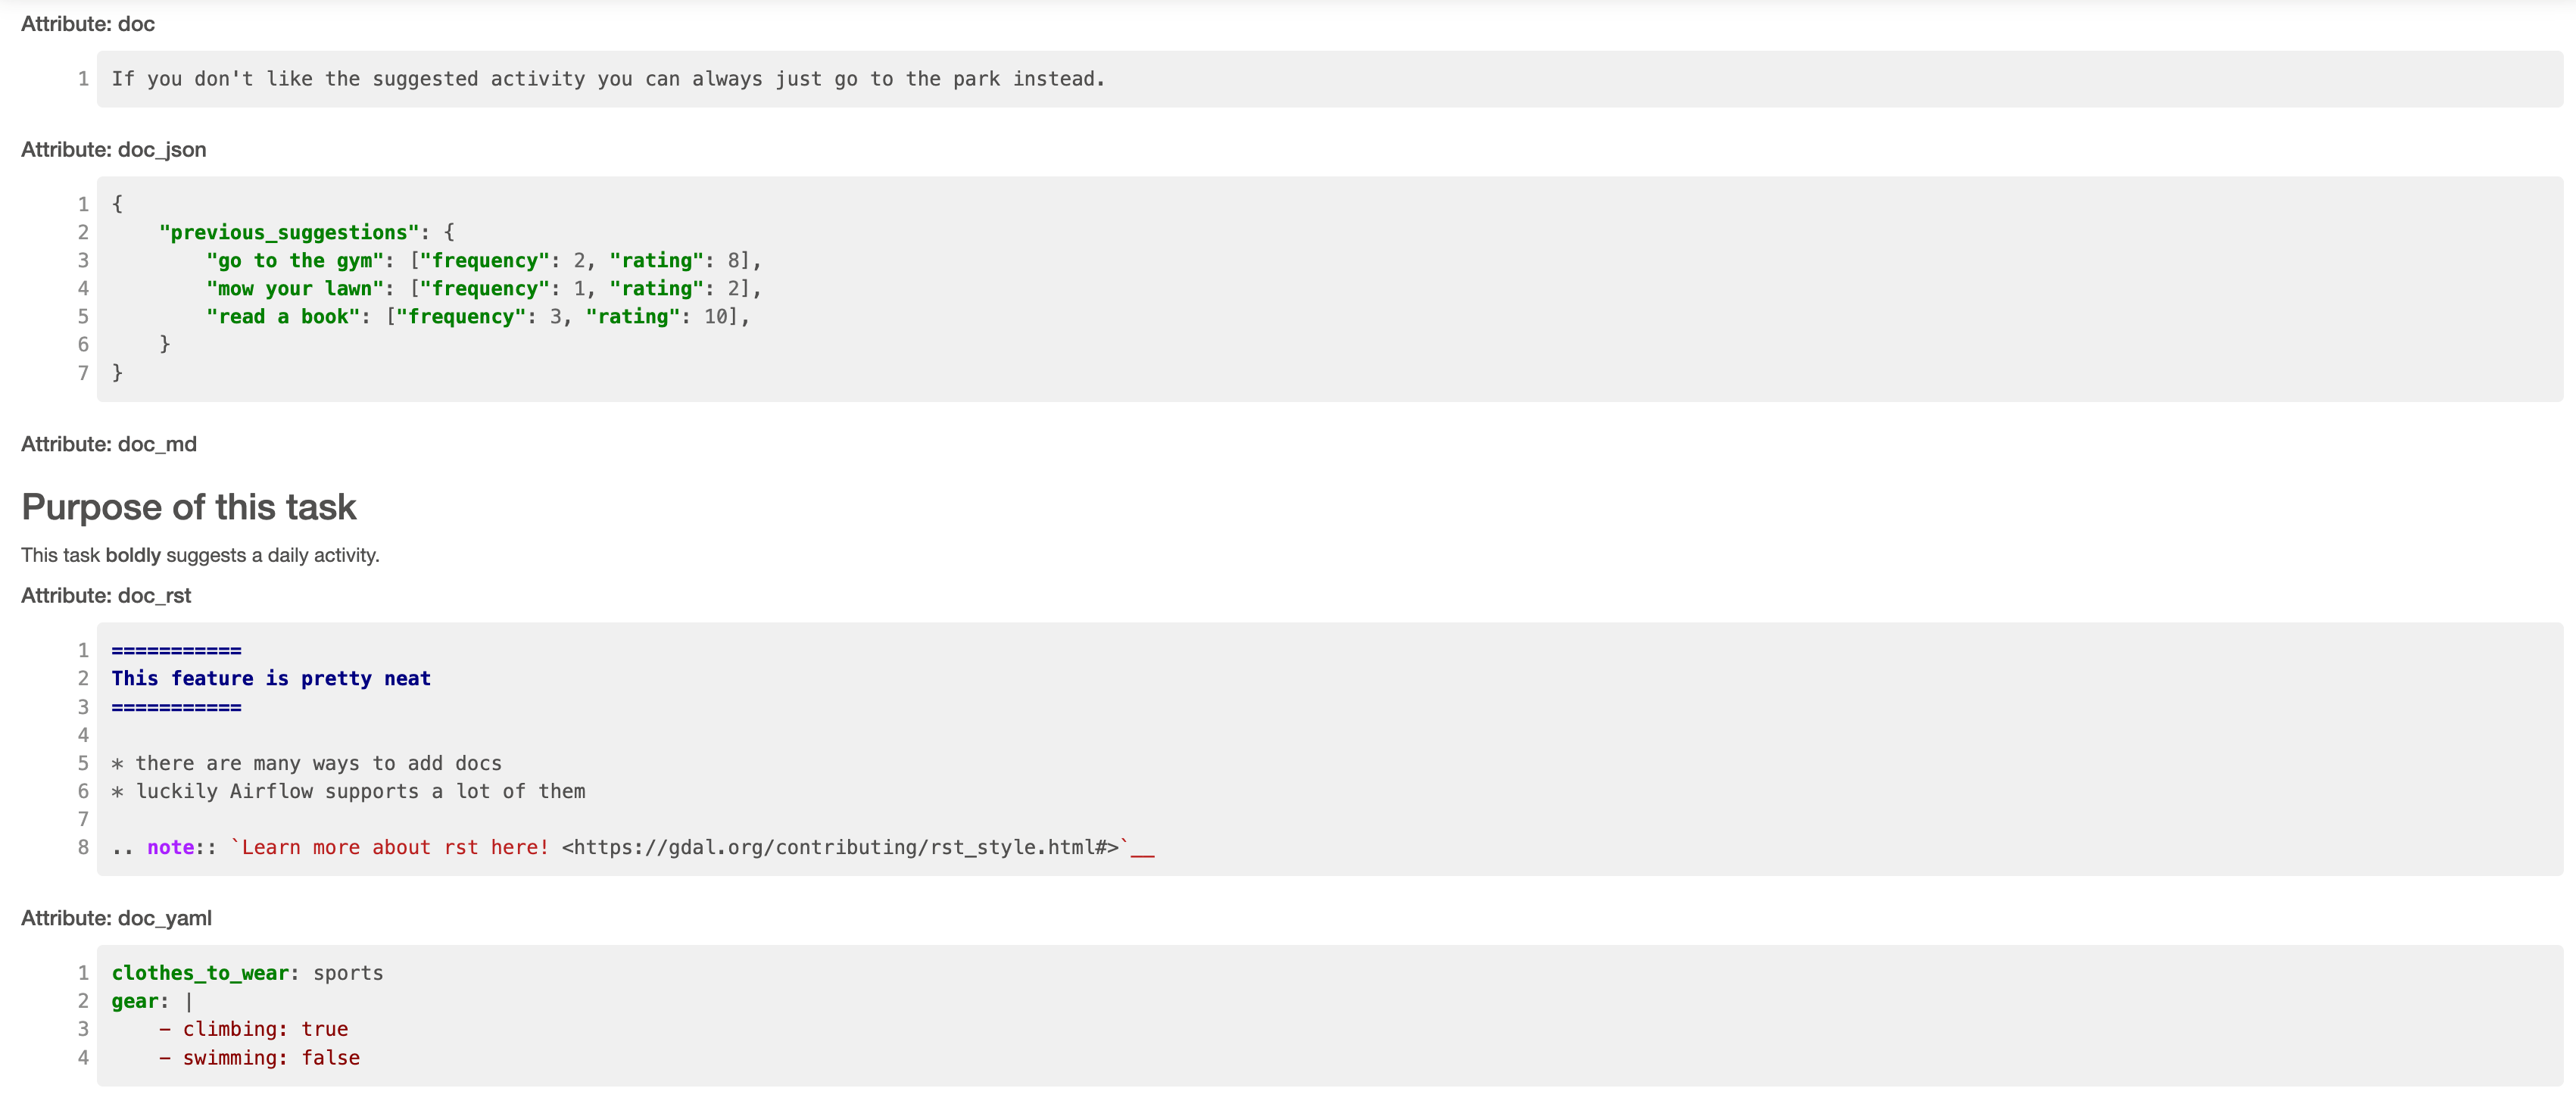 In Airflow 2.10+, task docs provided to `doc_md` or as a doc string in a `@task` decorated task are rendered in the task details in the Airflow UI.
 ## Step 5: Add notes to a task instance and DAG run
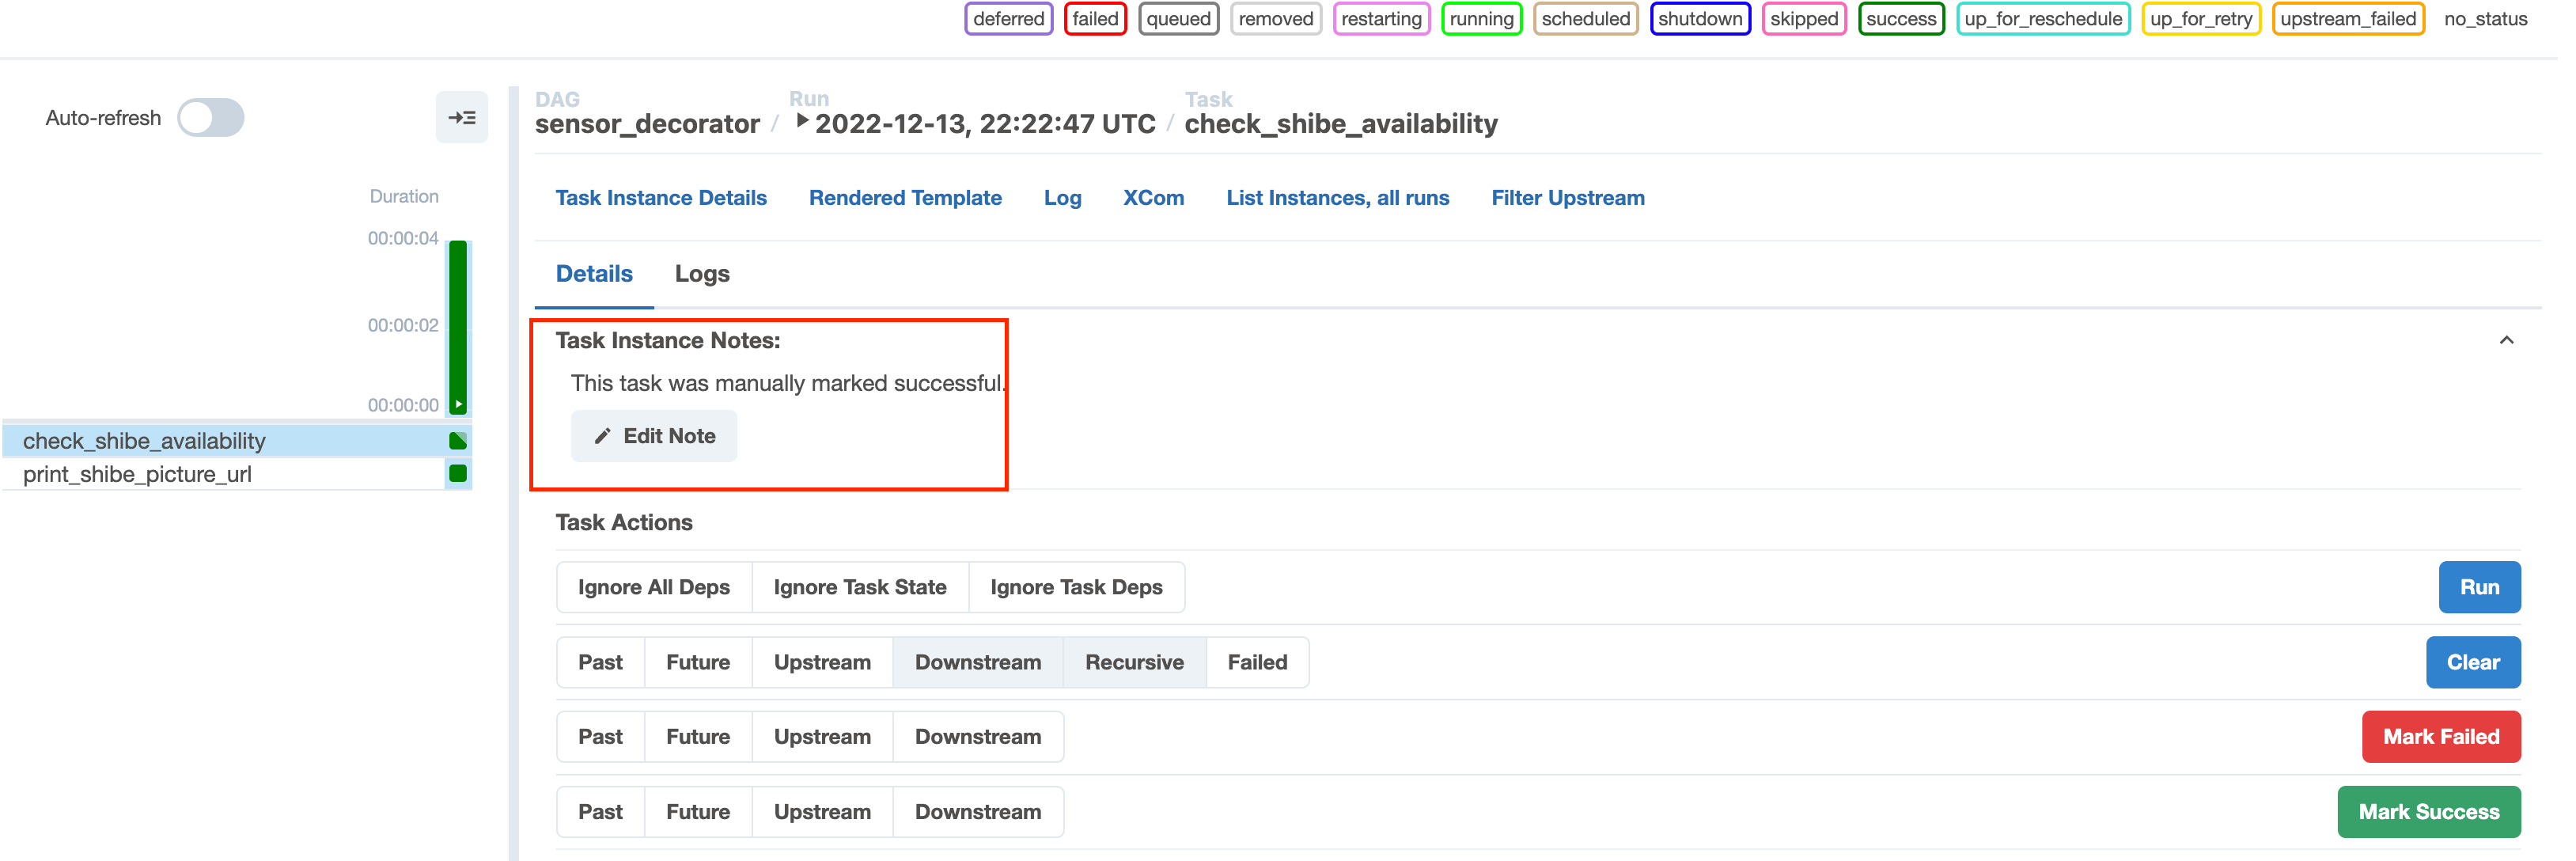
You can add notes to task instances and DAG runs from the **Grid** view in the Airflow UI. This feature is useful if you need to share contextual information about a DAG or task run with your team, such as why a specific run failed.
1. Go to the **Grid View** of the `docs_example_dag` DAG you created in [Step 2](#step-2-create-a-new-dag).
2. Select a task instance or DAG run.
3. Click **Details** > **Task Instance Notes** or **DAG Run Notes** > **Add Note**.
4. Write a note and click **Save Note**.
## Step 5: Add notes to a task instance and DAG run
You can add notes to task instances and DAG runs from the **Grid** view in the Airflow UI. This feature is useful if you need to share contextual information about a DAG or task run with your team, such as why a specific run failed.
1. Go to the **Grid View** of the `docs_example_dag` DAG you created in [Step 2](#step-2-create-a-new-dag).
2. Select a task instance or DAG run.
3. Click **Details** > **Task Instance Notes** or **DAG Run Notes** > **Add Note**.
4. Write a note and click **Save Note**.
 ## Conclusion
Congratulations! You now know how to add fancy documentation to both your DAGs and your Airflow tasks.
## Conclusion
Congratulations! You now know how to add fancy documentation to both your DAGs and your Airflow tasks.