> ## Documentation Index
> Fetch the complete documentation index at: https://astronomer.io/docs/llms.txt
> Use this file to discover all available pages before exploring further.
# Create a Microsoft Entra Workload ID connection in Airflow
This page hasn't yet been updated for Airflow 3. The concepts shown are relevant, but some code may need to be updated. If you run any examples, take care to update import statements and watch for any other breaking changes.
A [workload identity](https://learn.microsoft.com/en-us/entra/workload-id/workload-identities-overview) is an identity you can assign to your Airflow environment which is authorized to access external services and resources. On Azure, a single workload identity can be authorized to multiple Azure resources through Azure resource groups.
The new generic **Azure** connection type lets you assign a workload identity to your Airflow environment so that Airflow can access multiple Azure resources using a single Airflow connection. This configuration greatly simplifies the number of credentials and connections you need to manage for Azure workflows.
This guide explains how to set up an Azure Workload Identity connection using the **Azure** connection type on Astro. Astronomer recommends using this connection type for most Azure workflows.
## Prerequisites
* The [Astro CLI](/docs/cli/v1.43/overview).
* The [Azure CLI](https://learn.microsoft.com/en-us/cli/azure/) or access to the Azure web portal.
* An [Astro project](/docs/cli/v1.43/get-started-cli).
* (Optional) An [Astro Deployment](/docs/astro/create-deployment).
* A Microsoft Entra [managed identity](https://learn.microsoft.com/en-us/entra/identity/managed-identities-azure-resources/how-manage-user-assigned-managed-identities?pivots=identity-mi-methods-azp).
If you want to use Microsoft Entra Workload ID with a generic Apache Airflow project, your setup steps might vary. See [Airflow documentation](https://airflow.apache.org/docs/apache-airflow-providers-microsoft-azure/stable/connections/azure.html).
## Get connection details
To create a workload identity for your Airflow environment, you first need to link your Airflow environment to your Entra ID managed identity.
If you're using Astro, follow the steps in [Authorize Deployments to Cloud resources](/docs/astro/authorize-deployments-to-your-cloud?tab=azure#setup) to create a workload identity for your Deployment.
If you're using Apache Airflow outside of Astro, your setup will vary based on your cloud and the environment you're running Airflow in. Generally speaking, the setup will be similar to the following:
1. In your Azure portal, open the **Managed Identities** menu.
2. Search for your managed identity, click **Properties**, then copy its **Name**, **Client ID**, **Tenant ID**, and **Resource group name**.
3. Run the following command to create a workload identity for your Airflow environment, replacing the `` and `` values with your managed identity **Name** and **Resource group name** respectively.
```bash wrap theme={null}
workloads=( scheduler triggerer worker )
for workload in "${workloads[@]}"; do
az identity federated-credential create --name -$workload --identity-name --resource-group --issuer --subject
done
az identity federated-credential create --name --identity-name --resource-group --issuer --subject
```
## Create your connection
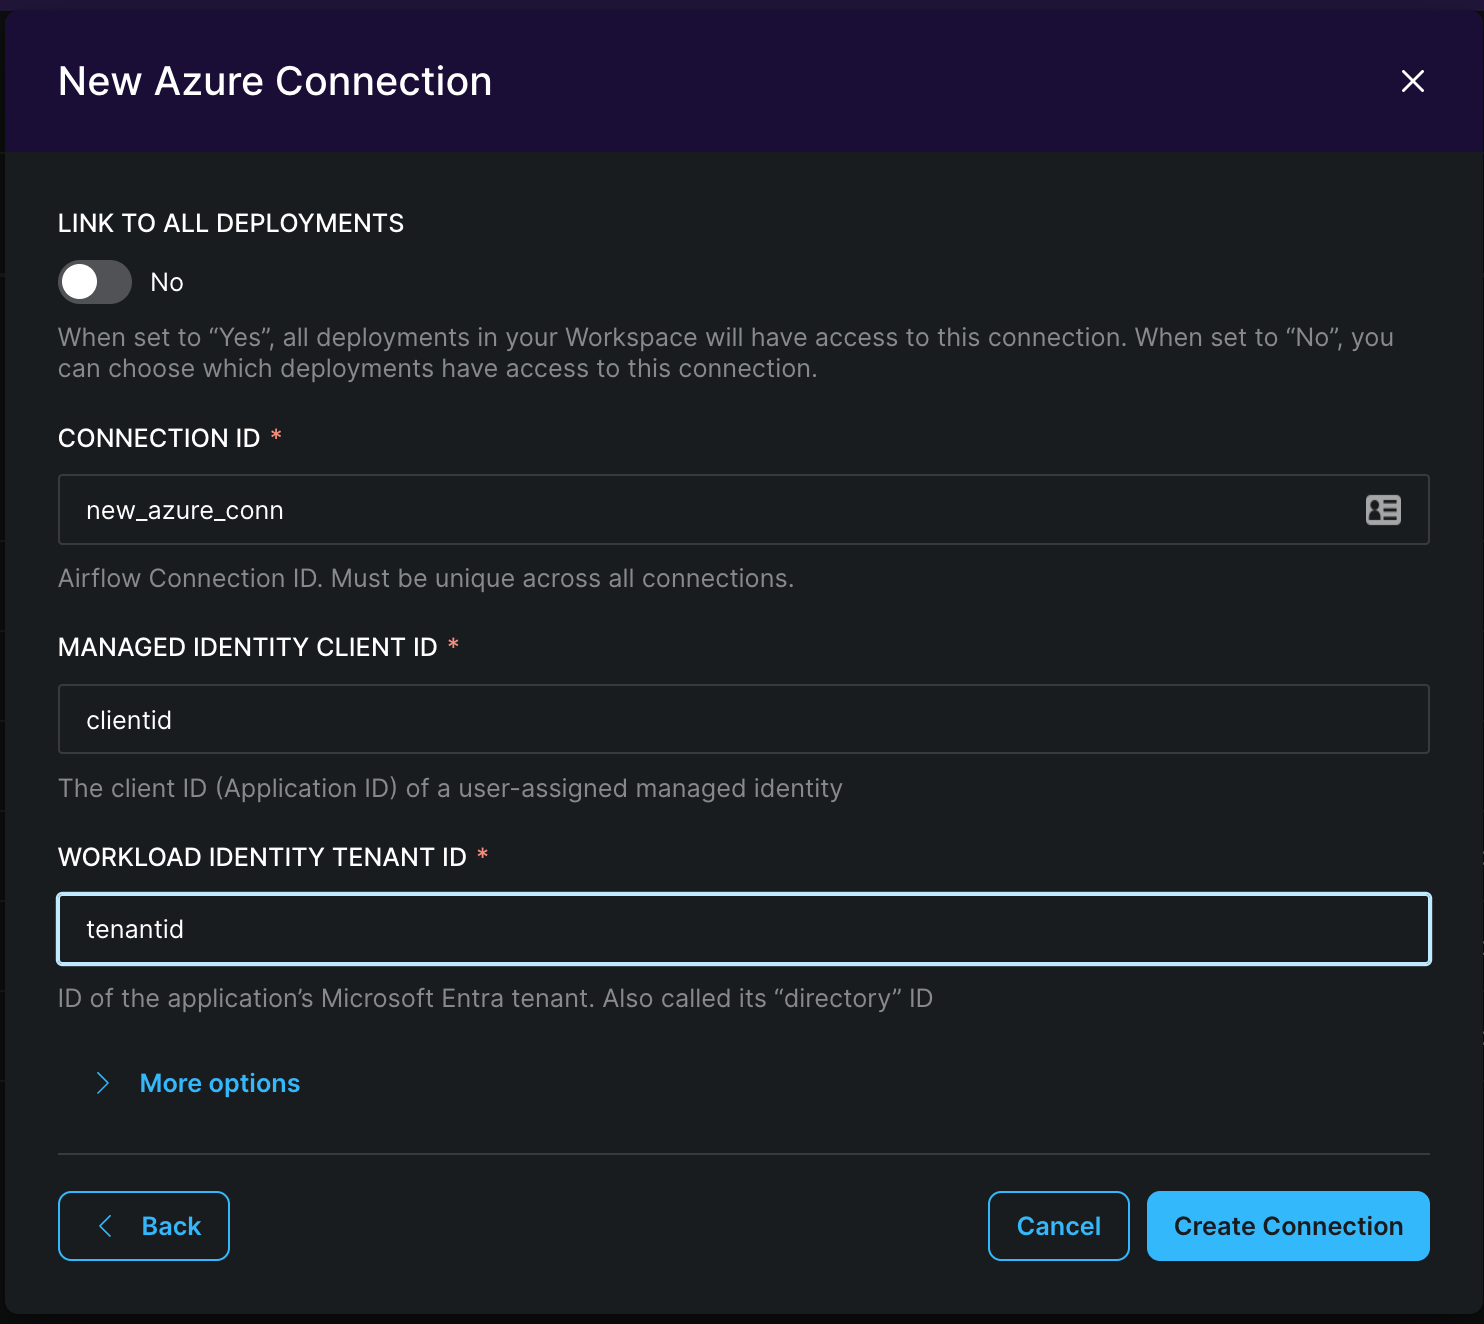
To create your connection in Astro, follow the steps to [create a new connection in the Astro Environment Manager](/docs/astro/create-and-link-connections). Select the **Azure workload identity** connection type and enter your **Client ID** and **Tenant ID**. If you need to specify a **Subscription ID** for a specific service, you can open the **More options** dropdown menu and add it there.
 Alternatively, to create your connection in the Airflow UI:
1. In the Airflow UI, go to **Admin** > **Connections**.
2. Click **+** to add a new connection, then select **Azure** as the connection type.
3. Enter the `clientId` and `tenantId` fields you retrieved from [Get connection details](#get-connection-details) and enter them into the **Managed Identity Client ID** and **Workload Identity Tenant ID** fields respectively. You can also specify a `subscriptionId` for a specific service if required.
4. Click **Save**.
After you create your connection, any DAGs using the connection will have the same permissions and access you defined in your managed identity.
Alternatively, to create your connection in the Airflow UI:
1. In the Airflow UI, go to **Admin** > **Connections**.
2. Click **+** to add a new connection, then select **Azure** as the connection type.
3. Enter the `clientId` and `tenantId` fields you retrieved from [Get connection details](#get-connection-details) and enter them into the **Managed Identity Client ID** and **Workload Identity Tenant ID** fields respectively. You can also specify a `subscriptionId` for a specific service if required.
4. Click **Save**.
After you create your connection, any DAGs using the connection will have the same permissions and access you defined in your managed identity.