> ## Documentation Index
> Fetch the complete documentation index at: https://astronomer.io/docs/llms.txt
> Use this file to discover all available pages before exploring further.
# Orchestrate Ray jobs with Apache Airflow®
[Ray](https://www.ray.io/) is an open-source framework for scaling Python applications, particularly for machine learning and AI workloads where it provides the layer for parallel processing and distributed computing. Many large language models (LLMs) are trained using Ray, including [OpenAI's GPT](https://platform.openai.com/docs/models) models.
The [Ray provider package](https://github.com/astronomer/astro-provider-ray) for [Apache Airflow®](https://airflow.apache.org/) allows you to interact with Ray from your Airflow Dags. This tutorial demonstrates how to use the Ray provider package to orchestrate a simple Ray job with Airflow in an existing Ray cluster. For more in-depth information, see the [Ray provider documentation](https://astronomer.github.io/astro-provider-ray/index.html).
For instructions on how to run Ray jobs on the [Anyscale](https://www.anyscale.com/) platform with Airflow, see the [Orchestrate Ray jobs on Anyscale with Apache Airflow®](/docs/learn/airflow-anyscale) tutorial.
This tutorial shows a simple implementation of the Ray provider package. For a more complex example, see the [Processing User Feedback: an LLM-fine-tuning reference architecture with Ray on Anyscale](/docs/learn/reference-architecture-fine-tuning-anyscale) reference architecture.
## Time to complete
This tutorial takes approximately 30 minutes to complete.
## Assumed knowledge
To get the most out of this tutorial, make sure you have an understanding of:
* Ray basics. See the [Getting Started section of the Ray documentation](https://docs.ray.io/en/latest/ray-overview/getting-started.html).
* Airflow decorators. See [Airflow decorators](/docs/learn/airflow-decorators).
## Prerequisites
* The [Astro CLI](/docs/cli/v1.43/get-started-cli).
* Optional: A pre-existing Ray cluster. This tutorial shows how to spin up a local Ray cluster using Docker. To connect to your existing Ray cluster, modify the connection defined in [Step 2](#step-2-configure-a-ray-connection).
The Ray provider package can also create a Ray cluster for you in an existing Kubernetes cluster. For more information, see the [Ray provider package documentation](https://astronomer.github.io/astro-provider-ray/getting_started/setup.html). Note that you need a Kubernetes cluster with a pre-configured LoadBalancer service to use the Ray provider package.
## Step 1: Configure your Astro project
Use the Astro CLI to create and run an Airflow project on your local machine.
1. Create a new Astro project:
```sh wrap theme={null}
$ mkdir astro-ray-tutorial && cd astro-ray-tutorial
$ astro dev init
```
2. In the `requirements.txt` file, add the [Ray provider](https://github.com/astronomer/astro-provider-ray).
```text wrap theme={null}
astro-provider-ray==0.3.1
```
3. (Optional). If you don't have a pre-existing Ray cluster, you can spin up a local Ray cluster alongside your local Astro project by using a `docker-compose.override.yml` file. Create a new file in your project's root directory called `docker-compose.override.yml` and add the following:
```yaml expandable wrap theme={null}
services:
ray-head:
image: rayproject/ray:latest
container_name: ray-head
command: >
ray start
--head
--dashboard-host=0.0.0.0
--dashboard-port=8265
--ray-client-server-port=10001
--port=6379
--num-cpus=4
--block
ports:
- "8265:8265" # Ray dashboard
- "10001:10001" # Ray client server
- "6379:6379" # Ray Redis
networks:
- airflow
environment:
- RAY_GRAFANA_HOST=http://grafana:3000
- RAY_PROMETHEUS_HOST=http://prometheus:9090
healthcheck:
test: ["CMD", "ray", "status"]
interval: 30s
timeout: 10s
retries: 5
start_period: 30s
restart: unless-stopped
networks:
airflow:
```
4. In your `.env` file, specify your Ray cluster address. Modify this address if you are using a pre-existing Ray cluster.
```text wrap theme={null}
RAY_ADDRESS=http://ray-head:8265
```
5. Run the following command to start your Astro project:
```sh wrap theme={null}
astro dev start
```
## Step 2: Configure a Ray connection
For Astro customers, Astronomer recommends using the [Astro Environment Manager](/docs/astro/manage-connections-variables#astro-environment-manager) to store connections in an Astro-managed secrets backend. These connections can be shared across multiple deployed and local Airflow environments. See [Manage Astro connections in branch-based deploy workflows](/docs/astro/best-practices/connections-branch-deploys).
1. In the Airflow UI, go to **Admin** -> **Connections** and click **+**.
2. Create a new connection and choose the `Ray` connection type. If you used the `docker-compose.override.yml` file to spin up a local Ray cluster, use the information below. If you are connecting to your existing Ray cluster, you need to modify your values accordingly.
* Connection ID: `ray_conn`
* Host: `ray-head`
* Port: `8265`
* Extra Fields:
* `ray_dashboard_url`: `"http://ray-head:8265"`
* `disable_job_log_to_stdout`: `false`
3. Click **Save**.
If you are connecting to a Ray cluster running on a cloud provider, you need to provide the `.kubeconfig` file of the Kubernetes cluster where the Ray cluster is running as `Kube config (JSON format)`, as well as valid Cloud credentials as environment variables.
## Step 3: Write a Dag to orchestrate Ray jobs
1. Create a new file in your `dags` directory called `ray_tutorial.py`.
2. Copy and paste the code below into the file:
TaskFlow
```python expandable wrap theme={null}
"""
## Ray Tutorial
This tutorial demonstrates how to use the Ray provider in Airflow to parallelize
a task using Ray.
"""
from airflow.sdk import dag, task
from ray_provider.decorators import ray
CONN_ID = "ray_conn"
RAY_TASK_CONFIG = {
"conn_id": CONN_ID,
"num_cpus": 1,
"num_gpus": 0,
"memory": 0,
"poll_interval": 5,
}
@dag(doc_md=__doc__)
def ray_example_dag():
@task
def generate_data() -> list:
"""
Generate sample data
Returns:
list: List of integers
"""
import random
return [random.randint(1, 100) for _ in range(10)]
# use the @ray.task decorator to parallelize the task
@ray.task(config=RAY_TASK_CONFIG)
def get_mean_squared_value(data: list) -> float:
"""
Get the mean squared value from a list of integers
Args:
data (list): List of integers
Returns:
float: Mean value of the list
"""
import numpy as np
import ray
@ray.remote
def square(x: int) -> int:
"""
Square a number
Args:
x (int): Number to square
Returns:
int: Squared number
"""
return x**2
ray.init()
data = np.array(data)
futures = [square.remote(x) for x in data]
results = ray.get(futures)
mean = np.mean(results)
print(f"Mean squared value: {mean}")
data = generate_data()
get_mean_squared_value(data)
ray_example_dag()
```
Traditional
```python expandable wrap theme={null}
"""
## Ray Tutorial
This tutorial demonstrates how to use the Ray provider in Airflow to
parallelize a task using Ray.
"""
from airflow.sdk import dag, chain
from airflow.providers.standard.operators.python import PythonOperator
from ray_provider.operators import SubmitRayJob
from pathlib import Path
CONN_ID = "ray_conn"
FOLDER_PATH = Path(__file__).parent
RAY_RUNTIME_ENV = {"working_dir": str(FOLDER_PATH)}
def _generate_data() -> list:
"""
Generate sample data
Returns:
list: List of integers
"""
import random
return [random.randint(1, 100) for _ in range(10)]
@dag(doc_md=__doc__)
def ray_tutorial():
data = PythonOperator(
task_id="generate_data",
python_callable=_generate_data,
)
get_mean_squared_value = SubmitRayJob(
task_id="SubmitRayJob",
conn_id=CONN_ID,
entrypoint="python ray_script.py {{ ti.xcom_pull(task_ids='generate_data') | join(' ') }}",
runtime_env=RAY_RUNTIME_ENV,
num_cpus=1,
num_gpus=0,
memory=0,
resources={},
xcom_task_key="SubmitRayJob.dashboard",
fetch_logs=True,
wait_for_completion=True,
job_timeout_seconds=600,
poll_interval=5,
)
chain(data, get_mean_squared_value)
ray_tutorial()
```
This is a simple Dag comprised of two tasks:
* The `generate_data` task randomly generates a list of 10 integers.
* The `get_mean_squared_value` task submits a Ray job on Anyscale to calculate the mean squared value of the list of integers.
3. (Optional). If you are using the traditional syntax with the SubmitRayJob operator, you need to provide the Python code to run in the Ray job as a script. Create a new file in your `dags` directory called `ray_script.py` and add the following code:
```python wrap theme={null}
# ray_script.py
import numpy as np
import ray
import argparse
@ray.remote
def square(x):
return x**2
def main(data):
ray.init()
data = np.array(data)
futures = [square.remote(x) for x in data]
results = ray.get(futures)
mean = np.mean(results)
print(f"Mean of this population is {mean}")
return mean
if __name__ == "__main__":
parser = argparse.ArgumentParser(description="Process some integers.")
parser.add_argument('data', nargs='+', type=float, help='List of numbers to process')
args = parser.parse_args()
data = args.data
main(data)
```
## Step 4: Run the Dag
1. In the Airflow UI, click the play button to manually run your Dag.
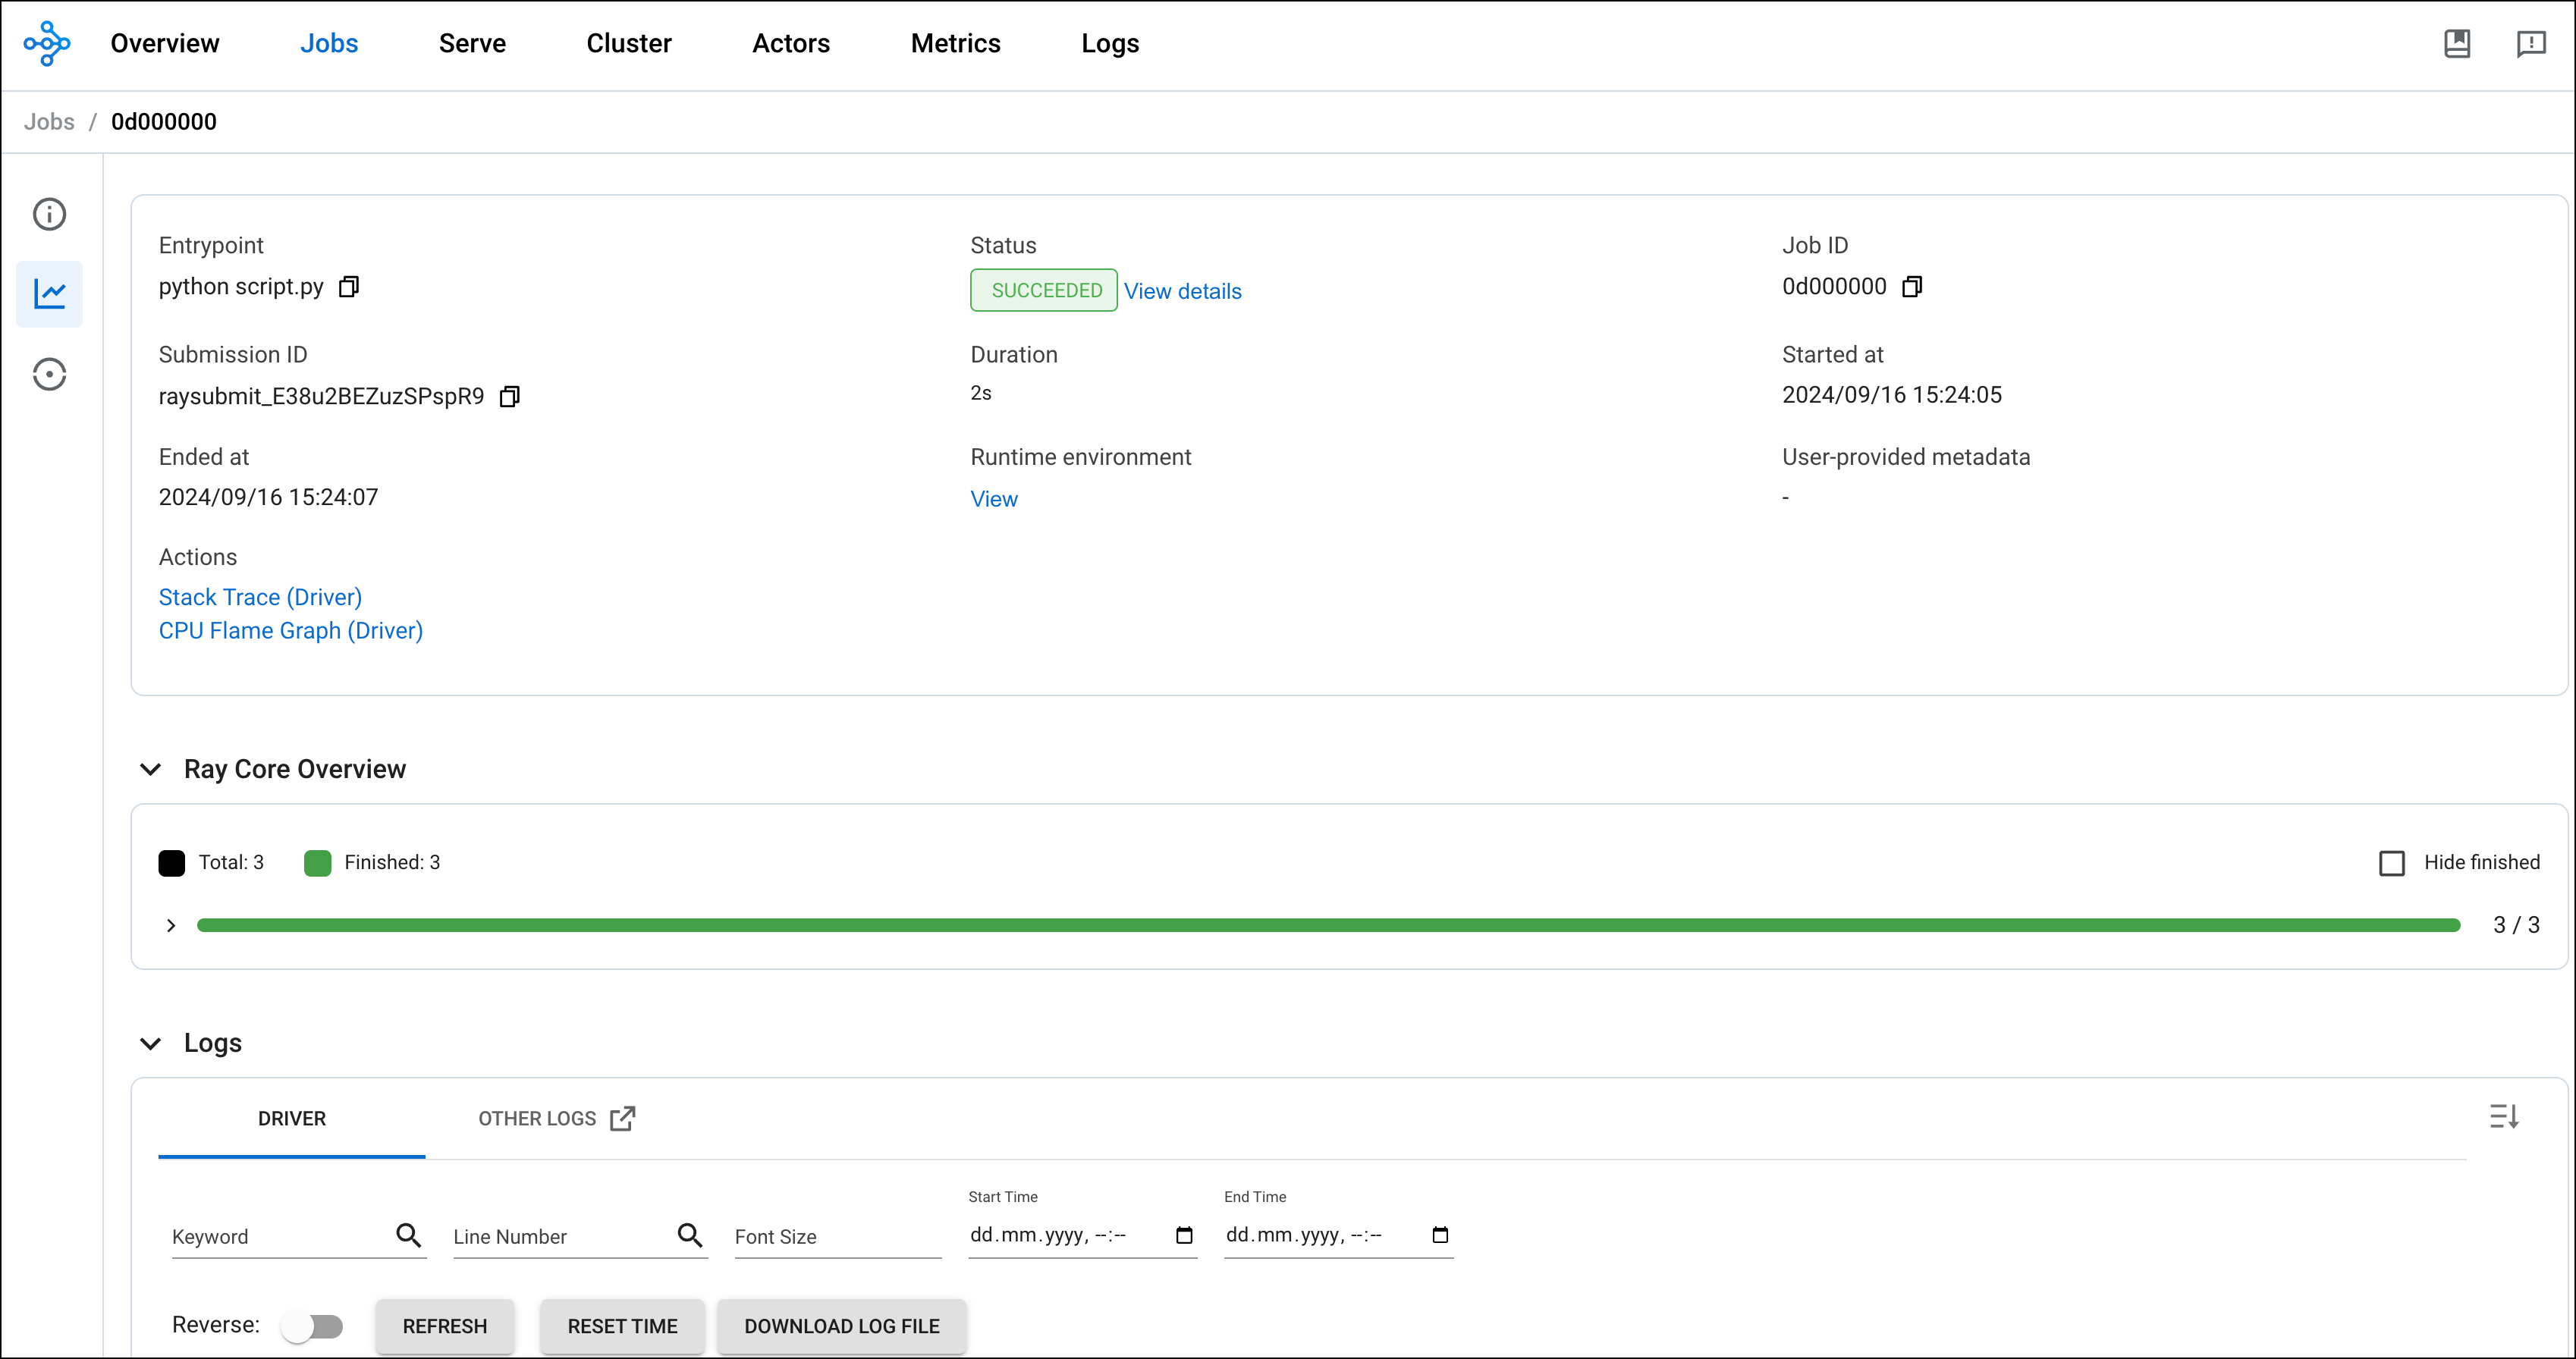
2. After the Dag runs successfully, check go to your Ray dashboard to see the job submitted by Airflow.
 ## Conclusion
Congratulations! You've run a Ray job using Apache Airflow. You can now use the Ray provider package to orchestrate more complex Ray jobs, see [Processing User Feedback: an LLM-fine-tuning reference architecture with Ray on Anyscale](/docs/learn/reference-architecture-fine-tuning-anyscale) for an example.
## Conclusion
Congratulations! You've run a Ray job using Apache Airflow. You can now use the Ray provider package to orchestrate more complex Ray jobs, see [Processing User Feedback: an LLM-fine-tuning reference architecture with Ray on Anyscale](/docs/learn/reference-architecture-fine-tuning-anyscale) for an example.