> ## Documentation Index
> Fetch the complete documentation index at: https://astronomer.io/docs/llms.txt
> Use this file to discover all available pages before exploring further.
# Develop Airflow DAGs locally with VS Code
This example shows how to set up [VS Code](https://code.visualstudio.com/) for local development with Airflow and the [Astro CLI](/docs/cli/v1.43/overview). Setting up a local development environment allows you to iterate more quickly when developing DAGs by taking advantage of IDE features like code autocompletion, identifying deprecated or unused imports, and error and warning syntax highlighting.
## Before you start
Before trying this example, make sure you have:
* [VS Code](https://code.visualstudio.com/)
* The [Dev Containers](https://marketplace.visualstudio.com/items?itemName=ms-vscode-remote.remote-containers) VS Code extension
* The [Astro CLI](/docs/cli/v1.43/install-cli)
* An Astro project running locally on your computer. See [Getting started with the Astro CLI](/docs/cli/v1.43/get-started-cli)
## Write Airflow code with VS Code
Follow these steps to start writing your DAGs in VS Code.
1. Open the folder containing your Astro Project in VS Code. In the bottom left corner of your VS Code window, click the green containers icon and select **Open Folder in Container...**
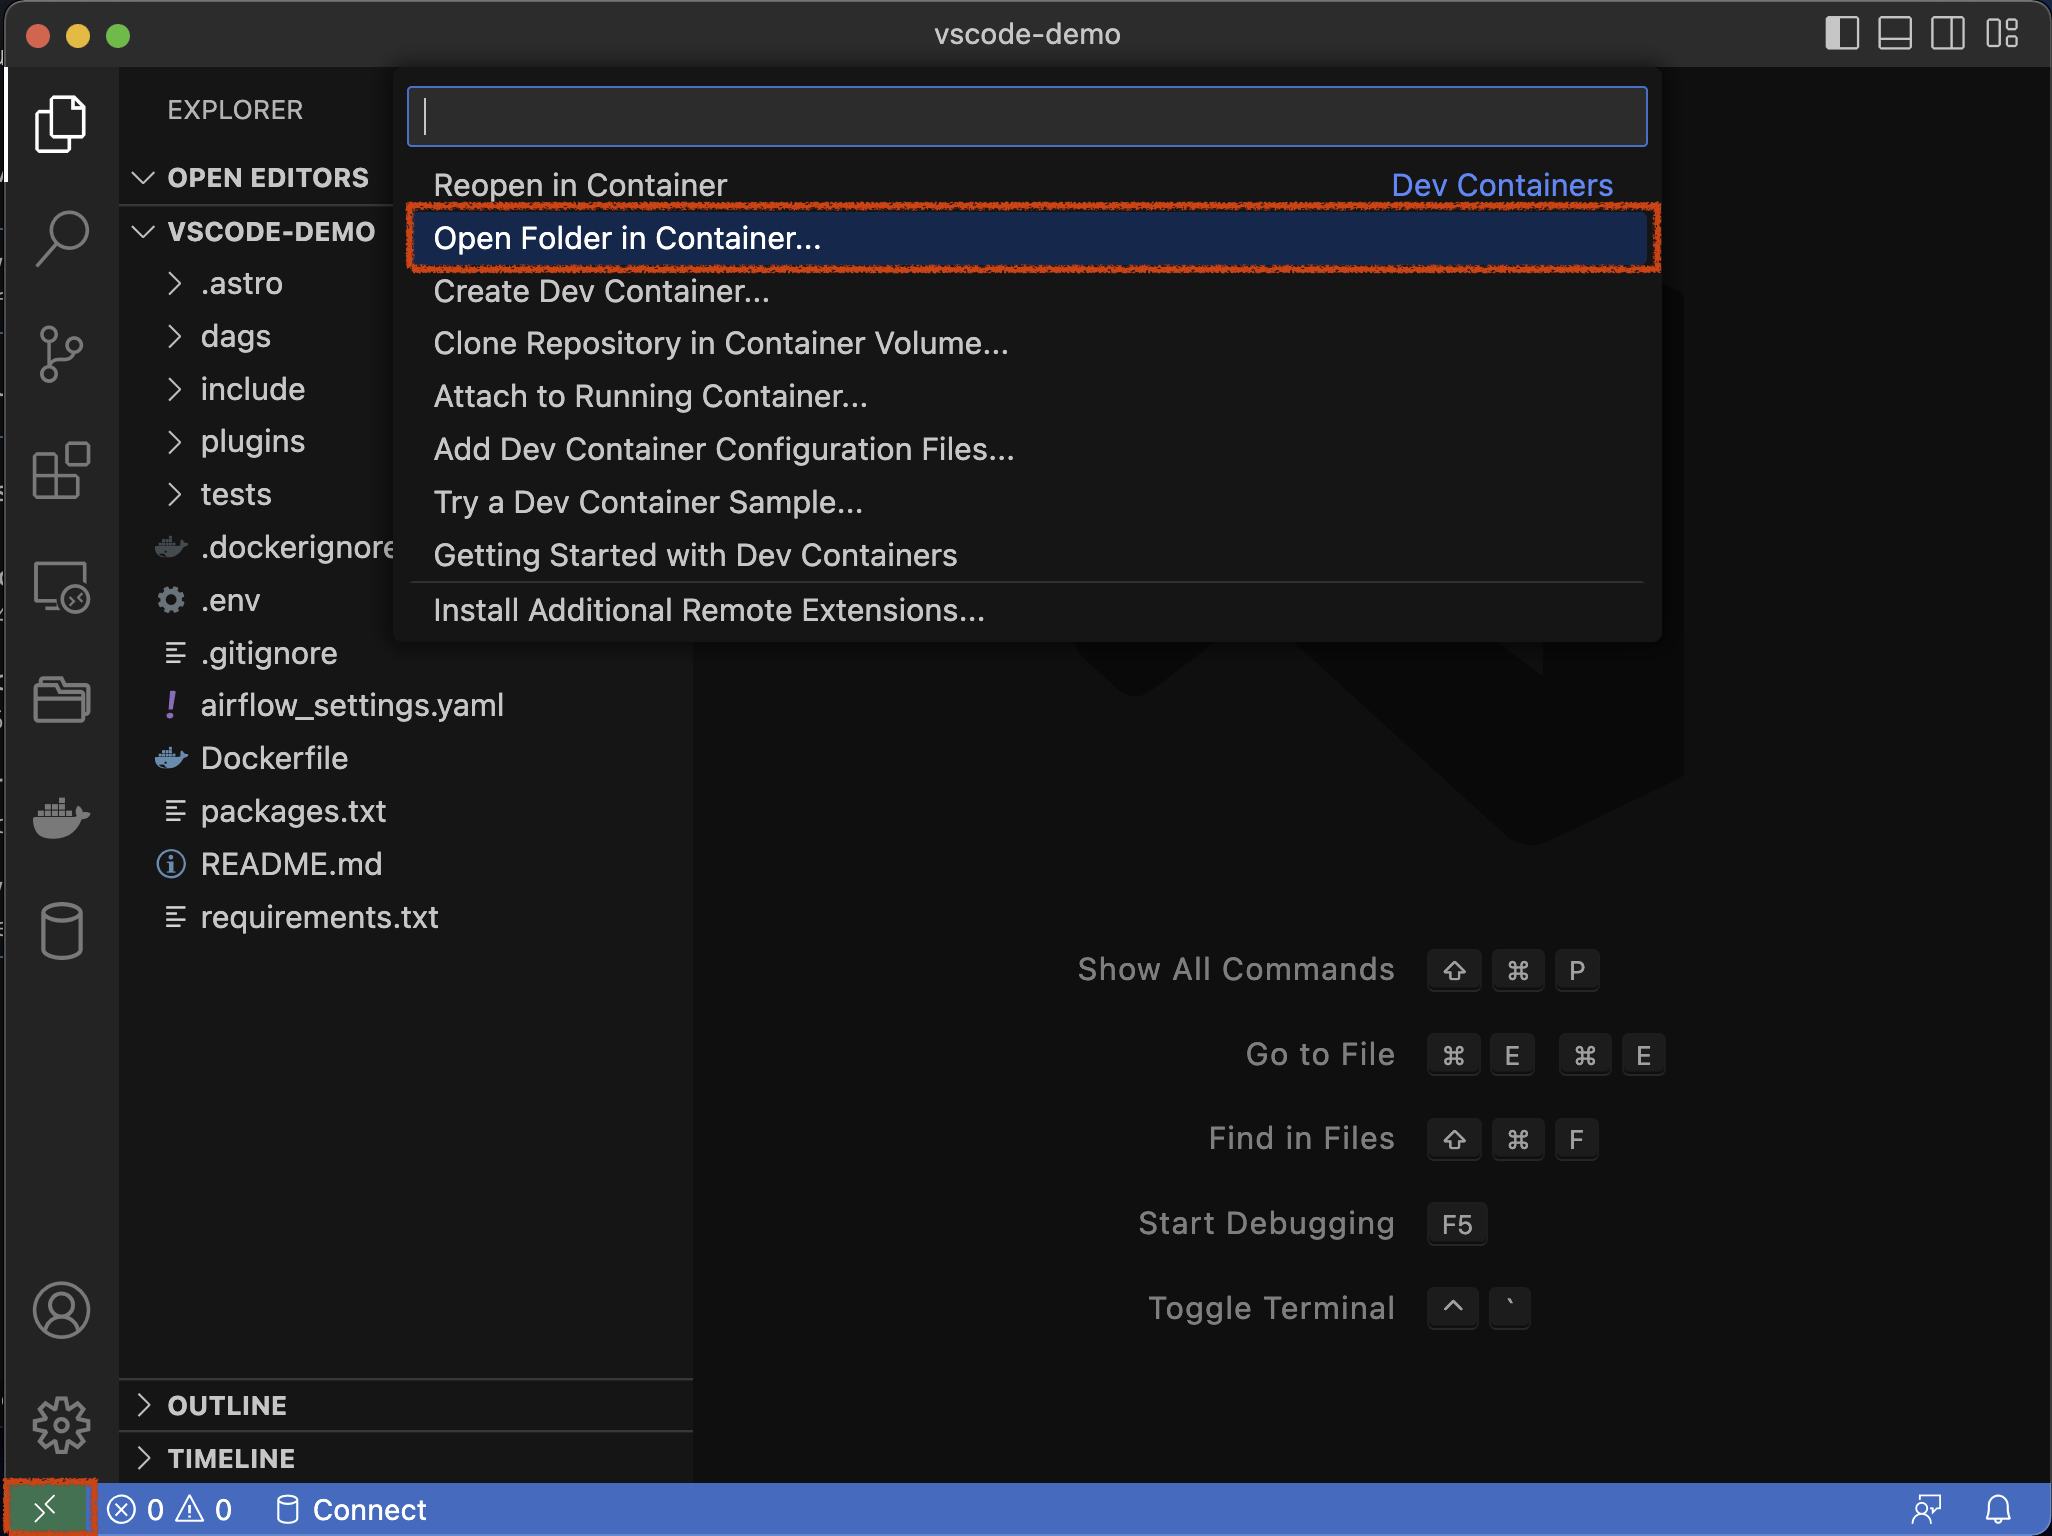 2. The Finder/File Explorer will open prompting you to select the project folder. Ensure that your Astro project is selected and click **Open**, then **From 'Dockerfile'**.
A new VS Code window appears. Note in the lower left corner of the window that your IDE is now pointing to that running Docker container.
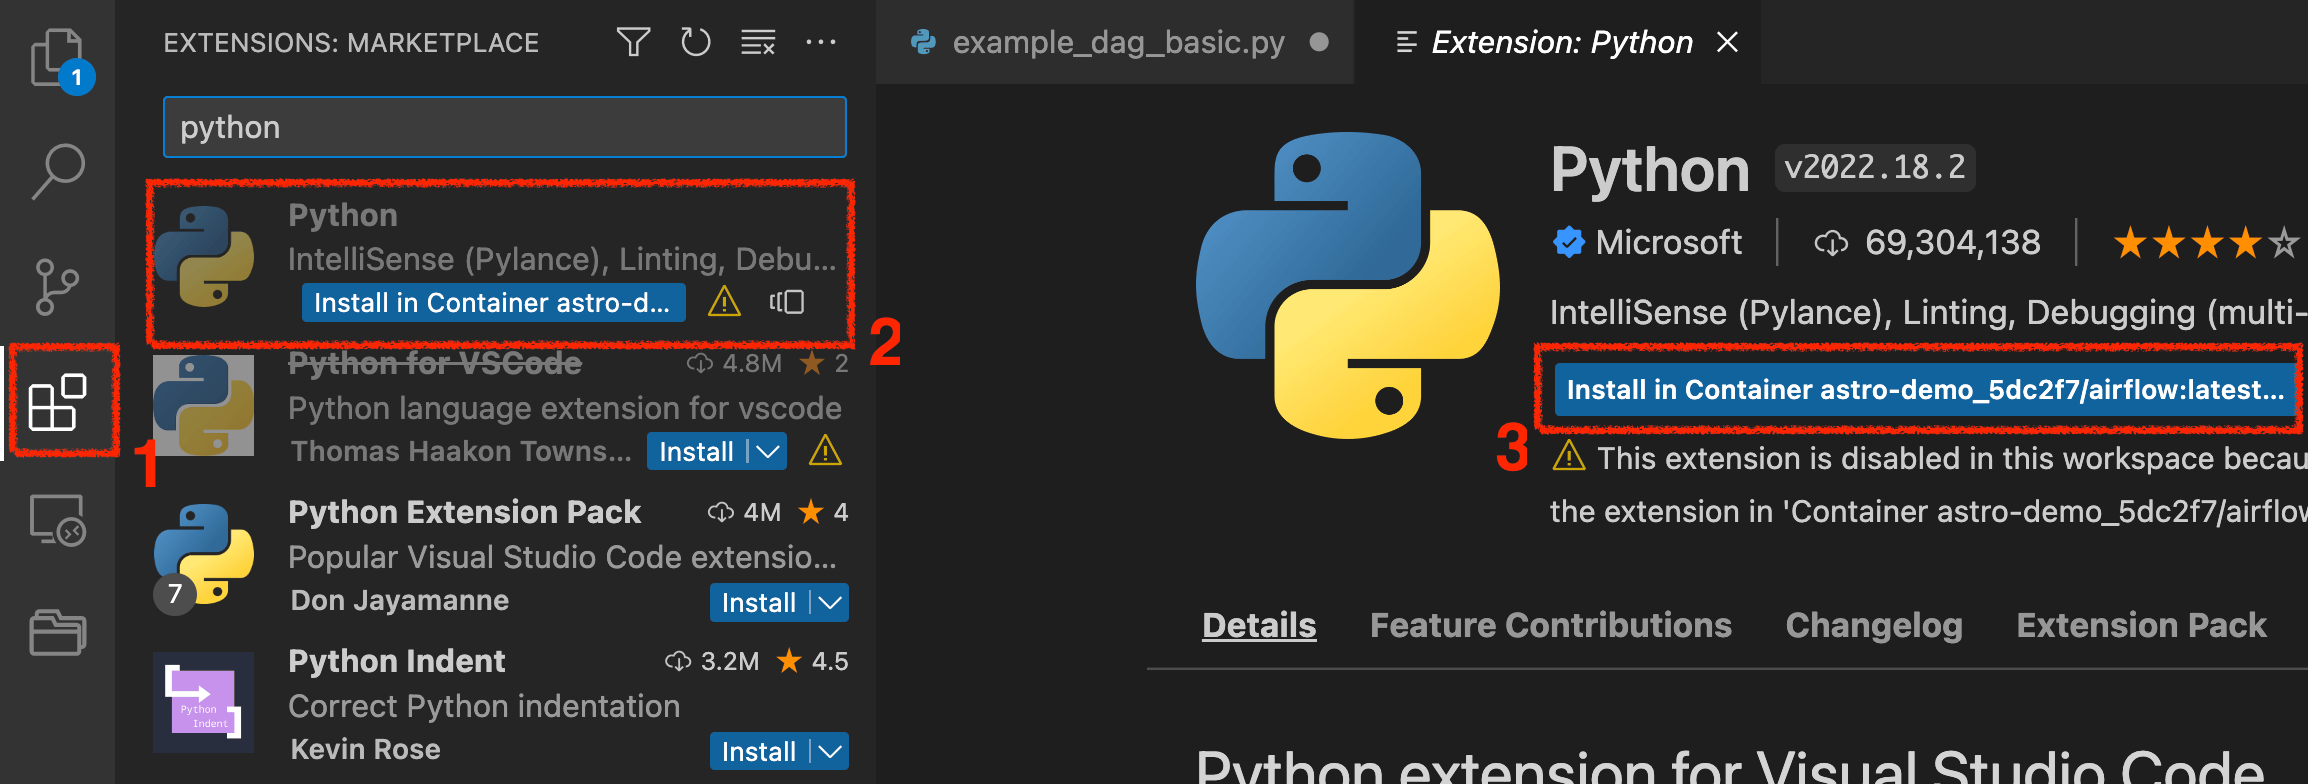
3. Install the [Python Extension](https://marketplace.visualstudio.com/items?itemName=ms-python.python) to your new session of VS Code. Go to the **Extensions** nav bar option, search for `Python`, and the first result should be the extension published by Microsoft. Install it by clicking the button **Install in Container \**.
2. The Finder/File Explorer will open prompting you to select the project folder. Ensure that your Astro project is selected and click **Open**, then **From 'Dockerfile'**.
A new VS Code window appears. Note in the lower left corner of the window that your IDE is now pointing to that running Docker container.
3. Install the [Python Extension](https://marketplace.visualstudio.com/items?itemName=ms-python.python) to your new session of VS Code. Go to the **Extensions** nav bar option, search for `Python`, and the first result should be the extension published by Microsoft. Install it by clicking the button **Install in Container \**.
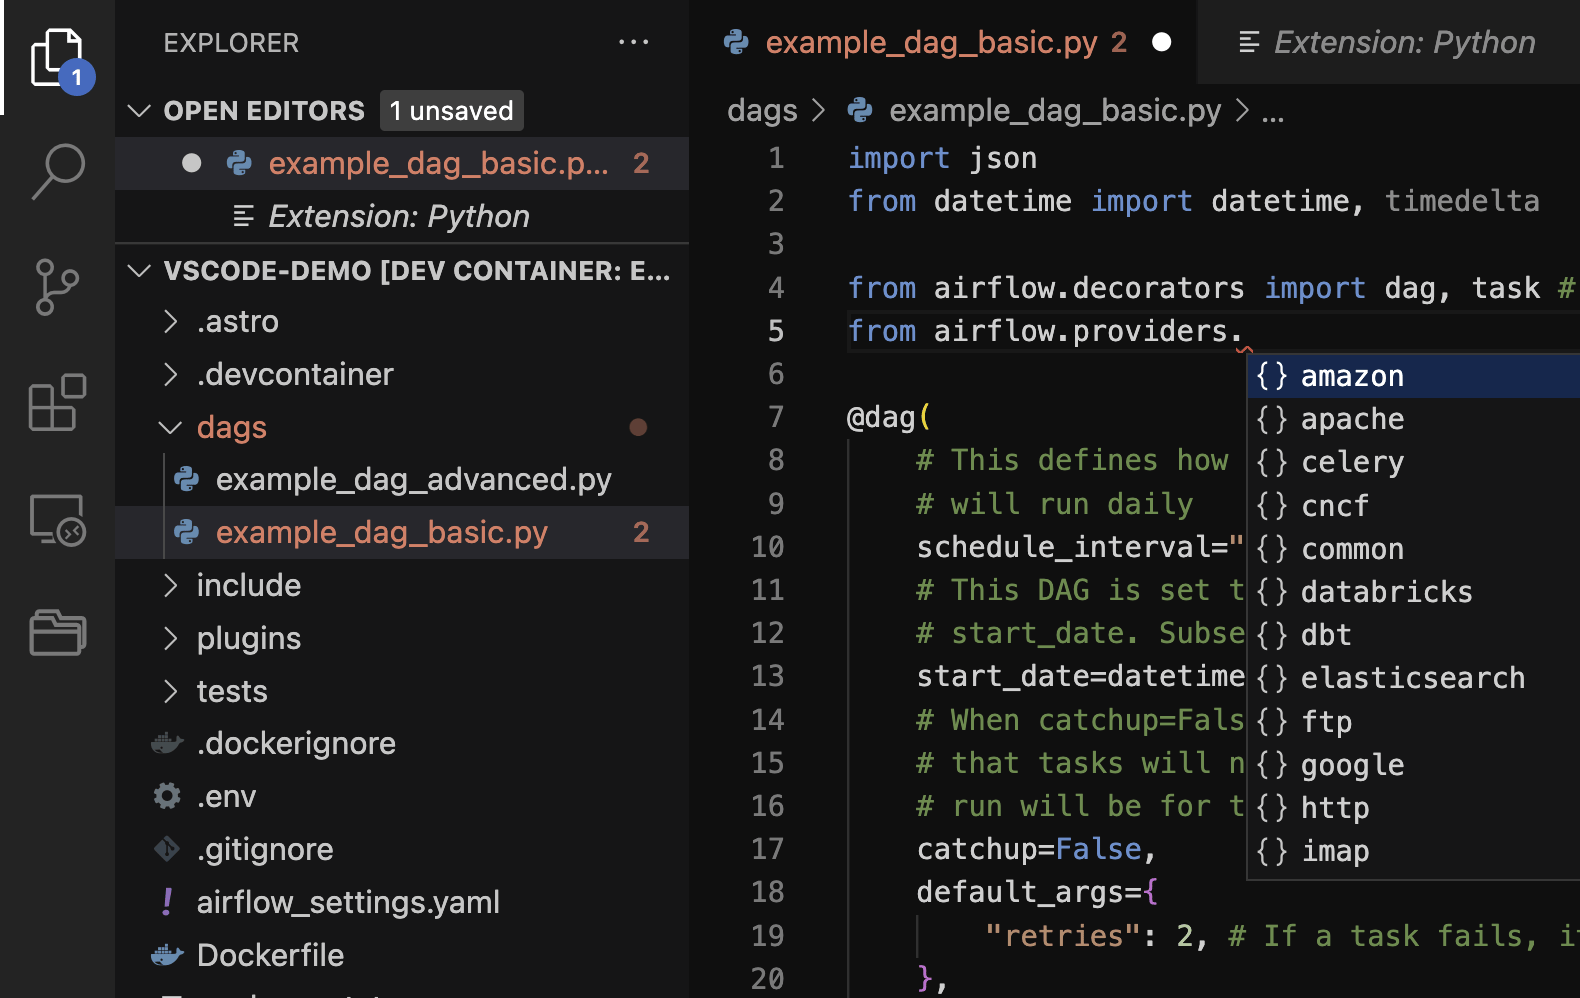
 4. Ensure the Python interpreter is configured properly by opening the `dags/example_dag_basic.py` file in your Astro project `dags/` folder and start writing some Python.
After you configure the integration, VS Code starts showing warnings and autocompletion suggestions for Airflow. In the example below, you can see that the Python interpreter is attempting to auto-complete the import line.
4. Ensure the Python interpreter is configured properly by opening the `dags/example_dag_basic.py` file in your Astro project `dags/` folder and start writing some Python.
After you configure the integration, VS Code starts showing warnings and autocompletion suggestions for Airflow. In the example below, you can see that the Python interpreter is attempting to auto-complete the import line.
 ## See also
* [Develop with PyCharm](/docs/learn/2.x/pycharm-local-dev)
* [Debug interactively with `dag.test`()](/docs/learn/testing-airflow#debug-interactively-with-dag-test)
## See also
* [Develop with PyCharm](/docs/learn/2.x/pycharm-local-dev)
* [Debug interactively with `dag.test`()](/docs/learn/testing-airflow#debug-interactively-with-dag-test)