> ## Documentation Index
> Fetch the complete documentation index at: https://astronomer.io/docs/llms.txt
> Use this file to discover all available pages before exploring further.
# Use MLflow with Apache Airflow
The [MLflow Airflow provider](https://github.com/astronomer/airflow-provider-mlflow) has been deprecated and is no longer maintained. This tutorial was kept for reference purposes only.
[MLflow](https://mlflow.org/) is a popular tool for tracking and managing machine learning models. It can be used together with Airflow for ML orchestration (MLOps), leveraging both tools for what they do best. In this tutorial, you’ll learn about three different ways you can use MLflow with Airflow.
## Three ways to use MLflow with Airflow
The DAG in this tutorial shows three different ways Airflow can interact with MLflow:
* Use an MLflow operator from the [MLflow Airflow provider](https://github.com/astronomer/airflow-provider-mlflow). The MLflow provider contains several operators that abstract over common actions you might want to perform in MLflow, such as creating a deployment with the [`CreateDeploymentOperator`](https://github.com/astronomer/airflow-provider-mlflow/blob/main/mlflow_provider/operators/deployment.py) or running predictions from an existing model with the [`ModelLoadAndPredictOperator`](https://github.com/astronomer/airflow-provider-mlflow/blob/main/mlflow_provider/operators/pyfunc.py).
* Use an MLflow hook from the MLflow Airflow provider. The MLflow provider contains several [Airflow hooks](/docs/learn/2.x/what-is-a-hook) that allow you to connect to MLflow using credentials stored in an Airflow connection. You can use these hooks if you need to perform actions in MLflow for which no dedicated operator exists. You can also use these hooks to create your own [custom operators](/docs/learn/2.x/airflow-importing-custom-hooks-operators).
* Use the MLflow Python package directly in a [@task decorated task](/docs/learn/2.x/airflow-decorators). The MLflow Python package contains functionality like tracking metrics and artifacts with [`mlflow.sklearn.autolog`](https://mlflow.org/docs/latest/python_api/mlflow.sklearn.html). You can use this package to write custom Airflow tasks for ML-related actions like feature engineering.
## Time to complete
This tutorial takes approximately 30 minutes to complete.
## Assumed knowledge
To get the most out of this tutorial, make sure you have an understanding of:
* The basics of MLflow. See [MLflow Concepts](https://mlflow.org/docs/latest/concepts.html).
* Airflow fundamentals, such as writing DAGs and defining tasks. See [Get started with Apache Airflow](/docs/learn/2.x/get-started-with-airflow).
* Airflow operators. See [Operators 101](/docs/learn/2.x/what-is-an-operator).
* Airflow hooks. See [Hooks 101](/docs/learn/2.x/what-is-a-hook).
* Airflow connections. See [Managing your Connections in Apache Airflow](/docs/learn/2.x/connections).
## Prerequisites
* The [Astro CLI](/docs/cli/v1.43/get-started-cli).
* An [MLflow instance](https://www.mlflow.org/docs/latest/quickstart.html). This tutorial uses a local instance.
* An object storage connected to your MLflow instance. This tutorial uses [MinIO](https://min.io/).
## Step 1: Configure your Astro project
1. Create a new Astro project:
```sh wrap theme={null}
$ mkdir astro-mlflow-tutorial && cd astro-mlflow-tutorial
$ astro dev init
```
2. Add the following packages to your `packages.txt` file:
```text wrap theme={null}
git
gcc
gcc python3-dev
```
3. Add the following packages to your `requirements.txt` file:
```text wrap theme={null}
airflow-provider-mlflow==1.1.0
mlflow-skinny==2.3.2
```
## Step 2: Configure your Airflow connection
To connect Airflow to your MLflow instance, you need to create a [connection in Airflow](/docs/learn/2.x/connections).
1. Run `astro dev start` in your Astro project to start up Airflow and open the Airflow UI at `localhost:8080`.
2. In the Airflow UI, go to **Admin** > **Connections** and click **+**.
3. Create a new connection named `mlflow_default` and choose the `HTTP` connection type. Enter the following values to create a connection to a local MLflow instance:
* **Connection ID**: `mlflow_default`
* **Connection Type**: `HTTP`
* **Host**: `http://host.docker.internal`
* **Port**: `5000`
If you are using a remote MLflow instance, enter your MLflow instance URL as the **Host** and your username and password as the **Login** and **Password** in the connection. If you are running your MLflow instance via Databricks, enter your Databricks URL as the **Host**, enter `token` as the **Login** and your [Databricks personal access token](https://docs.databricks.com/dev-tools/auth.html#personal-access-tokens-for-users) as the **Password**.
When you test the connection from the Airflow UI, note that the **Test** button might return a 405 error message even if your credentials are correct.
## Step 3: Create your DAG
1. In your `dags` folder, create a file called `mlflow_tutorial_dag.py`.
2. Copy the following code into the file. Make sure to provide the name of a bucket in your object storage that is connected to your MLflow instance to the `ARTIFACT_BUCKET` variable.
```python expandable wrap theme={null}
"""
### Show three ways to use MLFlow with Airflow
This DAG shows how you can use the MLflowClientHook to create an experiment in MLFlow,
directly log metrics and parameters to MLFlow in a TaskFlow task via the mlflow Python package, and
create a new model using the CreateRegisteredModelOperator of the MLflow Airflow provider package.
"""
from airflow.decorators import dag, task
from pendulum import datetime
from astro.dataframes.pandas import DataFrame
from mlflow_provider.hooks.client import MLflowClientHook
from mlflow_provider.operators.registry import CreateRegisteredModelOperator
# Adjust these parameters
EXPERIMENT_ID = 1
ARTIFACT_BUCKET = ""
## MLFlow parameters
MLFLOW_CONN_ID = "mlflow_default"
EXPERIMENT_NAME = "Housing"
REGISTERED_MODEL_NAME = "my_model"
@dag(
schedule=None,
start_date=datetime(2023, 1, 1),
catchup=False,
)
def mlflow_tutorial_dag():
# 1. Use a hook from the MLFlow provider to interact with MLFlow within a TaskFlow task
@task
def create_experiment(experiment_name, artifact_bucket, **context):
"""Create a new MLFlow experiment with a specified name.
Save artifacts to the specified S3 bucket."""
ts = context["ts"]
mlflow_hook = MLflowClientHook(mlflow_conn_id=MLFLOW_CONN_ID)
new_experiment_information = mlflow_hook.run(
endpoint="api/2.0/mlflow/experiments/create",
request_params={
"name": ts + "_" + experiment_name,
"artifact_location": f"s3://{artifact_bucket}/",
},
).json()
return new_experiment_information
# 2. Use mlflow.sklearn autologging in a TaskFlow task
@task
def scale_features(experiment_id: str):
"""Track feature scaling by sklearn in Mlflow."""
from sklearn.datasets import fetch_california_housing
from sklearn.preprocessing import StandardScaler
import mlflow
import pandas as pd
df = fetch_california_housing(download_if_missing=True, as_frame=True).frame
mlflow.sklearn.autolog()
target = "MedHouseVal"
X = df.drop(target, axis=1)
y = df[target]
scaler = StandardScaler()
with mlflow.start_run(experiment_id=experiment_id, run_name="Scaler") as run:
X = pd.DataFrame(scaler.fit_transform(X), columns=X.columns)
mlflow.sklearn.log_model(scaler, artifact_path="scaler")
mlflow.log_metrics(pd.DataFrame(scaler.mean_, index=X.columns)[0].to_dict())
X[target] = y
# 3. Use an operator from the MLFlow provider to interact with MLFlow directly
create_registered_model = CreateRegisteredModelOperator(
task_id="create_registered_model",
name="{{ ts }}" + "_" + REGISTERED_MODEL_NAME,
tags=[
{"key": "model_type", "value": "regression"},
{"key": "data", "value": "housing"},
],
)
(
create_experiment(
experiment_name=EXPERIMENT_NAME, artifact_bucket=ARTIFACT_BUCKET
)
>> scale_features(experiment_id=EXPERIMENT_ID)
>> create_registered_model
)
mlflow_tutorial_dag()
```
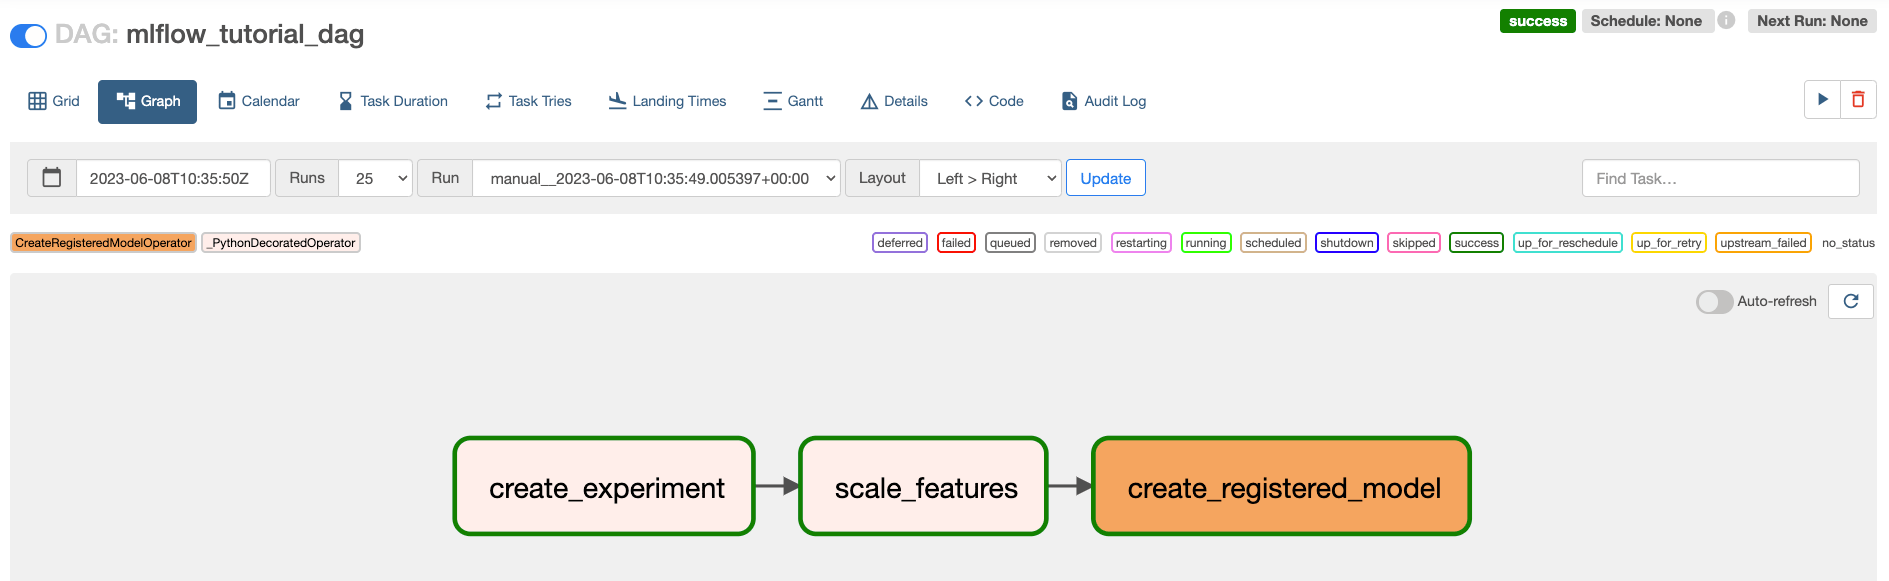
This DAG consists of three tasks, each showing a different way to use MLflow with Airflow.
* The `create_experiment` task creates a new experiment in MLflow by using the [`MLflowClientHook`](https://github.com/astronomer/airflow-provider-mlflow/blob/main/mlflow_provider/hooks/client.py) in a TaskFlow API task. The `MLflowClientHook` is one of several [hooks](https://github.com/astronomer/airflow-provider-mlflow/tree/main/mlflow_provider/hooks) in the MLflow provider that contains abstractions over calls to the MLflow API.
* The `scale_features` task uses the [mlflow](https://pypi.org/project/mlflow/) package in a Python decorated task with [scikit-learn](https://pypi.org/project/scikit-learn/) to log information about the scaler to MLflow. This functionality isn't included in any modules of the MLflow provider, so a custom Python function is the best way to implement this task.
* The `create_registered_model` task uses the [`CreateRegisteredModelOperator`](https://github.com/astronomer/airflow-provider-mlflow/blob/main/mlflow_provider/operators/registry.py) to register a new model in your MLflow instance.
## Step 4: Run your DAG
1. In the Airflow UI run the `mlflow_tutorial_dag` DAG by clicking the play button.
 2. Open the MLflow UI (if you are running locally at `localhost:5000`) to see the data recorded by each task in your DAG.
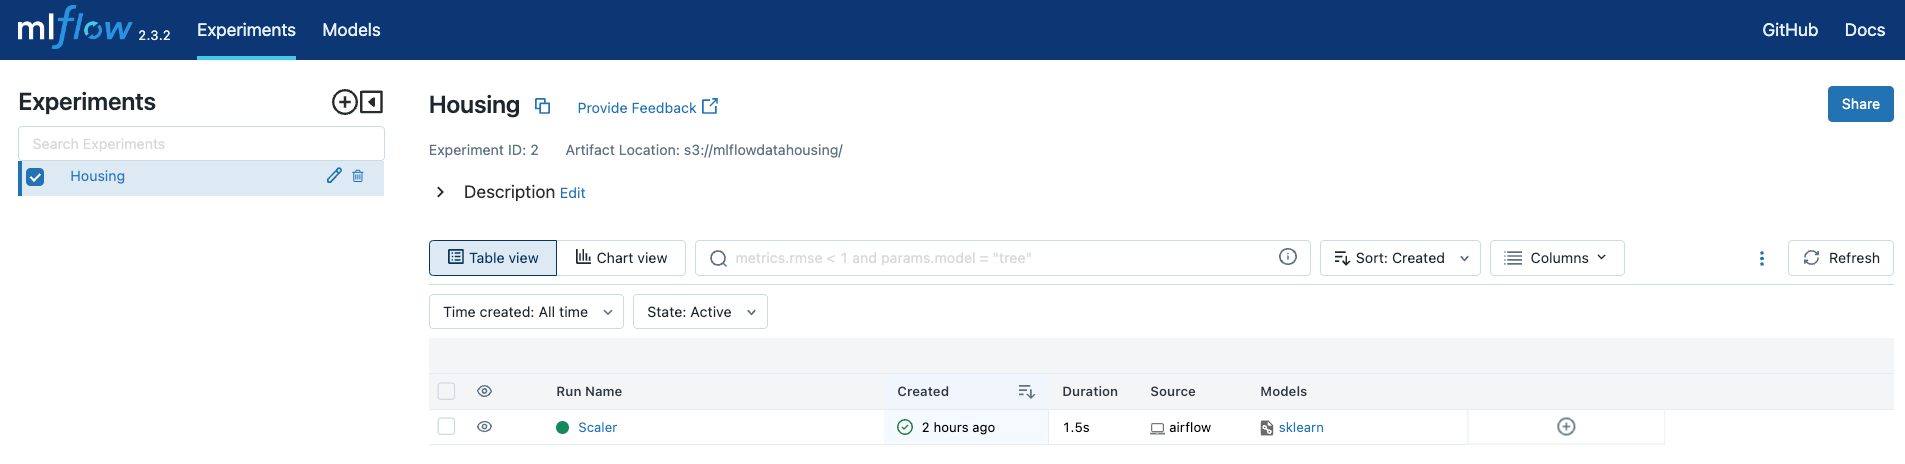
The `create_experiment` task created the `Housing` experiments, where your `Scaler` run from the `scale_features` task was recorded.
2. Open the MLflow UI (if you are running locally at `localhost:5000`) to see the data recorded by each task in your DAG.
The `create_experiment` task created the `Housing` experiments, where your `Scaler` run from the `scale_features` task was recorded.
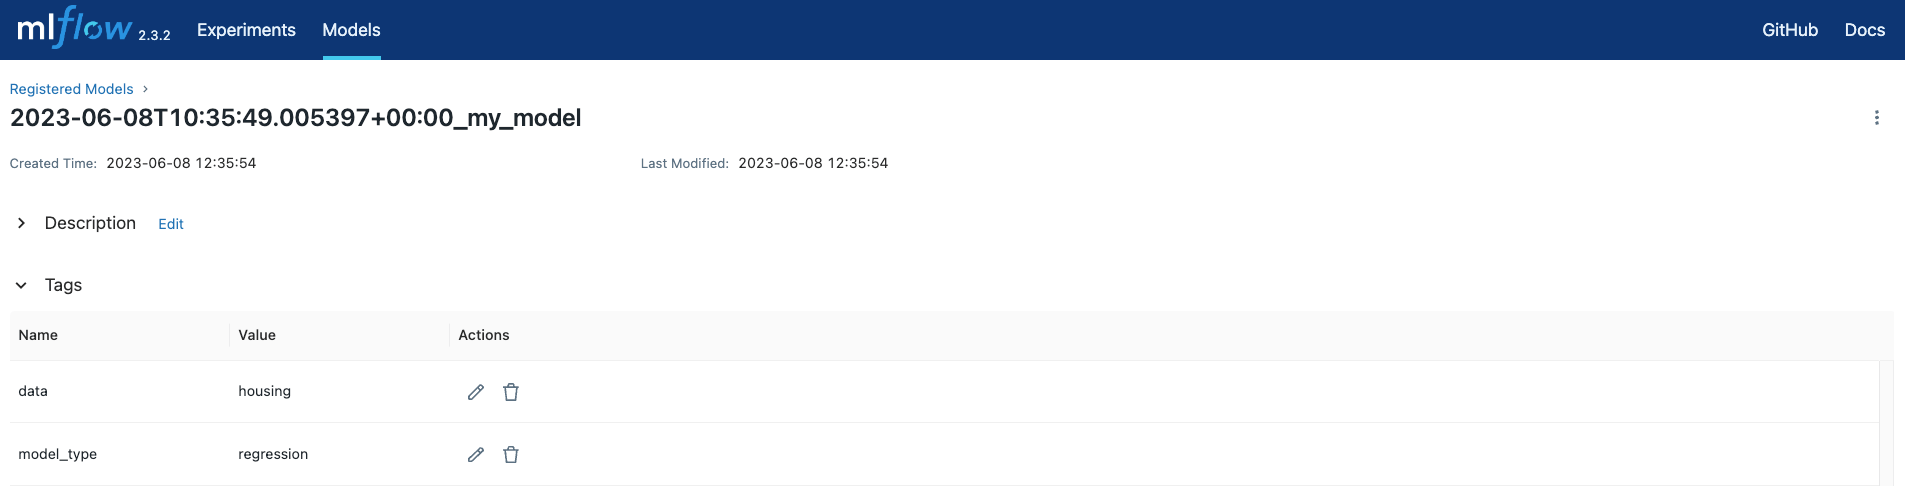
 The `create_registered_model` task created a registered model with two tags.
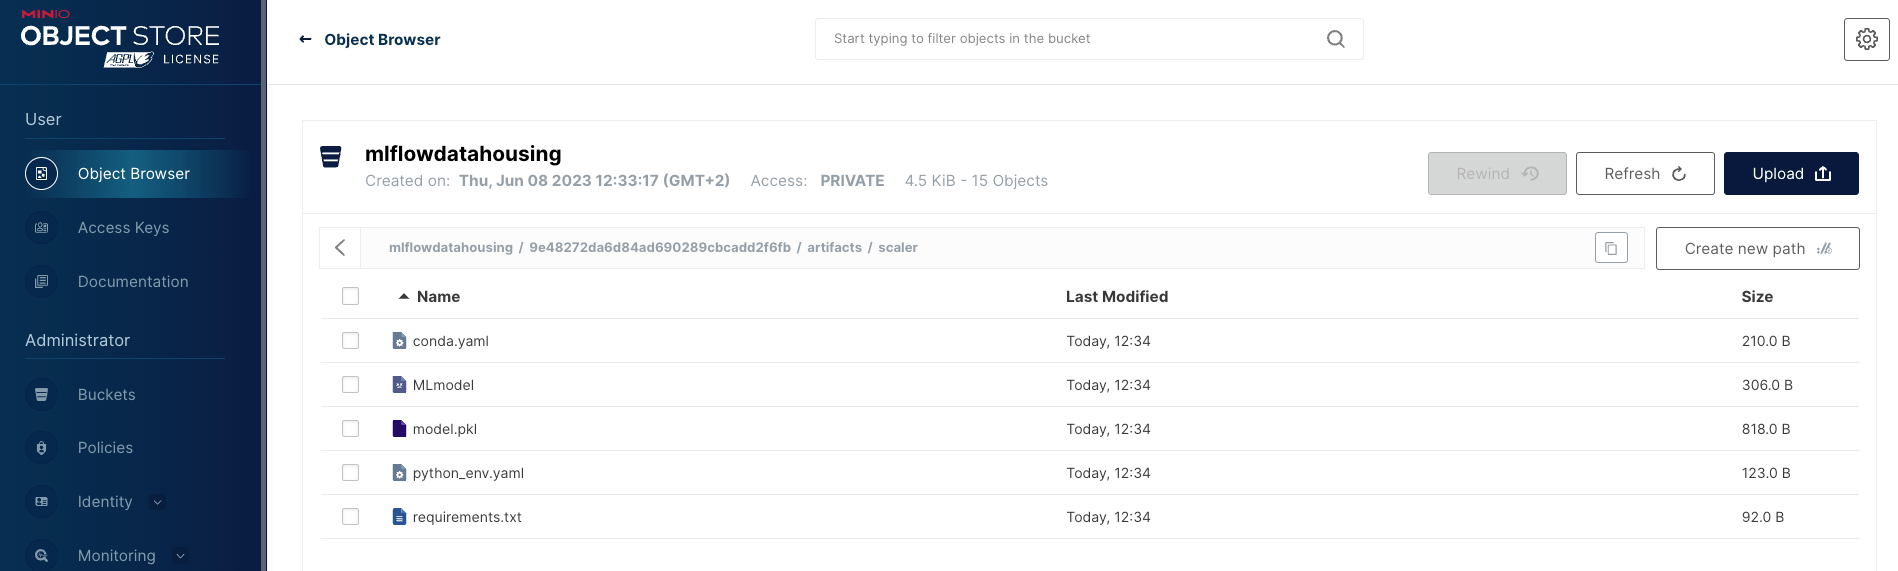
 3. Open your object storage (if you are using a local MinIO instance at `localhost:9001`) to see your MLflow artifacts.
 ## Conclusion
Congratulations! You used MLflow and Airflow together in three different ways. Learn more about other operators and hooks in the MLflow Airflow provider in the [official GitHub repository](https://github.com/astronomer/airflow-provider-mlflow).
## Conclusion
Congratulations! You used MLflow and Airflow together in three different ways. Learn more about other operators and hooks in the MLflow Airflow provider in the [official GitHub repository](https://github.com/astronomer/airflow-provider-mlflow).