> ## Documentation Index
> Fetch the complete documentation index at: https://astronomer.io/docs/llms.txt
> Use this file to discover all available pages before exploring further.
# Run your first Dag with GitHub Actions
The Astro GitHub integration can automatically deploy code from a GitHub repository to Astro without you needing to configure a GitHub action. In addition, the Astro UI shows Git metadata for each deploy on your Deployment information screen. See [Deploy code with the Astro GitHub integration](/docs/astro/deploy-github-integration) for setup steps.
Astro is the industry's leading managed service for [Apache Airflow®](https://airflow.apache.org/). To quickly learn how Astro works, follow the steps in this quickstart to create an Airflow environment and run your first Dag with GitHub Actions.
Specifically, you will:
* Authenticate and sign in to Astro.
* Create a Deployment.
* Fork an example GitHub repository with a new Astro project.
* Configure GitHub Actions.
* Trigger the GitHub Action to deploy an example Dag to Astro.
* Trigger a run of the example Dag in the Airflow UI.
The steps take about 15 minutes. If you prefer to use a CLI, you can alternatively create and run your first Dag [using the Astro CLI](/docs/astro/first-dag-cli) in the same amount of time.
This tutorial assumes that you're familiar with basic Apache Airflow concepts. If you're new to Airflow and want a more general introduction, see the [Airflow 101 Learning Path](https://academy.astronomer.io/path/airflow-101).
## Prerequisites
* An Astro account. To start an Astro trial and create your free trial account, see [Start a trial](/docs/astro/trial).
* A [GitHub account](https://docs.github.com/en/get-started/signing-up-for-github).
If you're on your organization's network and can't access Astro, make a request to add the following domains to the allowlist on your network:
* `https://cloud.astronomer.io/`
* `https://api.astronomer.io/`
* `https://images.astronomer.cloud/`
* `https://auth.astronomer.io/`
* `https://updates.astronomer.io/`
* `https://install.astronomer.io/`
* `https://install.astronomer.io/`
* `https://astro-.datakin.com/`
* `https://.astronomer.run/`
**A new Astro UI is here**
Astronomer has redesigned the Astro UI. Try the new experience and switch your instructions using the **New Astro UI** and **Legacy UI** tabs on this page. Your selection is remembered across the docs.
## Step 1: Create a Deployment
An Astro *Deployment* is an instance of Apache Airflow that is powered by all core Airflow components, including a webserver, scheduler, and one or more workers. You deploy Dags to a Deployment, and you can have one or more Deployments within your Workspace.
1. Log in to the [Astro UI](https://cloud.astronomer.io), then on the **Deployments** page click **+ Deployment**.
2. In the **Name** field, enter a name for your Deployment. You can leave the other fields at their default values. This creates a basic Deployment on a standard Astronomer-hosted cluster. You can delete the Deployment after you finish testing your example Dag runs.
3. Click **Create Deployment**.
A confirmation message appears indicating that the Deployment status is **Creating** until all underlying components in the Deployment are healthy. During this time, the Airflow UI is unavailable and you can't deploy code or modify Deployment settings. When the Deployment is ready, the status changes to **Healthy**.
For more information about possible Deployment health statuses, see [Deployment health](/docs/astro/deployment-health-incidents). Or, to learn more about how to customize your Deployment settings, see [Deployment settings](/docs/astro/deployment-settings).
Astro contains an in-product tutorial that guides you through Steps 2-4 of this document and includes shortcut buttons for some key Astro actions. If you prefer to finish the quickstart this way, open your **Deployments** page in the Astro UI and choose your Deployment. In the **Deploy your first dag** section, click **With GitHub Actions** and follow the steps in the window that appears.
If you don't see the **Deploy your first dag** option your Deployment page, click **Deploy dags?** to open it.
## Step 2: Fork the example project repository
This repository contains an *Astro project*, which is a collection of files required for running Airflow on Astro. An Astro project includes folders for Dag files, plugins, dependencies, and more. Specifically, this Astro project includes an example Dag which is a simple ETL pipeline example that queries the list of astronauts currently in space from the Open Notify API and prints a statement for each astronaut. The Dag uses the TaskFlow API to define tasks in Python, and dynamic task mapping to dynamically print a statement for each astronaut.
1. Open [the example project repository](https://github.com/astronomer/astro-example-dags/fork) in a new tab or browser window.
2. **Choose an owner** from your available options.
3. Keep the selection to **Copy the `main` branch only**.
4. Click **Create fork**.
## Step 3: Set up the GitHub Actions Workflow
This example repository also includes a pre-configured [Astronomer deploy action](https://github.com/astronomer/deploy-action), which you can use to set up a CI/CD deployment pipeline. In this step, you'll configure the GitHub action to deploy code from your forked repository to Astro and run the workflow.
1. Open two browser windows: one with the [Astro UI](https://cloud.astronomer.io), and one with your forked GitHub repository.
2. In the Astro UI, choose the Deployment where you want to deploy your Astro project.
3. In GitHub, open your forked repository and click **Actions**.
4. Click **I understand my workflows, go ahead and enable them.**
The [workflow](https://github.com/astronomer/astro-example-dags/blob/main/.github/workflows/deploy-to-astro.yaml) is a script that uses API tokens to deploy Dags from a GitHub repository to your Deployment, without requiring any local development.
5. Choose the **Astronomer CI - Deploy Code** workflow.
6. Click **Run workflow**. This opens a window to enter information about your Astro Deployment.
7. In the Astro UI, copy your **Deployment ID** from the Deployment information.
8. In GitHub, paste your **Deployment ID**.
9. In the Astro UI, click the **Access** tab on the Deployment screen.
10. Click **API Tokens**.
11. Click **+ Add API Token** and select **New Deployment API Token** to create a new API token, and give the token a **Name** and an **Expiration**.
12. Click **Create API Token**, then copy the token that appears.
For security reasons, this is the only opportunity you have to copy your API token. After you exit the modal window, you can't copy it again. Be sure to save your token in a safe place or paste it immediately.
13. In GitHub, paste the API Token in the **API Token** field on your GitHub Actions workflow page.
14. Click **Run workflow**.
1. Open two browser windows: one with the [Astro UI](https://cloud.astronomer.io), and one with your forked GitHub repository.
2. In the Astro UI, choose the Deployment where you want to deploy your Astro project.
3. In GitHub, open your forked repository and click **Actions**.
4. Click **I understand my workflows, go ahead and enable them.**
The [workflow](https://github.com/astronomer/astro-example-dags/blob/main/.github/workflows/deploy-to-astro.yaml) is a script that uses API tokens to deploy Dags from a GitHub repository to your Deployment, without requiring any local development.
5. Choose the **Astronomer CI - Deploy Code** workflow.
6. Click **Run workflow**. This opens a window to enter information about your Astro Deployment.
7. In the Astro UI, copy your **Deployment ID** from the Deployment information.
8. In GitHub, paste your **Deployment ID**.
9. In the Astro UI, click the **Access** tab on the Deployment screen.
10. Click **API Tokens**.
11. Click **+ API Token** and select **Add Deployment API Token** to create a new API token, and give the token a **Name** and an **Expiration**.
12. Click **Create API Token**, then copy the token that appears.
For security reasons, this is the only opportunity you have to copy your API token. After you exit the modal window, you can't copy it again. Be sure to save your token in a safe place or paste it immediately.
13. In GitHub, paste the API Token in the **API Token** field on your GitHub Actions workflow page.
14. Click **Run workflow**.
This automatically deploys the example Dags in your Astro project to your Deployment.
## Step 4: View your Dag run results
Open your Deployment in the Astro UI and click **DAGs** in the left sidebar, then click **Open in Airflow** for **example\_astronauts**. This opens the Dag details page for **example\_astronauts** in the Airflow UI. Each column in the grid represents a complete Dag run, and each block in the column represents a specific task instance.
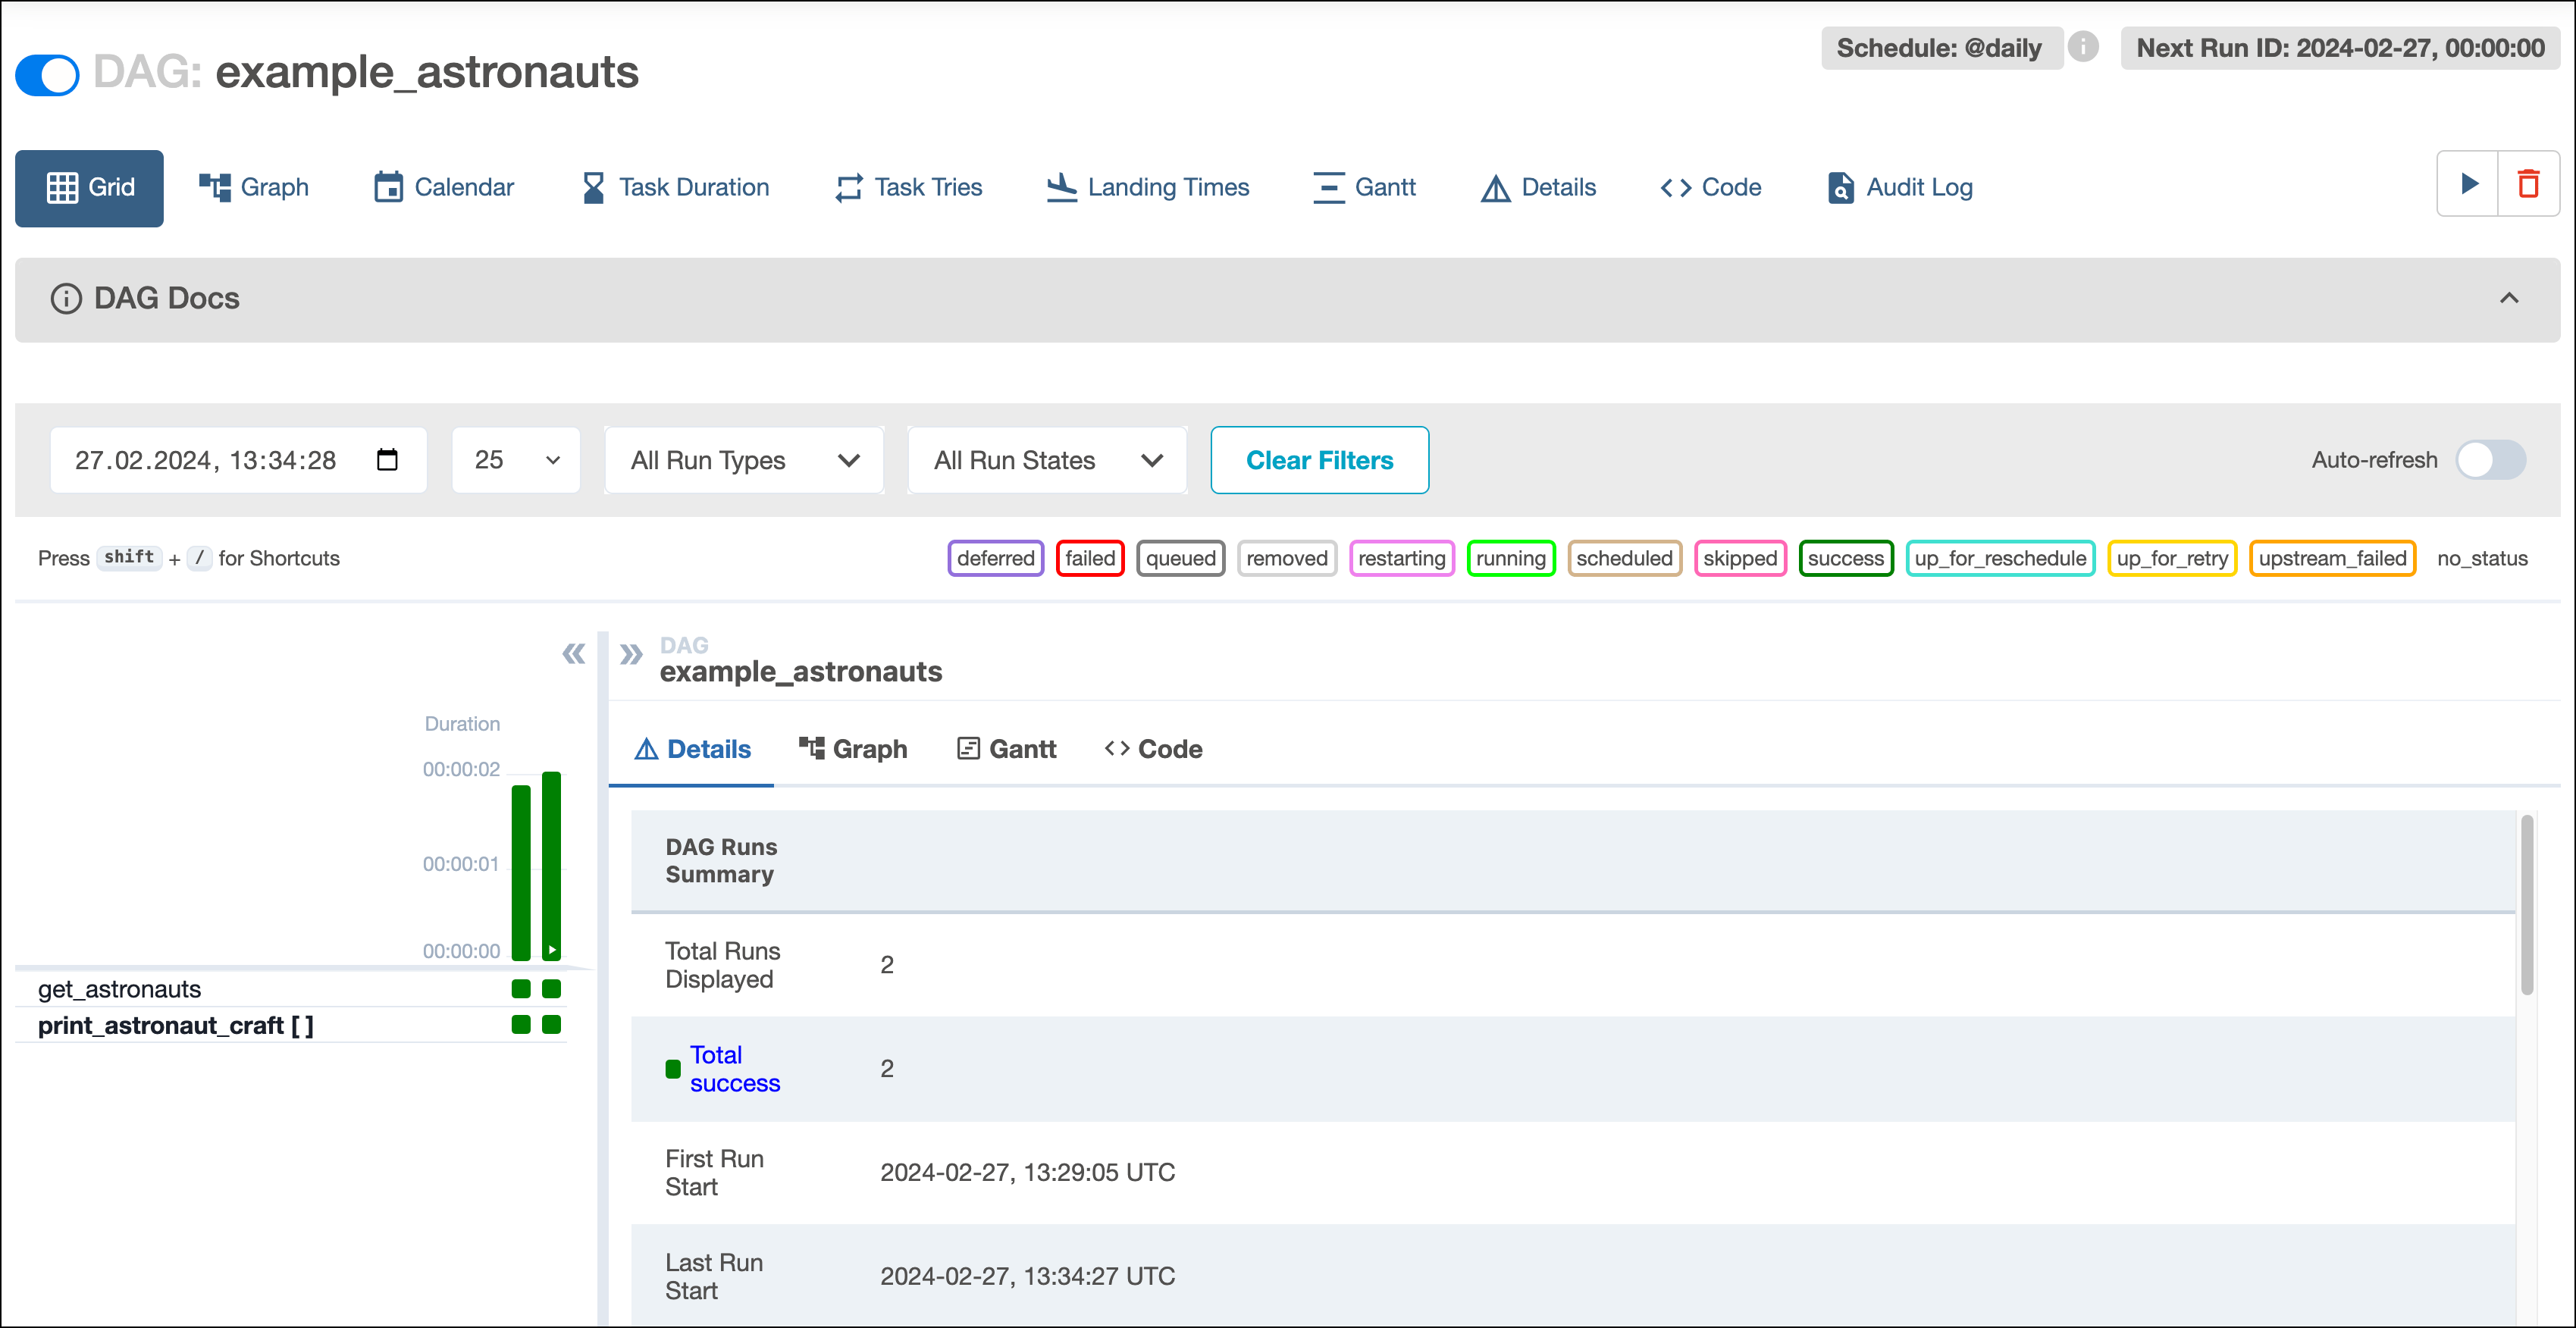 Congratulations! You deployed and ran your first Dag on Astro with GitHub Actions.
## Next Steps
* Develop your [Astro project](/docs/cli/v1.43/run-airflow-locally).
* Read more about [Developing CI/CD workflows](/docs/astro/set-up-ci-cd).
* Install [the CLI](/docs/cli/v1.43/install-cli) to test Dags or run Airflow locally.
* [Write your first Dag](/docs/learn/get-started-with-airflow).
Congratulations! You deployed and ran your first Dag on Astro with GitHub Actions.
## Next Steps
* Develop your [Astro project](/docs/cli/v1.43/run-airflow-locally).
* Read more about [Developing CI/CD workflows](/docs/astro/set-up-ci-cd).
* Install [the CLI](/docs/cli/v1.43/install-cli) to test Dags or run Airflow locally.
* [Write your first Dag](/docs/learn/get-started-with-airflow).