> ## Documentation Index
> Fetch the complete documentation index at: https://astronomer.io/docs/llms.txt
> Use this file to discover all available pages before exploring further.
# Run your first Dag with the Astro CLI
Astro is the industry's leading managed service for [Apache Airflow®](https://airflow.apache.org/). To quickly learn how Astro works, follow the steps in this quickstart to create an Airflow environment and run your first Dag with the Astro CLI.
Specifically, you will:
* Install the CLI.
* Authenticate and sign in to Astro.
* Create a Deployment.
* Create an Astro project.
* Deploy Dags to Astro with the Astro CLI.
* Trigger a run of an example Dag in the Airflow UI.
This tutorial takes about 15 minutes. If you're new to Airflow and want a more in-depth tutorial, see [Airflow 101 Learning Path](https://academy.astronomer.io/path/airflow-101).
If you want to deploy your first Dag without installing any software to your local machine, see [Run your first Dag with GitHub Actions](/docs/astro/first-dag-github-actions).
## Prerequisites
* An Astro account. To start an Astro trial and create your free trial account, see [Start a trial](/docs/astro/trial).
You don't need Docker or Podman to run Airflow locally. Standalone mode runs Airflow directly on your machine in a virtual environment. See [Step 4](#step-4-test-your-project-locally) for details.
If you're on your organization's network and can't access Astro, make a request to add the following domains to the allowlist on your network:
* `https://cloud.astronomer.io/`
* `https://api.astronomer.io/`
* `https://images.astronomer.cloud/`
* `https://auth.astronomer.io/`
* `https://updates.astronomer.io/`
* `https://install.astronomer.io/`
* `https://astro-.datakin.com/`
* `https://.astronomer.run/`
## Step 1: Install the Astro CLI
If you're encountering problems with installing the CLI or don't want to install software locally, see [Run your first Dag with GitHub Actions](/docs/astro/first-dag-github-actions).
Use [Homebrew](https://brew.sh/) to install the latest version of the [Astro CLI](/docs/cli/v1.43/overview).
```sh wrap theme={null}
brew install astro
```
For more information about Astro CLI install options and troubleshooting, see [Install the Astro CLI](/docs/cli/v1.43/install-cli).
If you're encountering problems with installing the CLI or don't want to install software locally, see [Run your first Dag with GitHub Actions](/docs/astro/first-dag-github-actions).
The winget command line tool is supported on Windows 10 1709 (build 16299) or later, and is bundled with Windows 11 and modern versions of Windows 10 by default as the App Installer. If you don't have winget, you can [Install the CLI on Windows manually](/docs/cli/v1.43/install-cli) instead.
1. Make sure you have the following:
* Windows Subsystem for Linux (WSL) 2 enabled: See [Enable the Windows Subsystem for Linux](https://docs.microsoft.com/en-us/windows/wsl/install), [WSL basic commands](https://learn.microsoft.com/en-us/windows/wsl/basic-commands), and [Troubleshooting WSL 2](https://learn.microsoft.com/en-us/windows/wsl/troubleshooting#error-0x80370102-the-virtual-machine-could-not-be-started-because-a-required-feature-is-not-installed).
* After you enable WSL, run:
```sh wrap theme={null}
wsl --update
wsl --install --no-distribution
```
* The latest version of the Windows [App Installer](https://apps.microsoft.com/store/detail/app-installer/9NBLGGH4NNS1?hl=en-ca\&gl=ca).
* Windows 10 1709 (build 16299) or later or Windows 11.
2. Open Windows PowerShell as an administrator and then run the following command:
```sh wrap theme={null}
winget install -e --id Astronomer.Astro
```
3. Run the following command to access the location of the CLI executable:
```sh wrap theme={null}
$env:path.split(";")
```
From the text that appears, copy the path for the Astro CLI executable. It should be similar to `C:\Users\myname\AppData\Local\Microsoft\WinGet\Packages\Astronomer.Astro_Microsoft.Winget.Source_8wekyb3d8bbwe`.
4. Paste the path into File Explorer or open the file path in terminal, then rename the Astro executable to `astro.exe`.
For more information about Astro CLI install options and troubleshooting, see [Install the Astro CLI](/docs/cli/v1.43/install-cli).
If you're encountering problems with installing the CLI or don't want to install software locally, see [Run your first Dag with GitHub Actions](/docs/astro/first-dag-github-actions).
Run the following command to install the latest version of the Astro CLI directly to `PATH`:
```sh wrap theme={null}
curl -sSL install.astronomer.io | sudo bash -s
```
For more information about Astro CLI install options and troubleshooting, see [Install the Astro CLI](/docs/cli/v1.43/install-cli).
## Step 2: Create a Deployment
An Astro *Deployment* is an instance of Apache Airflow that is powered by all core Airflow components, including a webserver, scheduler, and one or more workers. You deploy Dags to a Deployment, and you can have one or more Deployments within a Workspace.
1. Log in to the [Astro UI](https://cloud.astronomer.io), then on the **Deployments** page click **+ Deployment**.
2. In the **Name** field, enter a name for your Deployment. You can leave the other fields at their default values. This creates a basic Deployment on a standard Astronomer-hosted cluster. You can delete the Deployment after you finish testing your example Dag runs.
3. Click **Create Deployment**.
A confirmation message appears indicating that the Deployment status is **Creating** until all underlying components in the Deployment are healthy. During this time, the Airflow UI is unavailable and you can't deploy code or modify Deployment settings. When the Deployment is ready, the status changes to **Healthy**.
For more information about possible Deployment health statuses, see [Deployment health](/docs/astro/deployment-health-incidents). Or, to learn more about how to customize your Deployment settings, see [Deployment settings](/docs/astro/deployment-settings).
## Step 3: Create an Astro project
An *Astro project* contains the set of files necessary to run Airflow, including dedicated folders for your Dag files, plugins, and dependencies. All new Astro projects contain two example Dags. In this tutorial, you'll be deploying these example Dags to your Deployment on Astro.
1. Open your terminal or IDE.
2. Create a new folder for your Astro project:
```sh wrap theme={null}
mkdir
```
3. Open the folder:
```sh wrap theme={null}
cd
```
4. Run the following Astro CLI command to initialize an Astro project in the folder:
```sh wrap theme={null}
astro dev init
```
The command generates the following files in your folder:
```text wrap theme={null}
.
├── .env # Local environment variables
├── dags # Where your dags go
│ ├── example-dag-basic.py # Example dag that showcases a simple ETL data pipeline
│ └── example-dag-advanced.py # Example dag that showcases more advanced Airflow features, such as the TaskFlow API
├── Dockerfile # For the Astro Runtime Docker image, environment variables, and overrides
├── include # For any other files you'd like to include
├── plugins # For any custom or community Airflow plugins
│ └── example-plugin.py
├── tests # For any dag unit test files to be run with pytest
│ └── test_dag_example.py # Example test that checks for basic errors in your dags
├── airflow_settings.yaml # For your Airflow connections, variables and pools (local only)
├── packages.txt # For OS-level packages
└── requirements.txt # For Python packages
```
## Step 4: Test your project locally
Before deploying to Astro, you can test your Dags locally. This step is optional, but Astronomer recommends testing locally to catch issues before deploying.
Run the following command from your project folder:
```sh wrap theme={null}
astro dev start
```
This command builds your project and spins up 4 containers on your machine, one each for the Airflow webserver, scheduler, triggerer, and metadata database.
Standalone mode runs on macOS, Linux, and Windows Subsystem for Linux (WSL) for both Airflow 2 and Airflow 3. It doesn't support native Windows because of Apache Airflow limitations. For more information, see [Apache Airflow prerequisites](https://airflow.apache.org/docs/apache-airflow/stable/installation/prerequisites.html).
Run the following command from your project folder:
```sh wrap theme={null}
astro dev start --standalone
```
This command runs Airflow directly on your machine in a virtual environment, without Docker or Podman. To make standalone mode the default for your project, run:
```sh wrap theme={null}
astro config set dev.mode standalone
```
After your project starts, open the Airflow UI at `http://localhost:8080/` and verify that the example Dags appear. When you're done testing, run `astro dev stop` to stop the local environment.
## Step 5: Deploy example Dags to your Astro Deployment
Dag-only deploys are an Astro feature that you can use to quickly update your Astro Deployment by only deploying the `dags` folder of your Astro project. You'll now trigger a Dag-only deploy to push your example Dags to Astro.
1. Run the following command to authenticate to Astro on the CLI:
```sh wrap theme={null}
astro login astronomer.io
```
After running this command, you are prompted to open your web browser and enter your credentials to the Astro UI. The Astro UI then automatically authenticates you to the CLI. The next time you sign in, you can run `astro login` without specifying a domain. If you run into issues signing in, check to make sure that you have the latest version of the Astro CLI. See [Upgrade the CLI](/docs/cli/v1.43/upgrade-cli).
2. Run the following command to deploy your Dags to Astro:
```sh wrap theme={null}
astro deploy --dags
```
If you have modified any files other than those in the `dags` directory, make sure to run `astro deploy` instead.
This command returns a list of Deployments available in your Workspace and prompts you to confirm where you want to deploy your Dag code. After you select a Deployment, the CLI parses your Dags to ensure that they don't contain basic syntax and import errors. If your code passes the parse, the Astro CLI deploys your Dags to Astro. If you run into issues deploying your Dags, check to make sure that you have the latest version of the Astro CLI. See [Upgrade the CLI](/docs/cli/v1.43/upgrade-cli).
## Step 6: Trigger your Dag on Astro
Newly deployed Dags are paused by default and won't start running automatically. To run one of the example Dags in your Astro project according to its schedule, you must unpause it from the Airflow UI hosted on your Deployment.
1. In the Deployment page of the Astro UI, click the **Open Airflow** button.
2. In the main Dags view of the Airflow UI, click the slider button next to `example-dag-basic` to unpause it. If you hover over the Dag, it says `dag is Active`. When you do this, the Dag starts to run on the schedule that is defined in its code.
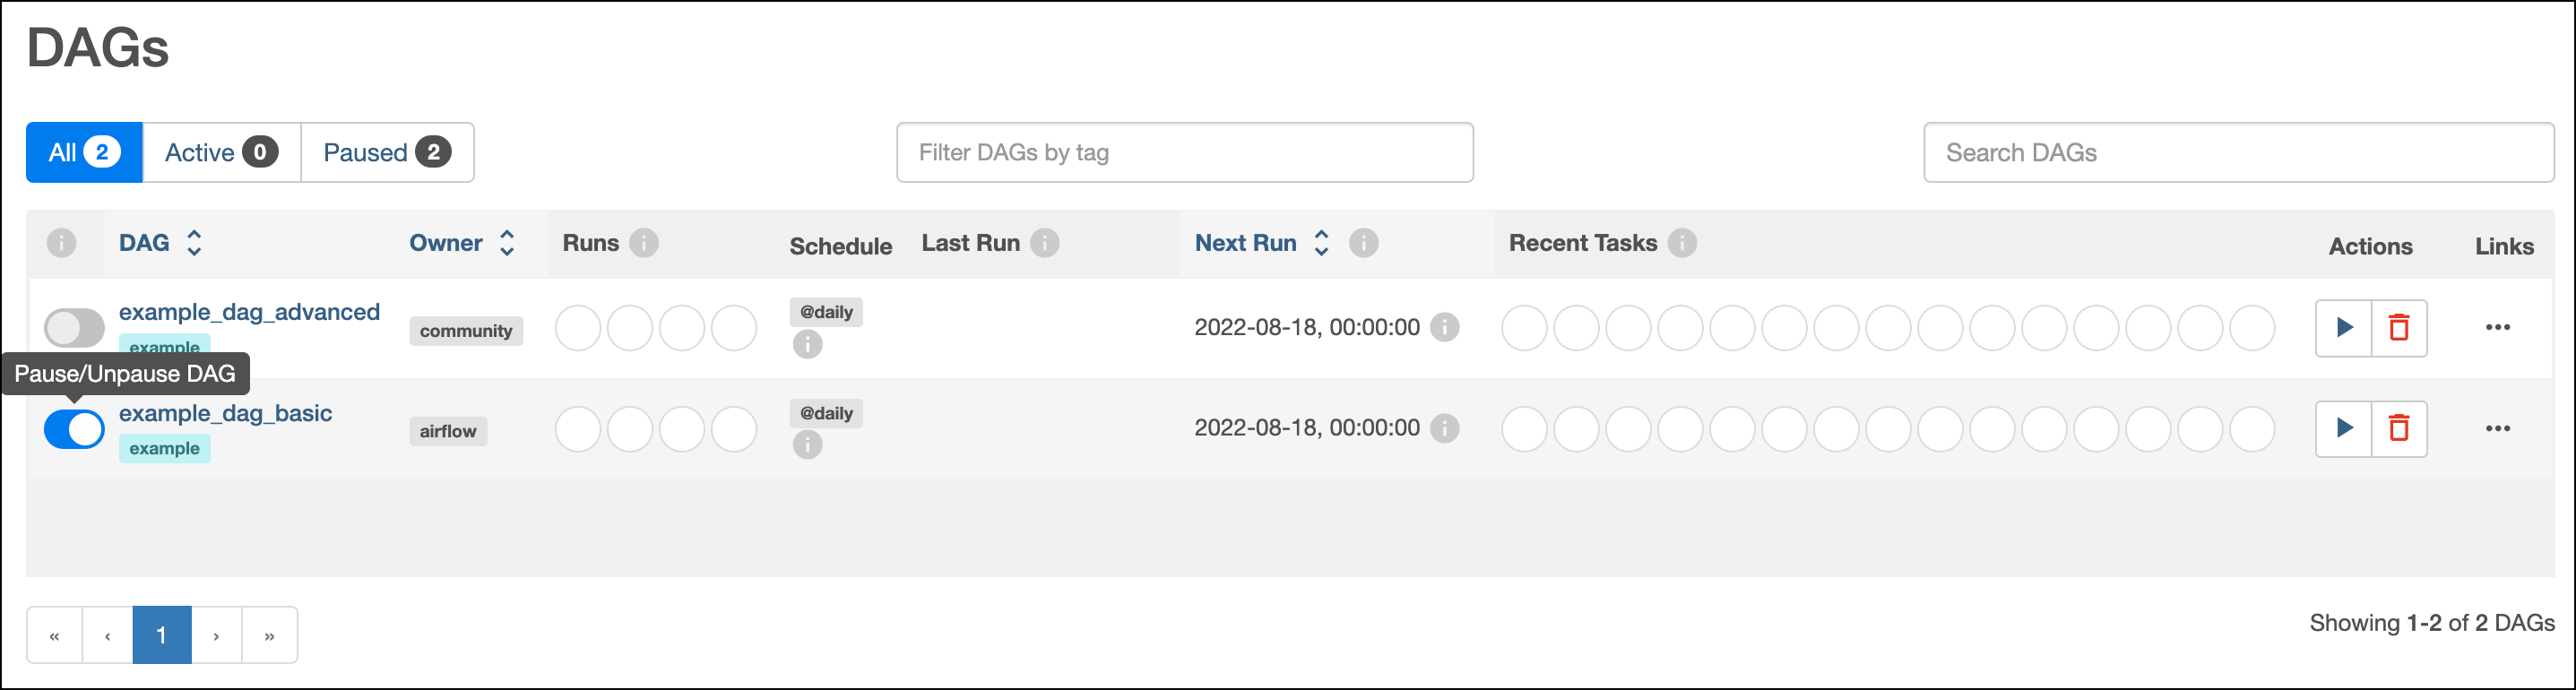 3. Manually trigger a Dag run of `example-dag-basic` by clicking the play button in the **Actions** column. When you develop Dags on Astro, triggering a Dag run instead of waiting for the Dag schedule can help you quickly identify and resolve issues.
After you press **Play**, the **Runs** and **Recent Tasks** sections for the Dag start to populate with data.
3. Manually trigger a Dag run of `example-dag-basic` by clicking the play button in the **Actions** column. When you develop Dags on Astro, triggering a Dag run instead of waiting for the Dag schedule can help you quickly identify and resolve issues.
After you press **Play**, the **Runs** and **Recent Tasks** sections for the Dag start to populate with data.
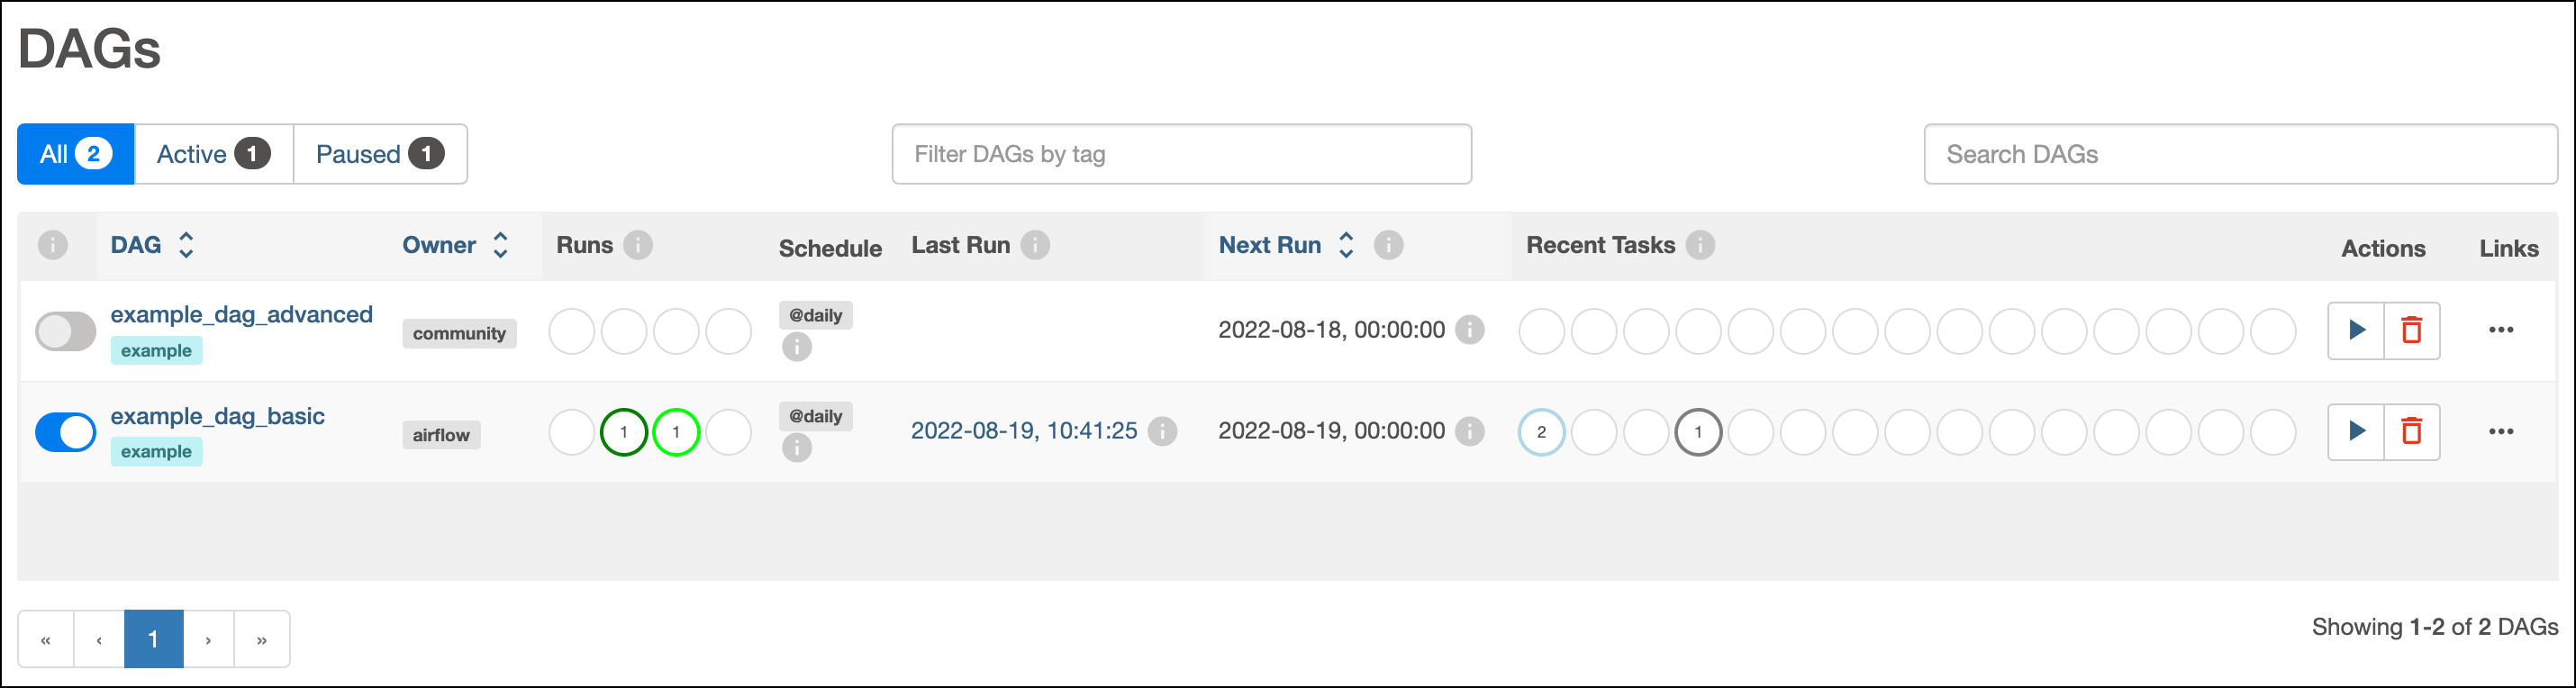 These circles represent different [states](https://airflow.apache.org/docs/apache-airflow/stable/core-concepts/tasks.html#task-instances) that your Dag and task runs can be in.
4. Click the name of the Dag, `example-dag-basic`, to open the **Grid** view for the Dag. To see if your Dag ran successfully, the most recent entry in the grid should have green squares for all of your tasks.
5. Pause your Dag by clicking the slider button next to `example-dag-basic`. This prevents your example Dag from running automatically and consuming your Deployment resources.
## Step 7: View your Dag status in the Astro UI
The Astro UI shows you information about the health of your Deployment, including analytics and logs for your Dag runs.
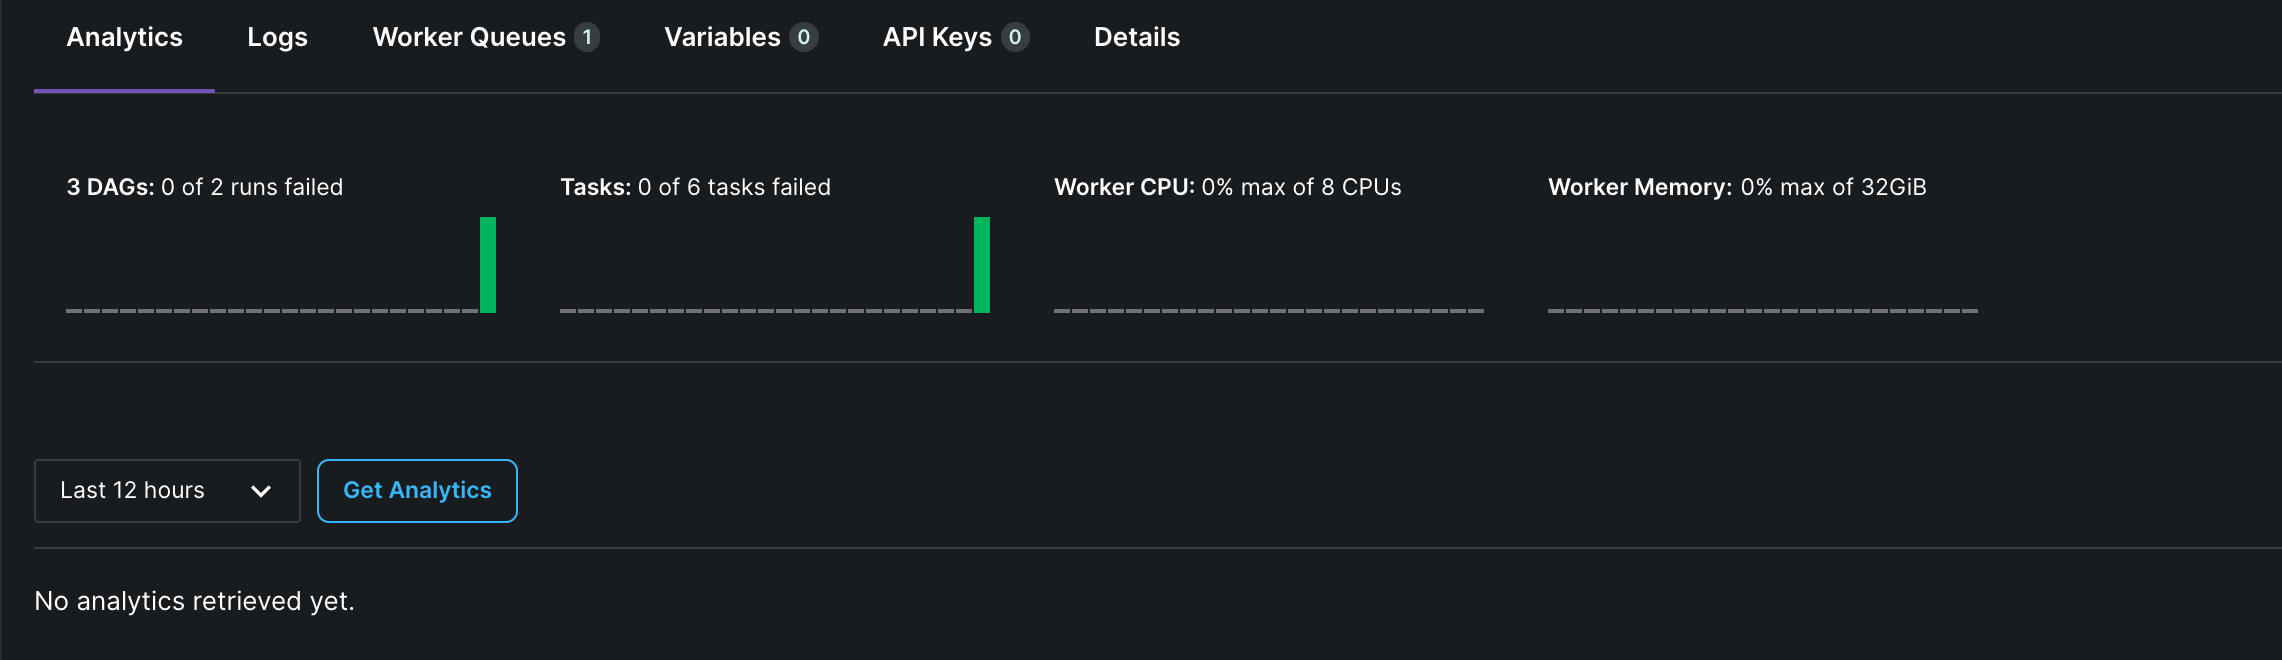
Go back to your Deployment page in the Astro UI. Because you ran your example Dag, your Deployment information page now has data about your Deployment and Dag runs. The following example shows what you might find in the **Overview** page for your Deployment.
These circles represent different [states](https://airflow.apache.org/docs/apache-airflow/stable/core-concepts/tasks.html#task-instances) that your Dag and task runs can be in.
4. Click the name of the Dag, `example-dag-basic`, to open the **Grid** view for the Dag. To see if your Dag ran successfully, the most recent entry in the grid should have green squares for all of your tasks.
5. Pause your Dag by clicking the slider button next to `example-dag-basic`. This prevents your example Dag from running automatically and consuming your Deployment resources.
## Step 7: View your Dag status in the Astro UI
The Astro UI shows you information about the health of your Deployment, including analytics and logs for your Dag runs.
Go back to your Deployment page in the Astro UI. Because you ran your example Dag, your Deployment information page now has data about your Deployment and Dag runs. The following example shows what you might find in the **Overview** page for your Deployment.
 When you're done exploring, you can delete your Deployment from your **Deployments** page.
## Next Steps
Now that you've created and run your first Dag on Astro, the next step is to add your own Dags, build out the rest of your Astro project, and start testing real data. See:
* [Develop a project](/docs/cli/v1.43/develop-project).
* [Write your first Dag](/docs/learn/get-started-with-airflow).
* [Deploy code to Astro](/docs/astro/deploy-code).
When you're done exploring, you can delete your Deployment from your **Deployments** page.
## Next Steps
Now that you've created and run your first Dag on Astro, the next step is to add your own Dags, build out the rest of your Astro project, and start testing real data. See:
* [Develop a project](/docs/cli/v1.43/develop-project).
* [Write your first Dag](/docs/learn/get-started-with-airflow).
* [Deploy code to Astro](/docs/astro/deploy-code).