> ## Documentation Index
> Fetch the complete documentation index at: https://astronomer.io/docs/llms.txt
> Use this file to discover all available pages before exploring further.
# Create a Deployment on Astronomer Software
Use this document to learn how to create a Deployment on Astronomer Software.
## Prerequisites
* [The Astro CLI](/docs/cli/v1.43/install-cli)
* A [Workspace](/docs/astro-private-cloud/v-0-36/manage-workspaces)
## Create a Deployment in the Software UI
To create an Airflow Deployment on Astronomer:
1. Log in to your Astronomer platform at `app.BASEDOMAIN`, select a Workspace, and then click **New Deployment**.
2. Complete the following fields:
* **Name**: Enter a descriptive name for the Deployment.
* **Description**: (Optional) Enter a description for your Deployment.
* **Airflow Version**: Select the Airflow version/ Astro Runtime version that the Deployment should run with.
* **Executor**: Astronomer recommends starting with Local.
3. Click **Create Deployment** and wait a few moments. After the Deployment is created, you can access the **Settings** page of your new Deployment:
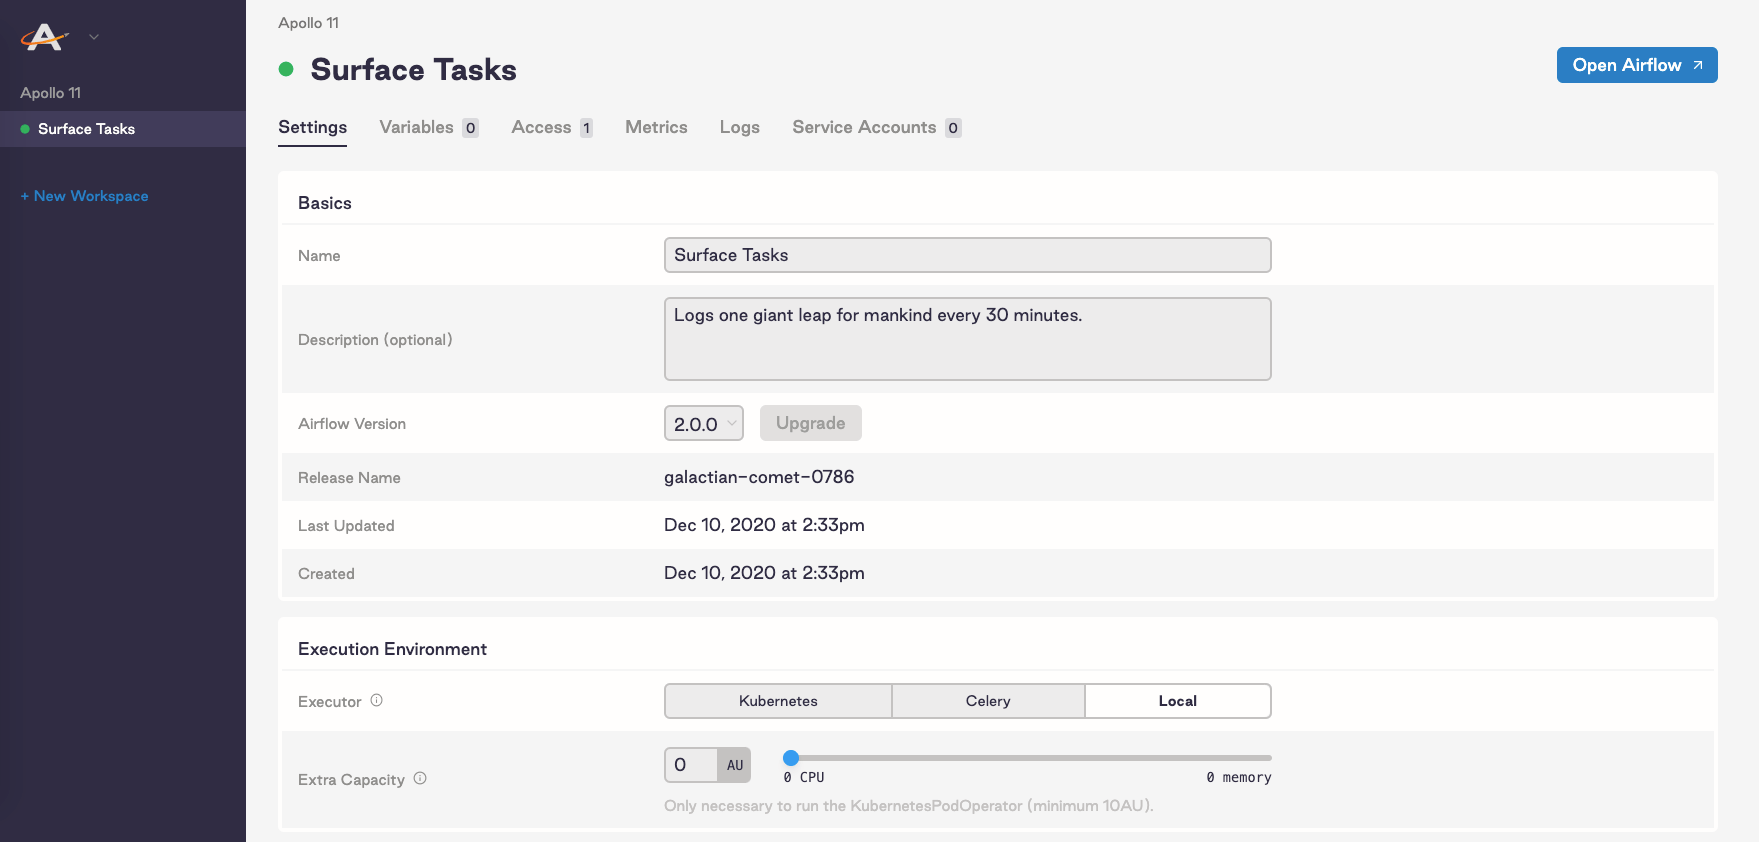 On this tab you can modify resources for your Deployment. Specifically, you can:
* Choose a strategy for how you configure resources to Airflow components. See [Customize resource usage](/docs/astro-private-cloud/v-0-36/customize-resource-usage).
* Select an Airflow executor
* Allocate resources to your Airflow scheduler and webserver
* Set scheduler count (*Airflow 2.0+ only*)
* Add extra capacity (*Kubernetes only*)
* Set worker count (*Celery only*)
* Adjust your worker termination grace period (*Celery only*)
## Customize Deployment release names
An Airflow Deployment's release name on Astronomer is a unique, immutable identifier for that Deployment. The release name corresponds to its Kubernetes namespace and that renders in Grafana, Kibana, and other platform-level monitoring tools.
By default, release names are randomly generated in the following format: `noun-noun-<4-digit-number>`. For example: `elementary-zenith-7243`. Alternatively, you can customize the release name for a Deployment if you want all namespaces in your cluster to follow a specific style.
To customize the release name for a Deployment as you're creating it, you first need to enable the feature on your Astronomer platform. To do so, set the following value in your `values.yaml` file:
```yaml wrap theme={null}
astronomer:
houston:
config:
deployments:
manualReleaseNames: true # Allows you to set your release names
```
Then, push the updated `config.yaml` file to your installation as described in [Apply a config change](/docs/astro-private-cloud/v-0-36/apply-platform-config).
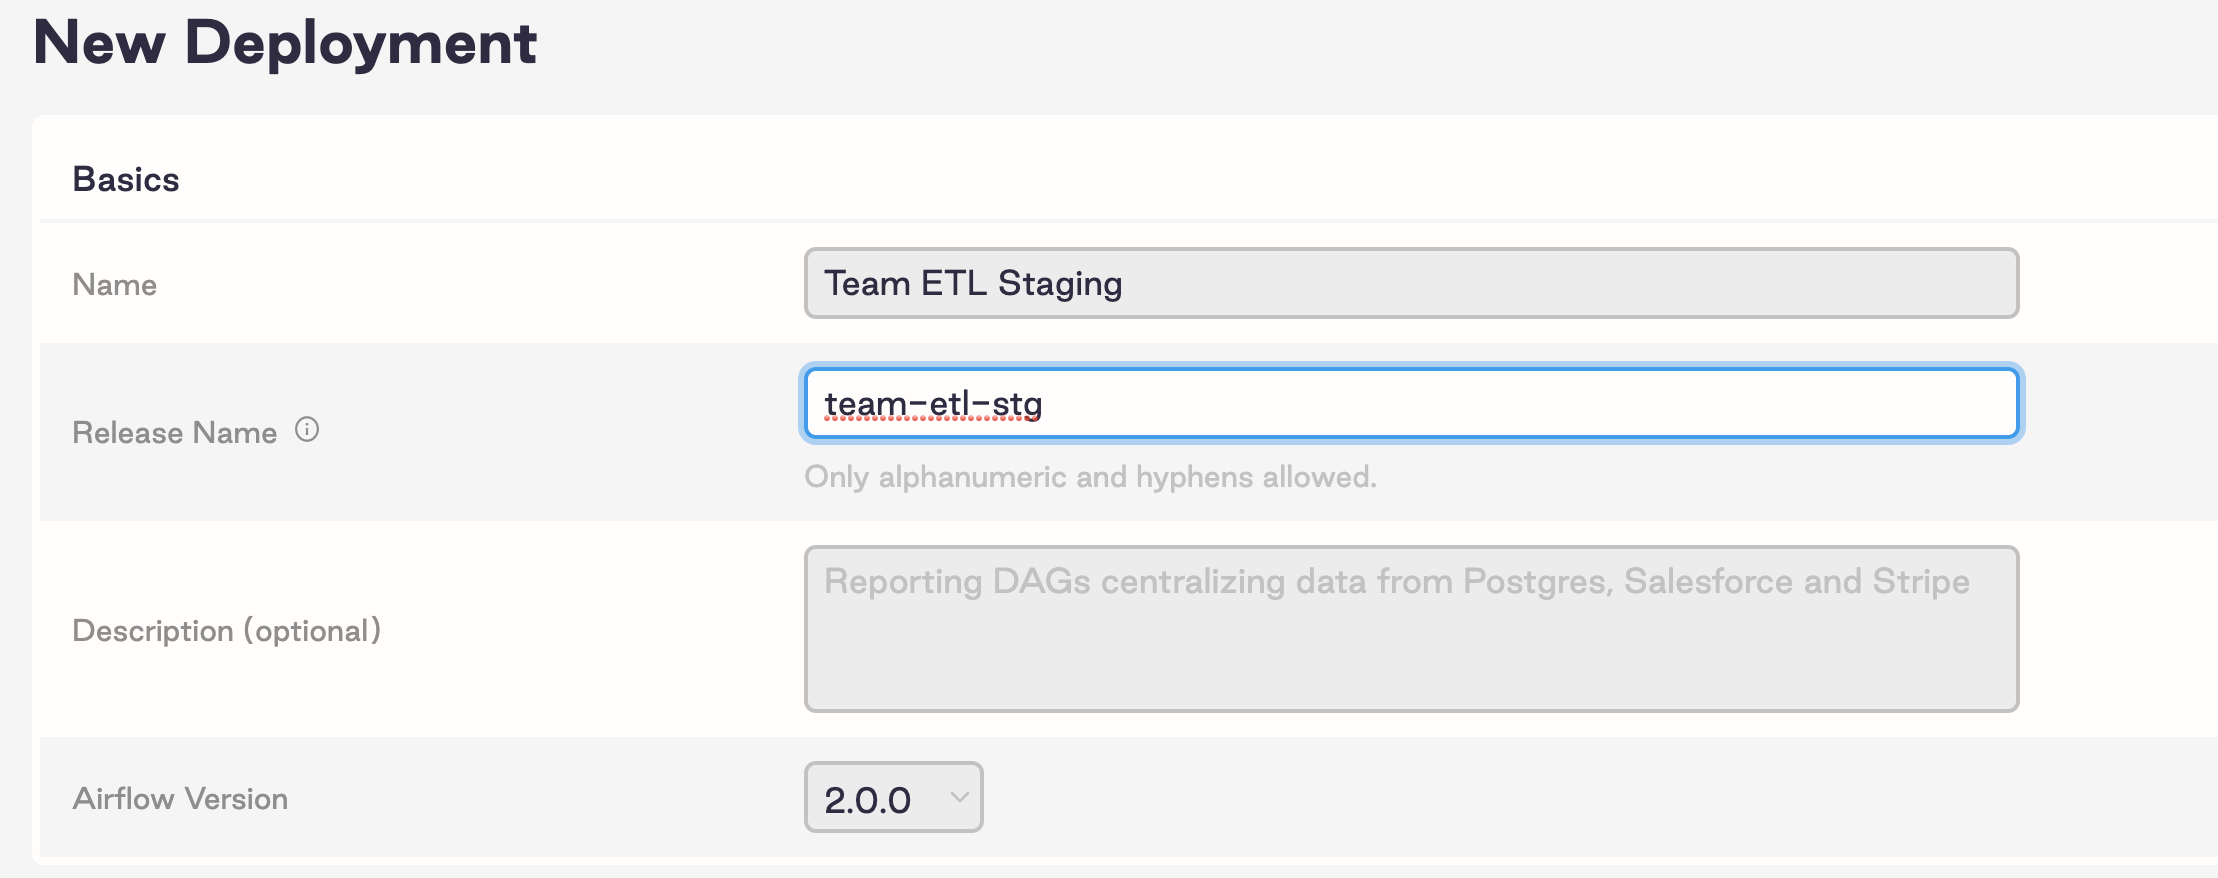
After applying this change, the **Release Name** field in the Software UI becomes configurable:
On this tab you can modify resources for your Deployment. Specifically, you can:
* Choose a strategy for how you configure resources to Airflow components. See [Customize resource usage](/docs/astro-private-cloud/v-0-36/customize-resource-usage).
* Select an Airflow executor
* Allocate resources to your Airflow scheduler and webserver
* Set scheduler count (*Airflow 2.0+ only*)
* Add extra capacity (*Kubernetes only*)
* Set worker count (*Celery only*)
* Adjust your worker termination grace period (*Celery only*)
## Customize Deployment release names
An Airflow Deployment's release name on Astronomer is a unique, immutable identifier for that Deployment. The release name corresponds to its Kubernetes namespace and that renders in Grafana, Kibana, and other platform-level monitoring tools.
By default, release names are randomly generated in the following format: `noun-noun-<4-digit-number>`. For example: `elementary-zenith-7243`. Alternatively, you can customize the release name for a Deployment if you want all namespaces in your cluster to follow a specific style.
To customize the release name for a Deployment as you're creating it, you first need to enable the feature on your Astronomer platform. To do so, set the following value in your `values.yaml` file:
```yaml wrap theme={null}
astronomer:
houston:
config:
deployments:
manualReleaseNames: true # Allows you to set your release names
```
Then, push the updated `config.yaml` file to your installation as described in [Apply a config change](/docs/astro-private-cloud/v-0-36/apply-platform-config).
After applying this change, the **Release Name** field in the Software UI becomes configurable:
 ## Programmatically create or update Deployments
You can programmatically create or update Deployments with all possible configurations using the Houston API `upsertDeployment` mutation. See [Create or update a Deployment with configurations](/docs/astro-private-cloud/v-0-36/houston-api-examples#create-or-update-a-deployment-with-configurations).
When you make upsert updates to your Airflow Deployments, you must explicitly specify all existing environment variables, otherwise, the upsert overwrites them.
## Programmatically create or update Deployments
You can programmatically create or update Deployments with all possible configurations using the Houston API `upsertDeployment` mutation. See [Create or update a Deployment with configurations](/docs/astro-private-cloud/v-0-36/houston-api-examples#create-or-update-a-deployment-with-configurations).
When you make upsert updates to your Airflow Deployments, you must explicitly specify all existing environment variables, otherwise, the upsert overwrites them.