> ## Documentation Index
> Fetch the complete documentation index at: https://astronomer.io/docs/llms.txt
> Use this file to discover all available pages before exploring further.
# Install Astronomer Certified on a virtual machine
No versions of Astronomer Certified (AC) are currently supported by Astronomer. Astronomer stopped releasing new versions of AC with the release of Apache Airflow 2.4. Astronomer recommends creating all new Deployments with Astro Runtime, as well as migrating existing Deployments from AC to Astro Runtime as soon as your organization is ready. See [Migrate to Runtime](/docs/astro-private-cloud/v-0-34/migrate-to-runtime) and [Runtime image architecture](/docs/runtime/runtime-image-architecture).
The Astronomer Certified Python wheel is a distribution of Apache Airflow maintained by Astronomer. While functionally identical to Apache Airflow, the Astronomer Certified Python wheel includes additional bug and security fixes, as well as extended support from the Astronomer team.
If you want to run Astronomer's distribution of Airflow without using Docker, you can install the Astronomer Certified Python wheel on either one or many virtual machines.
This guide provides steps for installing the Python wheel onto a single virtual machine. By the end of the setup, you'll have a simple development environment for Airflow running on your local machine.
Note that this setup represents one possible configuration of Astronomer Certified and uses optional tools such as systemd and PostgreSQL. After successfully starting Airflow for the first time, we recommend reviewing this configuration and adjusting it based on the functional requirements for your project.
## Prerequisites
The machines where you install Astronomer Certified must be Debian-based. CentOS and Windows Server are currently unsupported.
Once you've decided which machine you'll be installing Astronomer Certified on, ensure that the following OS-level packages are installed on the machine:
* sudo
* python3
* python3-dev
* python3-venv
* python3-psycopg2
* gcc
* postgresql
* systemd
If you're running on a Debian-based OS, you can install these with the following command:
```text wrap theme={null}
sudo apt-get install sudo python3 python3-dev python3-venv python3-psycopg2 gcc postgresql systemd
```
You also need a database on the machine that will run your Airflow instance. This guide walks through the process for configuring a PostgreSQL database, which is our recommended implementation, but Airflow is compatible with all of the following databases:
* PostgreSQL: 9.6, 10, 11, 12, 13
* MySQL: 5.7, 8
* SQLite: 3.15.0+
MySQL 5.7 is compatible with Airflow, but is not recommended for users running Airflow 2.0+, as it does not support the ability to run more than 1 scheduler. If you'd like to leverage Airflow's new [Highly-Available Scheduler](https://www.astronomer.io/blog/airflow-2-scheduler), make sure you're running MySQL 8.0+.
Lastly, this guide assumes that you are installing Airflow 2.0+. The differences for installing pre-2.0 versions of Airflow are noted throughout the guide.
## Step 1: Set Up Airflow's metadata database
In Airflow, the metadata database is responsible for keeping a record of all tasks across DAGs and their corresponding status (queued, scheduled, running, success, failed, etc). To set up the metadata database:
1. Create a database user named `airflow`:
```sh wrap theme={null}
sudo -u postgres createuser airflow -P
```
This will prompt you for a password. Create one, and make a note of it for later.
2. Create a database named `airflow` and set the `airflow` user as the owner:
```sh wrap theme={null}
sudo -u postgres createdb --owner airflow airflow
```
This guide assumes that your database server is local to where you run these commands and that you're on a Debian-like OS. If your setup is different, you will need to tweak these commands.
To make the database server accessible outside of your localhost, you may have to edit your [`/var/lib/postgresql/data/pg_hba.conf`](https://www.postgresql.org/docs/10/auth-pg-hba-conf.html) file and restart Postgres. Editing this file will vary for each individual database setup. Before editing this file, consider the security implications for your team.
If you'd like to use an existing PostgreSQL database instead of creating a new one, you can do so as long as both of the following are true:
* The database is compatible with Airflow as described in Prerequisites.
* A user named `airflow` has ownership access to the database.
When you specify the `AIRFLOW__CORE__SQL_ALCHEMY_CONN` environment variable in step 2F, replace the connection string with one that corresponds to your database.
## Step 2: Create a system user to run Airflow
Airflow can run as any user, but for this setup we configure a new user called `astro`. Run the following command to add this user to your machine:
```sh wrap theme={null}
sudo useradd --create-home astro
```
## Step 3: Create an Astro project directory
You also need to configure an `AIRFLOW_HOME` directory (not to be confused with the user's home directory) where you'll store your DAGs and other necessary files. We recommend using the path `/usr/local/airflow` as your project directory and `/usr/local/airflow/dags` as your DAG directory, but any path can be chosen as long as the `astro` user has write access to it. To do this, run the following commands:
```sh wrap theme={null}
sudo install --owner=astro --group=astro -d /usr/local/airflow
echo 'export AIRFLOW_HOME=/usr/local/airflow' | sudo tee --append ~astro/.bashrc
cd ${AIRFLOW_HOME}
sudo mkdir dags
```
## Step 4: Create a virtual environment
To isolate your Airflow components from changes to the system, create a virtual environment in a directory named `astro/airflow-venv` using the following command:
```sh wrap theme={null}
sudo -u astro python3 -m venv ~astro/airflow-venv
```
venv is a tool to create lightweight, isolated Python environments without affecting systemwide configuration. For more information, read [Python's venv documentation](https://docs.python.org/3/library/venv.html).
## Step 5: Install Astronomer Certified
To install the AC Python wheel onto your machine, run one of the following commands depending on your chosen Airflow Version and [Executor](/docs/learn/airflow-executors-explained):
* For Local Executor:
```sh wrap theme={null}
sudo -u astro ~astro/airflow-venv/bin/pip install --extra-index-url=https://pip.astronomer.io/simple/ 'astronomer-certified[postgres]==' --constraint "https://raw.githubusercontent.com/apache/airflow/constraints-/constraints-3.8.txt"
```
* For Celery Executor:
```sh wrap theme={null}
sudo -u astro ~astro/airflow-venv/bin/pip install --extra-index-url=https://pip.astronomer.io/simple/ 'astronomer-certified[postgres, celery, redis]==' --constraint "https://raw.githubusercontent.com/apache/airflow/constraints-/constraints-3.8.txt"
```
For example, to install the latest patch version of Apache Airflow 2.0.1 with support for the Celery executor, this command would be:
```sh wrap theme={null}
sudo -u astro ~astro/airflow-venv/bin/pip install --extra-index-url=https://pip.astronomer.io/simple/ 'astronomer-certified[postgres, celery, redis]==2.0.1.*' --constraint "https://raw.githubusercontent.com/apache/airflow/constraints-2.0.1/constraints-3.8.txt"
```
This command includes the optional `postgres`, `celery`, and `redis` dependencies so that all libraries for those tools are also installed. If your environment requires extra functionality, specify additional dependencies in a comma-delimited list:
```text wrap theme={null}
astronomer-certified[mysql, redis, celery, crypto, aws]==2.0.1.*
```
For a list of all optional dependencies, refer to the [AC pip index](https://pip.astronomer.io/simple/index.html).
## Step 6: Configure a process supervisor
To ensure that Airflow is always running when your machine is on, we recommend implementing a process supervisor. [Systemd](https://systemd.io/) is used in this example, though any process supervisor works here.
To use systemd as a process supervisor:
1. Create a systemd unit file using the following command:
```sh wrap theme={null}
sudo -e /etc/systemd/system/astronomer-certified@.service
```
2. Using a text editor, create and edit a file at `${AIRFLOW_HOME}/sys-config` to contain these environment variables and values:
```text wrap theme={null}
AIRFLOW_HOME= ${AIRFLOW_HOME}
AIRFLOW__CORE__LOAD_EXAMPLES=False
PATH=$PATH:/home/astro/airflow-venv/bin
```
If you want to configure environment variables for a single Airflow service, we recommend doing so in the `sys-config` file for the machine on which the service is running.
3. Add the following to your systemd unit file:
```text wrap theme={null}
[Unit]
Description=Airflow %I daemon
After=network-online.target cloud-config.service
Requires=network-online.target
[Service]
EnvironmentFile=${AIRFLOW_HOME}/sys-config
User=astro
Group=astro
Type=simple
WorkingDirectory=${AIRFLOW_HOME}
ExecStart=/home/astro/airflow-venv/bin/airflow %i
Restart=always
RestartSec=5s
[Install]
WantedBy=multi-user.target
```
## Step 7: Configure Airflow for database access
To connect your Airflow environment to the metadata database you created in Step 1, add the following environment variables to your `sys-config` file depending on your chosen [executor](/docs/learn/airflow-executors-explained):
* For Local Executor:
```text wrap theme={null}
AIRFLOW__CORE__SQL_ALCHEMY_CONN=postgresql+psycopg2://airflow:@localhost/airflow
AIRFLOW__WEBSERVER__BASE_URL=http://localhost:8080
AIRFLOW__CORE__EXECUTOR=LocalExecutor
```
* For Celery Executor:
```text wrap theme={null}
AIRFLOW__CORE__SQL_ALCHEMY_CONN=postgresql+psycopg2://airflow:@localhost/airflow
AIRFLOW__WEBSERVER__BASE_URL=http://localhost:8080
AIRFLOW__CELERY__BROKER_URL=redis://:@redis:6379/0/airflow:@localhost/airflow
AIRFLOW__CELERY__RESULT_BACKEND=db+postgresql://airflow:@localhost/airflow
AIRFLOW__CORE__EXECUTOR=CeleryExecutor
```
The password you specify here should be the same one you specified when prompted by the `createuser` command in Step 1. If your password contains `%`, `/`, or `@` then you will need to url-escape; replace `%` with `%25`, `/` with `%2F`, and `@` with `%40`.
When you've finished configuring environment variables, run the following command to add your environment variables to your `astro` user's shell environment:
```sh wrap theme={null}
echo 'set -a; source ${AIRFLOW_HOME}/sys-config; set +a' | sudo tee --append ~astro/.bashrc
```
### Optional: Configure a secret backend for database access
Your Airflow user password is stored in your `sys-config` file (owned by `root:root` and `0600` permissions) on your nodes. If you'd rather use an existing credential store, such as [HashiCorp Vault](https://www.hashicorp.com/products/vault), you can instead specify a command to obtain the connection string when the service starts up. For example:
```text wrap theme={null}
AIRFLOW__CORE__SQL_ALCHEMY_CONN_CMD=vault kv get -field=dsn secret/airflow-db
```
## Step 8: Set up the scheduler
In Airflow, [the scheduler](https://airflow.apache.org/docs/apache-airflow/stable/scheduler.html) is responsible for reading from the metadata database to check on the status of each task and decides the order in which tasks should be completed. To get your scheduler running:
1. Enable the scheduler by running the following command:
```sh wrap theme={null}
sudo systemctl enable astronomer-certified@scheduler.service
```
2. Edit the override file for the machine by running the following command:
```sh wrap theme={null}
sudo systemctl edit astronomer-certified@scheduler.service
```
3. In the override file, add the following lines:
```text wrap theme={null}
[Service]
ExecStartPre=/home/astro/airflow-venv/bin/airflow db upgrade
```
> **Note** If you're running Airflow 1.10, the command specified here will instead be `airflow upgradedb`.
4. Start the service by running:
```sh wrap theme={null}
sudo systemctl start astronomer-certified@scheduler.service
```
## Step 9: Set up the webserver
[The webserver](https://airflow.apache.org/docs/apache-airflow/stable/security/webserver.html) is a core Airflow component that is responsible for rendering the Airflow UI. To configure it on its own machine, follow the steps below.
1. Enable the webserver by running the following:
```sh wrap theme={null}
sudo systemctl enable astronomer-certified@webserver.service
```
2. Start the webserver by running the following:
```sh wrap theme={null}
sudo systemctl start astronomer-certified@webserver.service
```
For added security and stability, we recommend running the webserver behind a reverse proxy and load balancer such as [nginx](https://www.nginx.com/). For more information on this feature, read the [Apache Airflow documentation](https://airflow.apache.org/docs/stable/howto/run-behind-proxy.html).
## Step 10: Set up workers (Celery only)
Workers are an essential component for running Airflow with the Celery executor. To set up Celery workers on your machine:
1. Create a new systemd unit file specifically for your Celery workers by running the following command:
```sh wrap theme={null}
sudo -e /etc/systemd/system/astronomer-certified-worker.service
```
2. In the unit file, add the following lines:
```text wrap theme={null}
[Unit]
Description=Airflow %I daemon
After=network-online.target cloud-config.service
Requires=network-online.target
[Service]
ExecStartPre=/home/astro/airflow-venv/bin/airflow db upgrade
EnvironmentFile=${AIRFLOW_HOME}/sys-config
User=astro
Group=astro
Type=simple
WorkingDirectory=${AIRFLOW_HOME}
ExecStart=/home/astro/airflow-venv/bin/airflow celery %i
Restart=always
RestartSec=5s
[Install]
WantedBy=multi-user.target
```
You don't need to edit this unit file for Airflow versions earlier than 2.0.
3. Enable the worker service by running the following command:
```sh wrap theme={null}
sudo systemctl enable astronomer-certified-worker.service
```
4. Start the service by running the following command:
```sh wrap theme={null}
sudo systemctl start astronomer-certified-worker.service
```
## Step 11: Create an Airflow user
To log in to the Airflow UI, you need to first create an Airflow user:
1. Switch to your system `astro` user using the following command:
```sh wrap theme={null}
sudo -H su -u astro bash
```
All [Airflow CLI commands](https://airflow.apache.org/docs/apache-airflow/stable/usage-cli.html) must be run from your `astro` user.
2. Create a new `admin` Airflow user with the following command:
```sh wrap theme={null}
airflow users create -e EMAIL -f FIRSTNAME -l LASTNAME -p PASSWORD -r Admin -u USERNAME
```
## Step 12: Confirm the installation
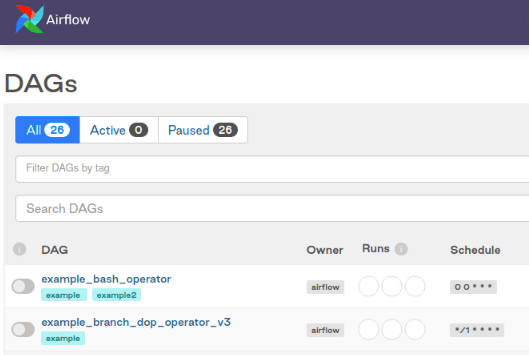
To confirm that you successfully installed Apache Airflow, open `http://localhost:8080` in your web browser. You should see the login screen for the Airflow UI.
Log in with your `admin` user. From there, you should see Airflow's primary 'DAGs' view: